|
|
|
|
| JetPack component | Sample locations on reference filesystem |
| TensorRT Samples | /usr/src/tensorrt/samples/ |
| cuDNN | /usr/src/cudnn_samples_v7/ |
| CUDA Samples | /usr/local/cuda-10.0/samples/ |
| Multimedia API L4T | /usr/src/tegra_multimedia_api/ *ディレクトリが無い |
| VisionWorks sample | /usr/share/visionworks/sources/samples/ /usr/share/visionworks-tracking/sources/samples/ /usr/share/visionworks-sfm/sources/samples/ |
| OpenCV sample | /usr/share/OpenCV/samples/ |
# NV Power Mode: MAXNで Jetson Nanoを本気モード(CPU 4コア)で動作させる
sudo nvpmodel -m 0
sudo nvpmodel -q

# Jetson Nanoを最高速(最大動作周波数)で動作させる
sudo jetson_clocks

# Jetson Nanoの現在の動作状態を表示する
sudo jetson_clocks --show
# /usr/src/tensorrt/samples/
cd
cp -a /usr/src/tensorrt/ ./
cd tensorrt/samples/
make -j4

ls -l ~/tensorrt/bin/
user@user-desktop:/usr/src/tensorrt/bin$ ./trtexec

Mandatory params:
  --deploy=<file>      Caffe deploy file
  OR --uff=<file>      UFF file
  OR --onnx=<file>     ONNX Model file

Mandatory params for UFF:
  --uffInput=<name>,C,H,W Input blob name and its dimensions for UFF parser (can be specified multiple times)
  --output=<name>      Output blob name (can be specified multiple times)

Mandatory params for Caffe:
  --output=<name>      Output blob name (can be specified multiple times)

Optional params:
  --input=<name>          Input blob name (can be specified multiple times)
  --model=<file>          Caffe model file (default = no model, random weights used)
  --batch=N               Set batch size (default = 1)
  --device=N              Set cuda device to N (default = 0)
  --iterations=N          Run N iterations (default = 10)
  --avgRuns=N             Set avgRuns to N - perf is measured as an average of avgRuns (default=10)
  --percentile=P          For each iteration, report the percentile time at P percentage (0<=P<=100, with 0 representing min, and 100 representing max; default = 99.0%)
  --workspace=N           Set workspace size in megabytes (default = 16)
  --fp16                  Run in fp16 mode (default = false). Permits 16-bit kernels
  --int8                  Run in int8 mode (default = false). Currently no support for ONNX model.
  --verbose               Use verbose logging (default = false)
  --engine=<file>         Engine file to serialize to or deserialize from
  --calib=<file>          Read INT8 calibration cache file.  Currently no support for ONNX model.
  --useDLACore=N          Specify a DLA engine for layers that support DLA. Value can range from 0 to n-1, where n is the number of DLA engines on the platform.
  --allowGPUFallback      If --useDLACore flag is present and if a layer can't run on DLA, then run on GPU.
  --useSpinWait           Actively wait for work completion. This option may decrease multi-process synchronization time at the cost of additional CPU usage. (default = false)
# /usr/src/cudnn_samples_v7/
cd
cp -a /usr/src/cudnn_samples_v7/ ./

ls -l ~/cudnn_samples_v7/
drwxr-xr-x 3 user user 4096  5月  3 20:40 conv_sample
drwxr-xr-x 4 user user 4096  3月 13 18:42 mnistCUDNN
drwxr-xr-x 2 user user 4096  3月 13 18:42 RNN

cd cudnn_samples_v7/conv_sample/

./conv_sample

Using format CUDNN_TENSOR_NCHW (for INT8x4 and INT8x32 tests use CUDNN_TENSOR_NCHW_VECT_C)
Testing single precision
====USER DIMENSIONS====
input dims are 1, 32, 4, 4
filter dims are 32, 32, 1, 1
output dims are 1, 32, 4, 4
====PADDING DIMENSIONS====
padded input dims are 1, 32, 4, 4
padded filter dims are 32, 32, 1, 1
padded output dims are 1, 32, 4, 4
Testing conv
^^^^ CUDA : elapsed = 0.000404119 sec,
Test PASSED
Testing half precision (math in single precision)
====USER DIMENSIONS====
input dims are 1, 32, 4, 4
filter dims are 32, 32, 1, 1
output dims are 1, 32, 4, 4
====PADDING DIMENSIONS====
padded input dims are 1, 32, 4, 4
padded filter dims are 32, 32, 1, 1
padded output dims are 1, 32, 4, 4
Testing conv
^^^^ CUDA : elapsed = 0.000326872 sec,
Test PASSED
# CUDA Samples
# /usr/local/cuda-10.0/samples/
# /usr/local/cudaにシンボリックリンクが存在します
cd
cp -a /usr/local/cuda-10.0/samples/ ./
cd samples/

# サンプルを全部ビルドすると -j4で約 30分掛かります
make -j4
# Finished building CUDA samples

# bin/aarch64/linux/release にビルドしたバイナリが全て有ります
cd bin/aarch64/linux/release
ls -l
./matrixMul

cd
cd ~/samples/bin/aarch64/linux/release
ls -l
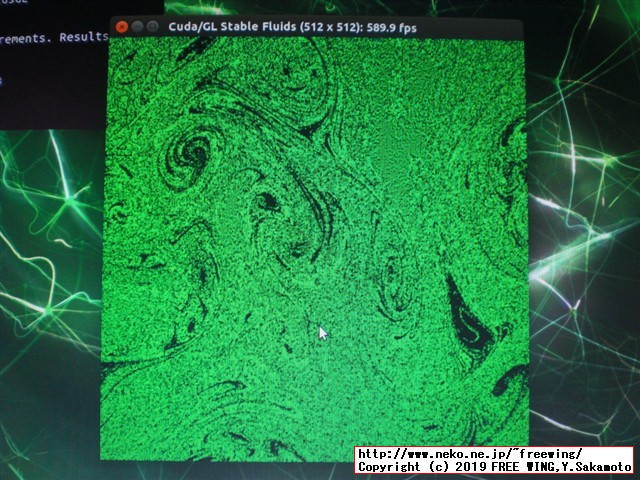
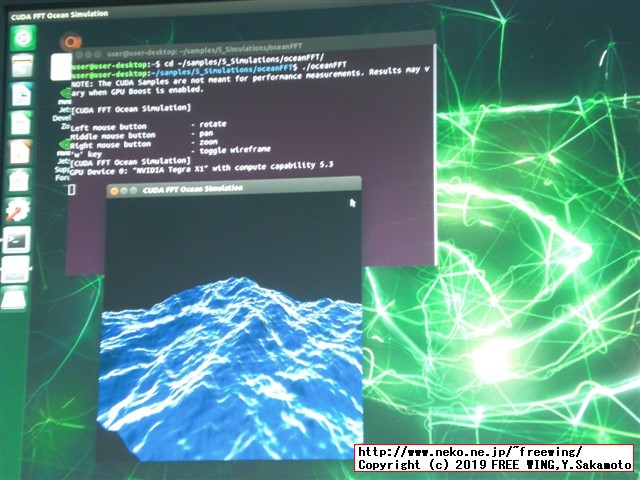
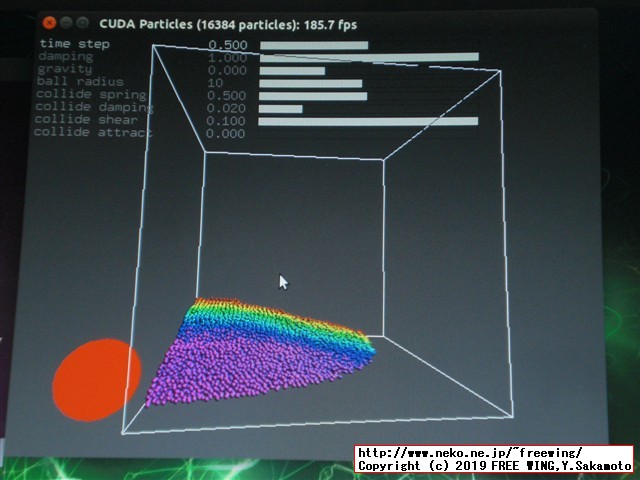
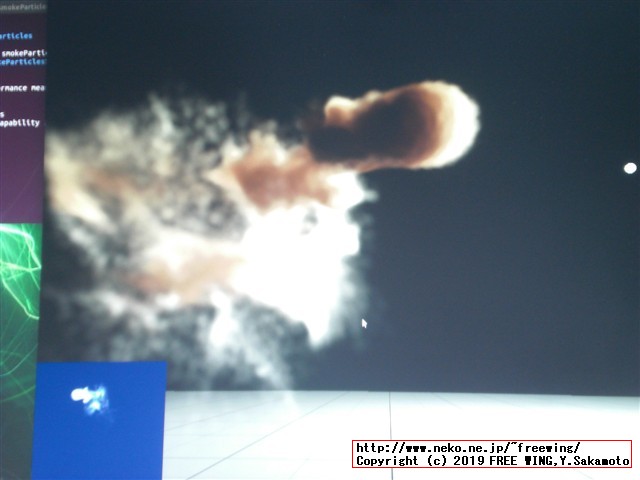
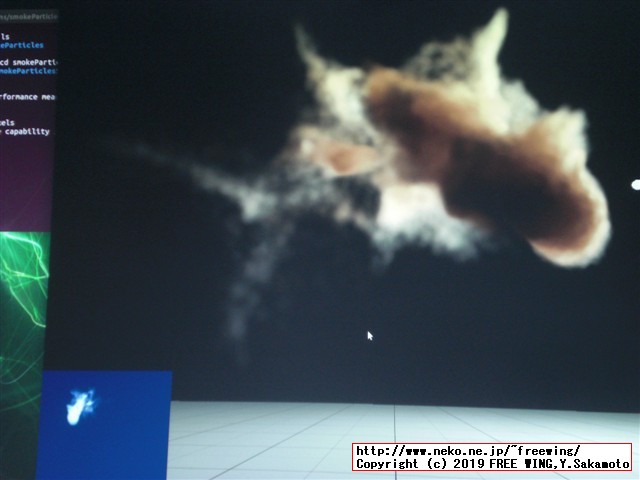
# 下記はピンポイントでビルドします
cd ~/samples/5_Simulations/fluidsGL/
make

cd ~/samples/5_Simulations/nbody/
make

cd ~/samples/5_Simulations/oceanFFT/
make

cd ~/samples/5_Simulations/particles/
make

cd ~/samples/5_Simulations/smokeParticles/
make
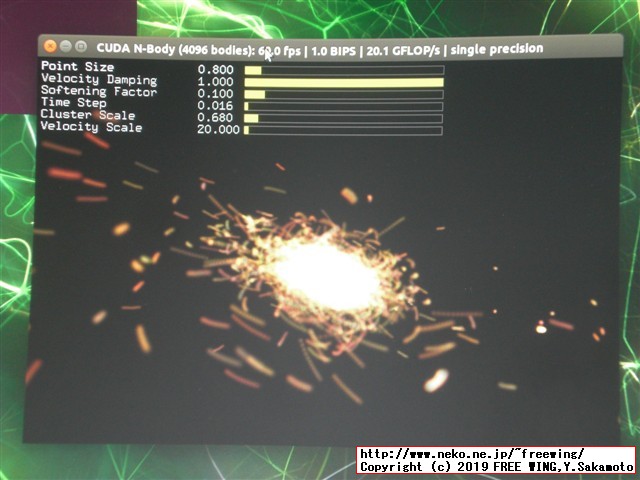
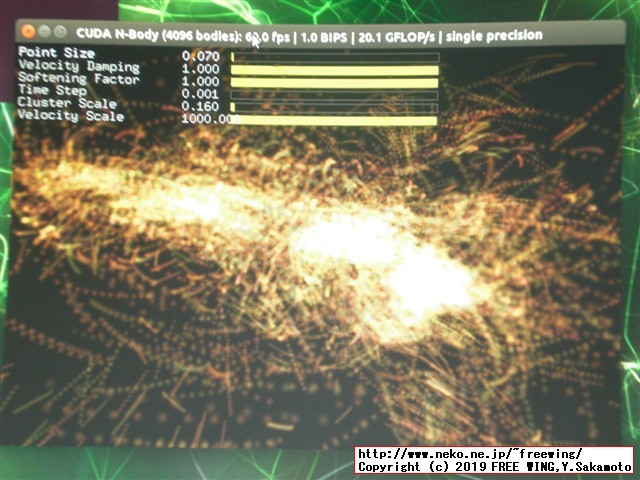
| 計算する bodyの数 | Compute 5.3 CUDA device: [NVIDIA Tegra X1] | Simulation with CPU | CPUに対する実行効率 |
| 1024 bodies | 16.194 ms 0.648 billion 12.950 single-precision GFLOP/s | 1395.524 ms 0.008 billion 0.150 single-precision GFLOP/s | 86倍 |
| 4096 bodies | 89.346 ms 1.878 billion 37.556 single-precision GFLOP/s | 22469.846 ms 0.007 billion 0.149 single-precision GFLOP/s | 598倍 |
# Jetson Nanoを最高速(最大動作周波数)で動作させる
sudo nvpmodel -m 0
sudo /usr/bin/jetson_clocks
user@user-desktop:~$ ls -l /usr/local/
lrwxrwxrwx  1 root root    9  3月 13 18:34 cuda -> cuda-10.0
drwxr-xr-x 12 root root 4096  3月 13 18:33 cuda-10.0

user@user-desktop:~$ ls -l /usr/local/cuda/samples/
total 104
drwxr-xr-x 39 root root  4096  3月 13 18:30 0_Simple
drwxr-xr-x  7 root root  4096  3月 13 18:30 1_Utilities
drwxr-xr-x 11 root root  4096  3月 13 18:30 2_Graphics
drwxr-xr-x 22 root root  4096  3月 13 18:31 3_Imaging
drwxr-xr-x  7 root root  4096  3月 13 18:31 4_Finance
drwxr-xr-x  9 root root  4096  3月 13 18:30 5_Simulations
drwxr-xr-x 29 root root  4096  3月 13 18:30 6_Advanced
drwxr-xr-x 32 root root  4096  3月 13 18:30 7_CUDALibraries
drwxr-xr-x  6 root root  4096  3月 13 18:31 common
-rw-r--r--  1 root root 64490 10月 16  2018 EULA.txt
-rw-r--r--  1 root root  2606 10月 16  2018 Makefile

user@user-desktop:~$ cd
user@user-desktop:~$ cp -a /usr/local/cuda-10.0/samples/ ~/

# サンプルを全部ビルドすると約 1時間掛かります
user@user-desktop:~$ cd ~/samples/
user@user-desktop:~$ time make
...
Finished building CUDA samples

real    71m14.523s
user    56m6.292s
sys     5m36.176s
user@user-desktop:~$ cd
user@user-desktop:~$ cp -a /usr/local/cuda-10.0/samples/ ~/

# サンプルは単体でもビルドが可能
user@user-desktop:~$ cd ~/samples/5_Simulations/nbody/
user@user-desktop:~/samples/5_Simulations/nbody$ make

user@user-desktop:~/samples/5_Simulations/nbody$ ./nbody
Run "nbody -benchmark [-numbodies=<numBodies>]" to measure performance.
        -fullscreen       (run n-body simulation in fullscreen mode)
        -fp64             (use double precision floating point values for simulation)
        -hostmem          (stores simulation data in host memory)
        -benchmark        (run benchmark to measure performance)
        -numbodies=<N>    (number of bodies (>= 1) to run in simulation)
        -device=<d>       (where d=0,1,2.... for the CUDA device to use)
        -numdevices=<i>   (where i=(number of CUDA devices > 0) to use for simulation)
        -compare          (compares simulation results running once on the default GPU and once on the CPU)
        -cpu              (run n-body simulation on the CPU)
        -tipsy=<file.bin> (load a tipsy model file for simulation)

NOTE: The CUDA Samples are not meant for performance measurements. Results may vary when GPU Boost is enabled.

> Windowed mode
> Simulation data stored in video memory
> Single precision floating point simulation
> 1 Devices used for simulation
freeglut (./nbody): failed to open display ':0'

# nbody CUDA GPU 1024
user@user-desktop:~/samples/5_Simulations/nbody$ ./nbody -benchmark
Run "nbody -benchmark [-numbodies=<numBodies>]" to measure performance.
        -fullscreen       (run n-body simulation in fullscreen mode)
        -fp64             (use double precision floating point values for simulation)
        -hostmem          (stores simulation data in host memory)
        -benchmark        (run benchmark to measure performance)
        -numbodies=<N>    (number of bodies (>= 1) to run in simulation)
        -device=<d>       (where d=0,1,2.... for the CUDA device to use)
        -numdevices=<i>   (where i=(number of CUDA devices > 0) to use for simulation)
        -compare          (compares simulation results running once on the default GPU and once on the CPU)
        -cpu              (run n-body simulation on the CPU)
        -tipsy=<file.bin> (load a tipsy model file for simulation)

NOTE: The CUDA Samples are not meant for performance measurements. Results may vary when GPU Boost is enabled.

> Windowed mode
> Simulation data stored in video memory
> Single precision floating point simulation
> 1 Devices used for simulation
GPU Device 0: "NVIDIA Tegra X1" with compute capability 5.3

> Compute 5.3 CUDA device: [NVIDIA Tegra X1]
1024 bodies, total time for 10 iterations: 16.194 ms
= 0.648 billion interactions per second
= 12.950 single-precision GFLOP/s at 20 flops per interaction

# nbody CPU 4096
user@user-desktop:~/samples/5_Simulations/nbody$ ./nbody -benchmark -cpu
Run "nbody -benchmark [-numbodies=<numBodies>]" to measure performance.
        -fullscreen       (run n-body simulation in fullscreen mode)
        -fp64             (use double precision floating point values for simulation)
        -hostmem          (stores simulation data in host memory)
        -benchmark        (run benchmark to measure performance)
        -numbodies=<N>    (number of bodies (>= 1) to run in simulation)
        -device=<d>       (where d=0,1,2.... for the CUDA device to use)
        -numdevices=<i>   (where i=(number of CUDA devices > 0) to use for simulation)
        -compare          (compares simulation results running once on the default GPU and once on the CPU)
        -cpu              (run n-body simulation on the CPU)
        -tipsy=<file.bin> (load a tipsy model file for simulation)

NOTE: The CUDA Samples are not meant for performance measurements. Results may vary when GPU Boost is enabled.

> Windowed mode
> Simulation data stored in video memory
> Single precision floating point simulation
> 1 Devices used for simulation
> Simulation with CPU
4096 bodies, total time for 10 iterations: 22469.846 ms
= 0.007 billion interactions per second
= 0.149 single-precision GFLOP/s at 20 flops per interaction

# nbody CUDA GPU 4096
user@user-desktop:~/samples/5_Simulations/nbody$ ./nbody -benchmark -numbodies=4096
Run "nbody -benchmark [-numbodies=<numBodies>]" to measure performance.
        -fullscreen       (run n-body simulation in fullscreen mode)
        -fp64             (use double precision floating point values for simulation)
        -hostmem          (stores simulation data in host memory)
        -benchmark        (run benchmark to measure performance)
        -numbodies=<N>    (number of bodies (>= 1) to run in simulation)
        -device=<d>       (where d=0,1,2.... for the CUDA device to use)
        -numdevices=<i>   (where i=(number of CUDA devices > 0) to use for simulation)
        -compare          (compares simulation results running once on the default GPU and once on the CPU)
        -cpu              (run n-body simulation on the CPU)
        -tipsy=<file.bin> (load a tipsy model file for simulation)

NOTE: The CUDA Samples are not meant for performance measurements. Results may vary when GPU Boost is enabled.

> Windowed mode
> Simulation data stored in video memory
> Single precision floating point simulation
> 1 Devices used for simulation
GPU Device 0: "NVIDIA Tegra X1" with compute capability 5.3

> Compute 5.3 CUDA device: [NVIDIA Tegra X1]
number of bodies = 4096
4096 bodies, total time for 10 iterations: 89.346 ms
= 1.878 billion interactions per second
= 37.556 single-precision GFLOP/s at 20 flops per interaction

# nbody CPU 1024
user@user-desktop:~/samples/5_Simulations/nbody$ ./nbody -benchmark -numbodies=1024 -cpu
Run "nbody -benchmark [-numbodies=<numBodies>]" to measure performance.
        -fullscreen       (run n-body simulation in fullscreen mode)
        -fp64             (use double precision floating point values for simulation)
        -hostmem          (stores simulation data in host memory)
        -benchmark        (run benchmark to measure performance)
        -numbodies=<N>    (number of bodies (>= 1) to run in simulation)
        -device=<d>       (where d=0,1,2.... for the CUDA device to use)
        -numdevices=<i>   (where i=(number of CUDA devices > 0) to use for simulation)
        -compare          (compares simulation results running once on the default GPU and once on the CPU)
        -cpu              (run n-body simulation on the CPU)
        -tipsy=<file.bin> (load a tipsy model file for simulation)

NOTE: The CUDA Samples are not meant for performance measurements. Results may vary when GPU Boost is enabled.

> Windowed mode
> Simulation data stored in video memory
> Single precision floating point simulation
> 1 Devices used for simulation
> Simulation with CPU
number of bodies = 1024
1024 bodies, total time for 10 iterations: 1395.524 ms
= 0.008 billion interactions per second
= 0.150 single-precision GFLOP/s at 20 flops per interaction
user@user-desktop:~$ ls -l /usr/local/cuda/samples/
total 104
drwxr-xr-x 39 root root  4096  3月 13 18:30 0_Simple
drwxr-xr-x  7 root root  4096  3月 13 18:30 1_Utilities
drwxr-xr-x 11 root root  4096  3月 13 18:30 2_Graphics
drwxr-xr-x 22 root root  4096  3月 13 18:31 3_Imaging
drwxr-xr-x  7 root root  4096  3月 13 18:31 4_Finance
drwxr-xr-x  9 root root  4096  3月 13 18:30 5_Simulations
drwxr-xr-x 29 root root  4096  3月 13 18:30 6_Advanced
drwxr-xr-x 32 root root  4096  3月 13 18:30 7_CUDALibraries
drwxr-xr-x  6 root root  4096  3月 13 18:31 common
-rw-r--r--  1 root root 64490 10月 16  2018 EULA.txt
-rw-r--r--  1 root root  2606 10月 16  2018 Makefile

user@user-desktop:~$ ls -l /usr/local/cuda/samples/*
-rw-r--r--  1 root root 64490 10月 16  2018 /usr/local/cuda/samples/EULA.txt
-rw-r--r--  1 root root  2606 10月 16  2018 /usr/local/cuda/samples/Makefile

/usr/local/cuda/samples/0_Simple:
total 148
drwxr-xr-x 2 root root 4096  3月 13 18:31 asyncAPI
drwxr-xr-x 2 root root 4096  3月 13 18:31 cdpSimplePrint
drwxr-xr-x 2 root root 4096  3月 13 18:31 cdpSimpleQuicksort
drwxr-xr-x 2 root root 4096  3月 13 18:31 clock
drwxr-xr-x 2 root root 4096  3月 13 18:31 cppIntegration
drwxr-xr-x 2 root root 4096  3月 13 18:31 cppOverload
drwxr-xr-x 2 root root 4096  3月 13 18:31 cudaOpenMP
drwxr-xr-x 2 root root 4096  3月 13 18:31 fp16ScalarProduct
drwxr-xr-x 2 root root 4096  3月 13 18:31 inlinePTX
drwxr-xr-x 2 root root 4096  3月 13 18:31 matrixMul
drwxr-xr-x 2 root root 4096  3月 13 18:31 matrixMulCUBLAS
drwxr-xr-x 2 root root 4096  3月 13 18:31 matrixMulDrv
drwxr-xr-x 2 root root 4096  3月 13 18:31 simpleAssert
drwxr-xr-x 3 root root 4096  3月 13 18:31 simpleAtomicIntrinsics
drwxr-xr-x 2 root root 4096  3月 13 18:31 simpleCallback
drwxr-xr-x 2 root root 4096  3月 13 18:31 simpleCooperativeGroups
drwxr-xr-x 2 root root 4096  3月 13 18:31 simpleCubemapTexture
drwxr-xr-x 2 root root 4096  3月 13 18:31 simpleCudaGraphs
drwxr-xr-x 2 root root 4096  3月 13 18:31 simpleLayeredTexture
drwxr-xr-x 2 root root 4096  3月 13 18:31 simpleMPI
drwxr-xr-x 3 root root 4096  3月 13 18:31 simpleMultiCopy
drwxr-xr-x 2 root root 4096  3月 13 18:31 simpleMultiGPU
drwxr-xr-x 2 root root 4096  3月 13 18:31 simpleOccupancy
drwxr-xr-x 2 root root 4096  3月 13 18:31 simplePitchLinearTexture
drwxr-xr-x 2 root root 4096  3月 13 18:31 simplePrintf
drwxr-xr-x 2 root root 4096  3月 13 18:31 simpleSeparateCompilation
drwxr-xr-x 2 root root 4096  3月 13 18:31 simpleStreams
drwxr-xr-x 3 root root 4096  3月 13 18:31 simpleSurfaceWrite
drwxr-xr-x 2 root root 4096  3月 13 18:31 simpleTemplates
drwxr-xr-x 3 root root 4096  3月 13 18:31 simpleTexture
drwxr-xr-x 3 root root 4096  3月 13 18:31 simpleTextureDrv
drwxr-xr-x 2 root root 4096  3月 13 18:31 simpleVoteIntrinsics
drwxr-xr-x 3 root root 4096  3月 13 18:31 simpleZeroCopy
drwxr-xr-x 3 root root 4096  3月 13 18:31 template
drwxr-xr-x 2 root root 4096  3月 13 18:31 UnifiedMemoryStreams
drwxr-xr-x 2 root root 4096  3月 13 18:31 vectorAdd
drwxr-xr-x 2 root root 4096  3月 13 18:31 vectorAddDrv

/usr/local/cuda/samples/1_Utilities:
total 20
drwxr-xr-x 2 root root 4096  3月 13 18:31 bandwidthTest
drwxr-xr-x 2 root root 4096  3月 13 18:31 deviceQuery
drwxr-xr-x 2 root root 4096  3月 13 18:31 deviceQueryDrv
drwxr-xr-x 2 root root 4096  3月 13 18:31 p2pBandwidthLatencyTest
drwxr-xr-x 2 root root 4096  3月 13 18:31 UnifiedMemoryPerf

/usr/local/cuda/samples/2_Graphics:
total 36
drwxr-xr-x 4 root root 4096  3月 13 18:31 bindlessTexture
drwxr-xr-x 4 root root 4096  3月 13 18:31 Mandelbrot
drwxr-xr-x 4 root root 4096  3月 13 18:31 marchingCubes
drwxr-xr-x 4 root root 4096  3月 13 18:31 simpleGL
drwxr-xr-x 3 root root 4096  3月 13 18:31 simpleGLES
drwxr-xr-x 3 root root 4096  3月 13 18:31 simpleGLES_EGLOutput
drwxr-xr-x 4 root root 4096  3月 13 18:31 simpleTexture3D
drwxr-xr-x 4 root root 4096  3月 13 18:31 volumeFiltering
drwxr-xr-x 4 root root 4096  3月 13 18:31 volumeRender

/usr/local/cuda/samples/3_Imaging:
total 80
drwxr-xr-x 3 root root 4096  3月 13 18:31 bicubicTexture
drwxr-xr-x 3 root root 4096  3月 13 18:31 bilateralFilter
drwxr-xr-x 4 root root 4096  3月 13 18:31 boxFilter
drwxr-xr-x 2 root root 4096  3月 13 18:31 convolutionFFT2D
drwxr-xr-x 3 root root 4096  3月 13 18:31 convolutionSeparable
drwxr-xr-x 3 root root 4096  3月 13 18:31 convolutionTexture
drwxr-xr-x 4 root root 4096  3月 13 18:31 dct8x8
drwxr-xr-x 4 root root 4096  3月 13 18:31 dwtHaar1D
drwxr-xr-x 4 root root 4096  3月 13 18:31 dxtc
drwxr-xr-x 2 root root 4096  3月 13 18:31 EGLStream_CUDA_CrossGPU
drwxr-xr-x 2 root root 4096  3月 13 18:31 EGLStreams_CUDA_Interop
drwxr-xr-x 2 root root 4096  3月 13 18:31 EGLSync_CUDAEvent_Interop
drwxr-xr-x 3 root root 4096  3月 13 18:31 histogram
drwxr-xr-x 4 root root 4096  3月 13 18:31 HSOpticalFlow
drwxr-xr-x 4 root root 4096  3月 13 18:31 imageDenoising
drwxr-xr-x 4 root root 4096  3月 13 18:31 postProcessGL
drwxr-xr-x 4 root root 4096  3月 13 18:31 recursiveGaussian
drwxr-xr-x 3 root root 4096  3月 13 18:31 simpleCUDA2GL
drwxr-xr-x 4 root root 4096  3月 13 18:31 SobelFilter
drwxr-xr-x 3 root root 4096  3月 13 18:31 stereoDisparity

/usr/local/cuda/samples/4_Finance:
total 20
drwxr-xr-x 3 root root 4096  3月 13 18:31 binomialOptions
drwxr-xr-x 3 root root 4096  3月 13 18:31 BlackScholes
drwxr-xr-x 3 root root 4096  3月 13 18:31 MonteCarloMultiGPU
drwxr-xr-x 2 root root 4096  3月 13 18:31 quasirandomGenerator
drwxr-xr-x 2 root root 4096  3月 13 18:31 SobolQRNG

/usr/local/cuda/samples/5_Simulations:
total 28
drwxr-xr-x 4 root root 4096  3月 13 18:31 fluidsGL
drwxr-xr-x 3 root root 4096  3月 13 18:31 fluidsGLES
drwxr-xr-x 3 root root 4096  3月 13 18:31 nbody
drwxr-xr-x 2 root root 4096  3月 13 18:31 nbody_opengles
drwxr-xr-x 4 root root 4096  3月 13 18:31 oceanFFT
drwxr-xr-x 4 root root 4096  3月 13 18:31 particles
drwxr-xr-x 4 root root 4096  3月 13 18:31 smokeParticles

/usr/local/cuda/samples/6_Advanced:
total 108
drwxr-xr-x 3 root root 4096  3月 13 18:31 alignedTypes
drwxr-xr-x 2 root root 4096  3月 13 18:31 cdpAdvancedQuicksort
drwxr-xr-x 2 root root 4096  3月 13 18:31 cdpBezierTessellation
drwxr-xr-x 2 root root 4096  3月 13 18:31 cdpQuadtree
drwxr-xr-x 2 root root 4096  3月 13 18:31 concurrentKernels
drwxr-xr-x 4 root root 4096  3月 13 18:31 eigenvalues
drwxr-xr-x 3 root root 4096  3月 13 18:31 fastWalshTransform
drwxr-xr-x 4 root root 4096  3月 13 18:31 FDTD3d
drwxr-xr-x 3 root root 4096  3月 13 18:31 FunctionPointers
drwxr-xr-x 3 root root 4096  3月 13 18:31 interval
drwxr-xr-x 2 root root 4096  3月 13 18:31 lineOfSight
drwxr-xr-x 3 root root 4096  3月 13 18:31 matrixMulDynlinkJIT
drwxr-xr-x 2 root root 4096  3月 13 18:31 mergeSort
drwxr-xr-x 2 root root 4096  3月 13 18:31 newdelete
drwxr-xr-x 2 root root 4096  3月 13 18:31 ptxjit
drwxr-xr-x 3 root root 4096  3月 13 18:31 radixSortThrust
drwxr-xr-x 2 root root 4096  3月 13 18:31 reduction
drwxr-xr-x 2 root root 4096  3月 13 18:31 scalarProd
drwxr-xr-x 2 root root 4096  3月 13 18:31 scan
drwxr-xr-x 3 root root 4096  3月 13 18:31 segmentationTreeThrust
drwxr-xr-x 2 root root 4096  3月 13 18:31 shfl_scan
drwxr-xr-x 3 root root 4096  3月 13 18:31 simpleHyperQ
drwxr-xr-x 2 root root 4096  3月 13 18:31 sortingNetworks
drwxr-xr-x 2 root root 4096  3月 13 18:31 threadFenceReduction
drwxr-xr-x 2 root root 4096  3月 13 18:31 threadMigration
drwxr-xr-x 3 root root 4096  3月 13 18:31 transpose
drwxr-xr-x 2 root root 4096  3月 13 18:31 warpAggregatedAtomicsCG

/usr/local/cuda/samples/7_CUDALibraries:
total 120
drwxr-xr-x 2 root root 4096  3月 13 18:31 batchCUBLAS
drwxr-xr-x 2 root root 4096  3月 13 18:31 BiCGStab
drwxr-xr-x 2 root root 4096  3月 13 18:31 boundSegmentsNPP
drwxr-xr-x 2 root root 4096  3月 13 18:31 boxFilterNPP
drwxr-xr-x 2 root root 4096  3月 13 18:31 cannyEdgeDetectorNPP
drwxr-xr-x 4 root root 4096  3月 13 18:30 common
drwxr-xr-x 2 root root 4096  3月 13 18:31 conjugateGradient
drwxr-xr-x 2 root root 4096  3月 13 18:31 conjugateGradientPrecond
drwxr-xr-x 2 root root 4096  3月 13 18:31 conjugateGradientUM
drwxr-xr-x 2 root root 4096  3月 13 18:31 cuSolverDn_LinearSolver
drwxr-xr-x 2 root root 4096  3月 13 18:31 cuSolverRf
drwxr-xr-x 2 root root 4096  3月 13 18:31 cuSolverSp_LinearSolver
drwxr-xr-x 2 root root 4096  3月 13 18:31 cuSolverSp_LowlevelCholesky
drwxr-xr-x 2 root root 4096  3月 13 18:31 cuSolverSp_LowlevelQR
drwxr-xr-x 2 root root 4096  3月 13 18:31 FilterBorderControlNPP
drwxr-xr-x 2 root root 4096  3月 13 18:31 freeImageInteropNPP
drwxr-xr-x 2 root root 4096  3月 13 18:31 histEqualizationNPP
drwxr-xr-x 2 root root 4096  3月 13 18:31 jpegNPP
drwxr-xr-x 4 root root 4096  3月 13 18:31 MC_EstimatePiInlineP
drwxr-xr-x 4 root root 4096  3月 13 18:31 MC_EstimatePiInlineQ
drwxr-xr-x 4 root root 4096  3月 13 18:31 MC_EstimatePiP
drwxr-xr-x 4 root root 4096  3月 13 18:31 MC_EstimatePiQ
drwxr-xr-x 4 root root 4096  3月 13 18:31 MC_SingleAsianOptionP
drwxr-xr-x 2 root root 4096  3月 13 18:31 MersenneTwisterGP11213
drwxr-xr-x 3 root root 4096  3月 13 18:31 randomFog
drwxr-xr-x 2 root root 4096  3月 13 18:31 simpleCUBLAS
drwxr-xr-x 2 root root 4096  3月 13 18:31 simpleCUBLASXT
drwxr-xr-x 2 root root 4096  3月 13 18:31 simpleCUFFT
drwxr-xr-x 2 root root 4096  3月 13 18:31 simpleCUFFT_2d_MGPU
drwxr-xr-x 2 root root 4096  3月 13 18:31 simpleCUFFT_MGPU

/usr/local/cuda/samples/common:
total 24
drwxr-xr-x 2 root root 4096  3月 13 18:31 data
-rw-r--r-- 1 root root 6509 10月 16  2018 findgllib.mk
drwxr-xr-x 3 root root 4096  3月 13 18:31 inc
drwxr-xr-x 3 root root 4096  3月 13 18:30 lib
drwxr-xr-x 2 root root 4096  3月 13 18:31 src
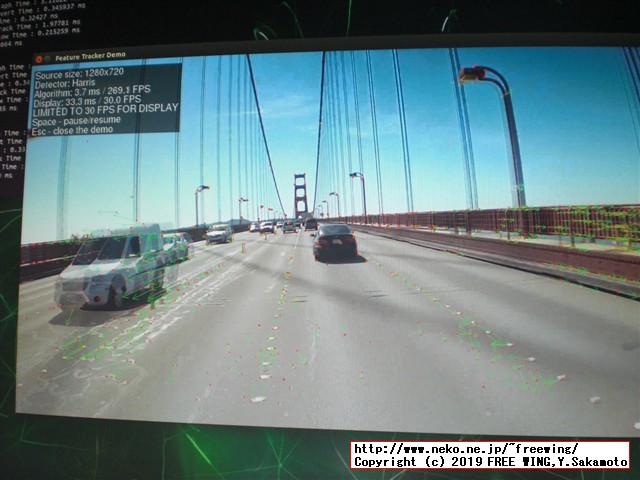
cd
/usr/share/visionworks/sources/install-samples.sh
# Copying VisionWorks samples to /home/user/VisionWorks-1.6-Samples

cd ~/VisionWorks-1.6-Samples
make -j4

# bin/aarch64/linux/release にビルドしたバイナリが全て有ります
cd bin/aarch64/linux/release
ls -l
./nvx_demo_feature_tracker

cd ~/VisionWorks-1.6-Samples/bin/aarch64/linux/release
ls -l
For on-board camera, please use --source="device:///nvcamera?index=0"
For usb camera, please use --source="device:///v4l2?index=1"

# Logitech USB Camera
cat /dev/v4l/by-id/*

# cat: /dev/v4l/by-id/usb-046d_Logitech_Webcam_C930e_AD9E226E-video-index0

nvx_demo_feature_tracker --source="device:///v4l2?index=0"
VisionWorks officially supports following input format:
・Video
・Image
・Image sequence
・V4L2 camera
・NVIDIA camera
./nvx_demo_feature_tracker --source="/full_path/movie/sample.mp4"
./nvx_demo_feature_tracker --source="./relative_path/movie/sample.mp4"
# on-board camera
./nvx_demo_feature_tracker --source="device:///nvcamera?index=0"
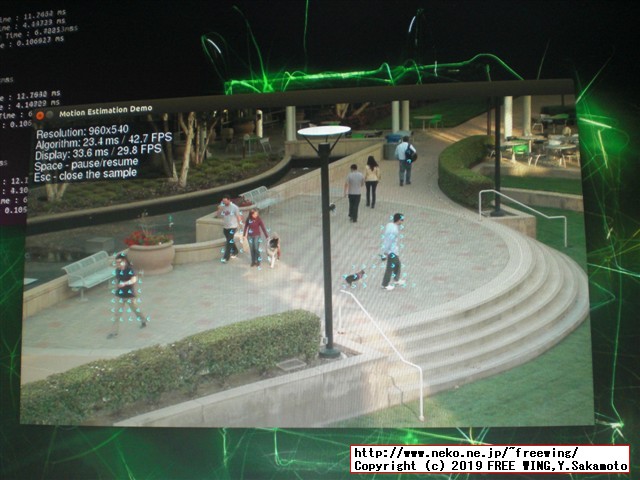
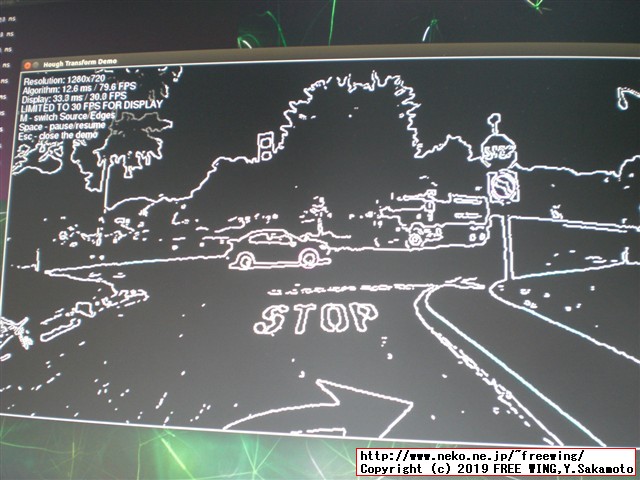
user@user-desktop:~/VisionWorks-1.6-Samples/bin/aarch64/linux/release$ ls -l
total 13532
-rwxrwxr-x 1 user user 1359232  5月  3 21:18 nvx_demo_feature_tracker
-rwxrwxr-x 1 user user 1313608  5月  3 21:18 nvx_demo_feature_tracker_nvxcu
-rwxrwxr-x 1 user user 1357792  5月  3 21:18 nvx_demo_hough_transform
-rwxrwxr-x 1 user user 1357552  5月  3 21:18 nvx_demo_motion_estimation
-rwxrwxr-x 1 user user 1378296  5月  3 21:18 nvx_demo_stereo_matching
-rwxrwxr-x 1 user user 1375232  5月  3 21:19 nvx_demo_video_stabilizer
-rwxrwxr-x 1 user user 1305792  5月  3 21:19 nvx_sample_nvgstcamera_capture
-rwxrwxr-x 1 user user 1432384  5月  3 21:19 nvx_sample_object_tracker_nvxcu
-rwxrwxr-x 1 user user 1222984  5月  3 21:19 nvx_sample_opencv_npp_interop
-rwxrwxr-x 1 user user  424928  5月  3 21:19 nvx_sample_opengl_interop
-rwxrwxr-x 1 user user 1310888  5月  3 21:19 nvx_sample_player
# https://github.com/dusty-nv/jetson-inference/blob/master/docs/building-repo-2.md
# Hello AI World - Building the Repo from Source
sudo apt-get -y install git cmake

# Cloning the Repo
cd
git clone https://github.com/dusty-nv/jetson-inference
cd jetson-inference
git submodule update --init

# Configuring with CMake
mkdir build
cd build
cmake ../

# [sudo] password for user:

# Compiling the Project
cd ~/jetson-inference/build
make
sudo make install
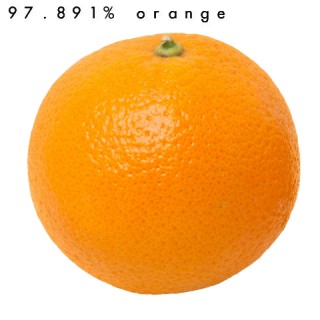
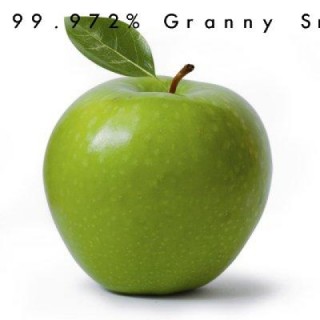
# Classifying Images with ImageNet
cd ~/jetson-inference/build/aarch64/bin
./imagenet-console orange_0.jpg output_0.jpg
./imagenet-console granny_smith_1.jpg output_1.jpg
./imagenet-console cat_0.jpg output_2.jpg
cd ~/jetson-inference/build/aarch64/bin

# to run using googlenet
./imagenet-camera googlenet

# to run using alexnet
./imagenet-camera alexnet
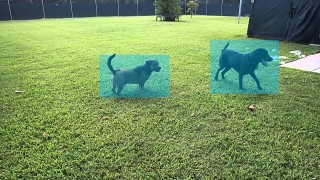
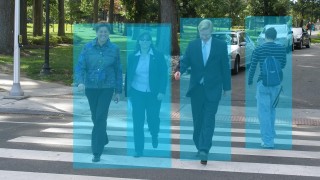
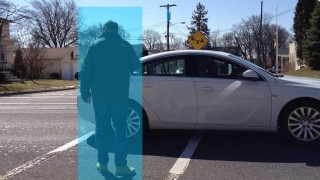
# Detecting Objects from the Command Line
./detectnet-console dog_1.jpg output_1.jpg coco-dog

# Running Other MS-COCO Models on Jetson
./detectnet-console bottle_0.jpg output_bot.jpg coco-bottle

./detectnet-console airplane_0.jpg output_air.jpg coco-airplane

# Running Pedestrian Models on Jetson
./detectnet-console peds-001.jpg output-p1.jpg multiped

./detectnet-console peds-002.jpg output-p2.jpg multiped

./detectnet-console peds-003.jpg output-p3.jpg multiped

./detectnet-console peds-004.jpg output-p4.jpg multiped

cd ~/jetson-inference/build/aarch64/bin

# run using facial recognition network
./detectnet-camera facenet

# run using multi-class pedestrian/luggage detector
./detectnet-camera multiped

# run using original single-class pedestrian detector
./detectnet-camera pednet

# detect bottles/soda cans in the camera
./detectnet-camera coco-bottle

# detect dogs in the camera
./detectnet-camera coco-dog

# by default, program will run using multiped
./detectnet-camera
cd ~/jetson-inference/build/aarch64/bin

# 画像セグメンテーション - SegNet
./segnet-batch.sh

# ラズパイカメラ RaspiCamを使用して画像セグメンテーション。
./segnet-camera

# 任意の画像の場合
./segnet-console input.jpg output.jpg

./segnet-console drone_0435.png doro_seg.jpg

cd ~/jetson-inference/build/aarch64/bin

./homography-console --model=coco --imageA=./peds-001.jpg --imageB=peds-002.jpg --imageOut=./hoge.jpg

./homography-console --model=coco --imageA=./drone_0427.png --imageB=drone_0435.png --imageOut=./doro1.jpg

./homography-console --model=coco --imageA=./drone_0427.png --imageB=drone_0436.png --imageOut=./doro2.jpg

./homography-camera --model=coco
homography-camera:  failed to open camera for streaming

./homography-console
homography-console:   two input image filenames required

USAGE:
  homography-console --model=<name/path> --imageA=<path> --imageB=<path> --imageOut<path>

 >  --model is optional and can be path to ONNX model, 'coco', or 'webcam'
    if --model is left unspecified, the default model is 'webcam'

 >  --imageOut is optional, and if specified will be imageA warped by the homography
cd ~/jetson-inference/build/aarch64/bin

user@user-desktop:~/jetson-inference/build/aarch64/bin$ ls -l
 実行ファイルのみ
-rwxr-xr-x 1 root root  677392  5月  4 18:40 detectnet-camera
-rwxr-xr-x 1 root root  675784  5月  4 18:40 detectnet-console
-rwxr-xr-x 1 root root  675744  5月  4 18:40 gl-display-test
-rwxr-xr-x 1 root root  676504  5月  4 18:40 gst-camera
-rwxr-xr-x 1 root root  681144  5月  4 18:40 homography-camera
-rwxr-xr-x 1 root root  671584  5月  4 18:40 homography-console
-rwxr-xr-x 1 root root  681376  5月  4 18:40 imagenet-camera
-rwxr-xr-x 1 root root  675544  5月  4 18:40 imagenet-console
-rwxrwxr-x 1 user user     124  5月  4 16:35 segnet-batch.sh
-rwxr-xr-x 1 root root  676808  5月  4 18:40 segnet-camera
-rwxr-xr-x 1 root root  671056  5月  4 18:40 segnet-console
-rwxr-xr-x 1 root root  675608  5月  4 18:40 superres-console
-rwxr-xr-x 1 root root  709744  5月  4 18:40 trt-bench
-rwxr-xr-x 1 root root    9128  5月  4 18:40 trt-console
-rwxr-xr-x 1 root root   19304  5月  4 18:40 v4l2-console
-rwxr-xr-x 1 root root   14168  5月  4 18:40 v4l2-display
user@user-desktop:~$ pkg-config opencv --modversion
3.3.1

user@user-desktop:~$ python -c "import cv2; print (cv2.__version__)"
3.3.1

user@user-desktop:~$ python3 -c "import cv2; print (cv2.__version__)"
3.3.1
user@user-desktop:~$ nvcc -V gives
nvcc: NVIDIA (R) Cuda compiler driver
Copyright (c) 2005-2018 NVIDIA Corporation
Built on Sun_Sep_30_21:09:22_CDT_2018
Cuda compilation tools, release 10.0, V10.0.166

user@user-desktop:~$ cd /usr/local/cuda/samples/1_Utilities/deviceQuery
user@user-desktop:/usr/local/cuda/samples/1_Utilities/deviceQuery$ sudo make
user@user-desktop:/usr/local/cuda/samples/1_Utilities/deviceQuery$ ./deviceQuery./
deviceQuery Starting...

 CUDA Device Query (Runtime API) version (CUDART static linking)

Detected 1 CUDA Capable device(s)

Device 0: "NVIDIA Tegra X1"
  CUDA Driver Version / Runtime Version          10.0 / 10.0
  CUDA Capability Major/Minor version number:    5.3
  Total amount of global memory:                 3957 MBytes (4148756480 bytes)
  ( 1) Multiprocessors, (128) CUDA Cores/MP:     128 CUDA Cores
  GPU Max Clock rate:                            922 MHz (0.92 GHz)
  Memory Clock rate:                             13 Mhz
  Memory Bus Width:                              64-bit
  L2 Cache Size:                                 262144 bytes
  Maximum Texture Dimension Size (x,y,z)         1D=(65536), 2D=(65536, 65536), 3D=(4096, 4096, 4096)
  Maximum Layered 1D Texture Size, (num) layers  1D=(16384), 2048 layers
  Maximum Layered 2D Texture Size, (num) layers  2D=(16384, 16384), 2048 layers
  Total amount of constant memory:               65536 bytes
  Total amount of shared memory per block:       49152 bytes
  Total number of registers available per block: 32768
  Warp size:                                     32
  Maximum number of threads per multiprocessor:  2048
  Maximum number of threads per block:           1024
  Max dimension size of a thread block (x,y,z): (1024, 1024, 64)
  Max dimension size of a grid size    (x,y,z): (2147483647, 65535, 65535)
  Maximum memory pitch:                          2147483647 bytes
  Texture alignment:                             512 bytes
  Concurrent copy and kernel execution:          Yes with 1 copy engine(s)
  Run time limit on kernels:                     Yes
  Integrated GPU sharing Host Memory:            Yes
  Support host page-locked memory mapping:       Yes
  Alignment requirement for Surfaces:            Yes
  Device has ECC support:                        Disabled
  Device supports Unified Addressing (UVA):      Yes
  Device supports Compute Preemption:            No
  Supports Cooperative Kernel Launch:            No
  Supports MultiDevice Co-op Kernel Launch:      No
  Device PCI Domain ID / Bus ID / location ID:   0 / 0 / 0
  Compute Mode:
     < Default (multiple host threads can use ::cudaSetDevice() with device simultaneously) >

deviceQuery, CUDA Driver = CUDART, CUDA Driver Version = 10.0, CUDA Runtime Version = 10.0, NumDevs = 1
Result = PASS
# Python 2.7
wget https://nvidia.box.com/shared/static/m6vy0c7rs8t1alrt9dqf7yt1z587d1jk.whl -O torch-1.1.0a0+b457266-cp27-cp27mu-linux_aarch64.whl
pip install torch-1.1.0a0+b457266-cp27-cp27mu-linux_aarch64.whl
sudo apt -y install python-pip
# Successfully installed torch-1.1.0a0+b457266

# Python 3.6
wget https://nvidia.box.com/shared/static/veo87trfaawj5pfwuqvhl6mzc5b55fbj.whl -O torch-1.1.0a0+b457266-cp36-cp36m-linux_aarch64.whl
pip3 install numpy torch-1.1.0a0+b457266-cp36-cp36m-linux_aarch64.whl
# Successfully installed numpy-1.16.3 torch-1.1.0a0+b457266
https://github.com/AastaNV/JEP/blob/master/script/install_opencv4.0.0_Nano.sh
# PyCuda and Numba is working on Jetson:
NVIDIA Answer: Could you try if you can install pyCUDA with the steps shared in this comment?
Is the memory management method of TX1 and TX2 different?
# PyCuda and Numba is working on Jetson:
numba package (in python) on Jetson
NVIDIA Answer: We don't have the experience on numba for Jetson.
For C++ app, you will need to recompile it with Nano architecture(sm=53).
# Step 0: Ensure that CUDA is installed and settings are correct
echo $CUDA_HOME
# /usr/local/cuda
CUDA_ROOT=$CUDA_HOME
echo $CUDA_ROOT
# /usr/local/cuda

# Don't forget to include the cuda library directories LD_LIBRARY_PATH
echo $LD_LIBRARY_PATH
# /usr/local/cuda/lib64:

# Step 1: Install gcc4.4 (Ubuntu 11.04)
sudo apt-get install build-essential gcc-4.3 g++-4.3
cd /usr/bin
sudo ln -sf gcc-4.3 gcc

# Step 2: Install Boost C++ libraries
sudo apt-get -y install libboost-all-dev

# Step 3: Install numpy
sudo apt-get install python-numpy -y

# Step 4: Download, unpack and install PyCUDA
sudo apt-get install build-essential python-dev python-setuptools libboost-python-dev libboost-thread-dev -y

# https://pypi.org/project/pycuda/
# pycuda-2019.1.tar.gz
wget https://files.pythonhosted.org/packages/4d/29/5a3eb66c2f1a4adc681f6c8131e9ed677af31b0c8a78726d540bd44b3403/pycuda-2019.1.tar.gz
tar xzvf pycuda-2019.1.tar.gz

# Configure, make and install PyCUDA:
cd pycuda-2019.1
rm ./siteconf.py
./configure.py --python-exe=/usr/bin/python3 --cuda-root=/usr/local/cuda --cudadrv-lib-dir=/usr/lib --boost-inc-dir=/usr/include --boost-lib-dir=/usr/lib --boost-python-libname=boost_python-mt-py32 --boost-thread-libname=boost_thread-mt --no-use-shipped-boost
make cleam
make -j 4
sudo python3 setup.py install
sudo apt-get install python3-pip libhdf5-serial-dev hdf5-tools
pip3 install --extra-index-url https://developer.download.nvidia.com/compute/redist/jp/v42 tensorflow-gpu==1.13.1+nv19.4 --user
# Copy the ssd-mobilenet-v2 archive
cd
cd ~/Downloads/
wget --no-check-certificate 'https://nvidia.box.com/shared/static/8oqvmd79llr6lq1fr43s4fu1ph37v8nt.gz' -O ssd-mobilenet-v2.tar.gz
tar -xvf ssd-mobilenet-v2.tar.gz
cd
cd ~/Downloads/
cd ssd-mobilenet-v2
sudo cp -R sampleUffSSD_rect /usr/src/tensorrt/samples
sudo cp sample_unpruned_mobilenet_v2.uff /usr/src/tensorrt/data/ssd/
sudo cp image1.ppm /usr/src/tensorrt/data/ssd/

# Compile the sample
cd /usr/src/tensorrt/samples/sampleUffSSD_rect
sudo make

# Run the sample to measure inference performance
cd /usr/src/tensorrt/bin
sudo ./sample_uff_ssd_rect
# SSD-Mobilenet-V2
user@user-desktop:/usr/src/tensorrt/bin$ sudo ./sample_uff_ssd_rect
../data/ssd/sample_unpruned_mobilenet_v2.uff
Registering UFF model
Registered Input
Registered output NMS
Creating engine
Begin parsing model...
End parsing model...
Begin building engine...
Time lapsed to create an engine: 189409ms
End building engine...
Created engine
 Num batches  1
 Data Size  270000
*** deserializing
3 Binding
Allocating buffer sizes for binding index: 0 of size : 270000 * 4 B
Allocating buffer sizes for binding index: 1 of size : 700 * 4 B
Allocating buffer sizes for binding index: 2 of size : 1 * 4 B
Time taken for inference per run is 26.0485 ms.
Time taken for inference per run is 26.078 ms.
Time taken for inference per run is 26.0773 ms.
Time taken for inference per run is 26.0772 ms.
Time taken for inference per run is 26.0752 ms.
Time taken for inference per run is 26.0736 ms.
Time taken for inference per run is 26.0774 ms.
Time taken for inference per run is 26.0761 ms.
Time taken for inference per run is 26.0763 ms.
Time taken for inference per run is 26.0763 ms.
Average time spent per iteration is 26.0736 ms.
Time taken for inference is 26.0763 ms.
 KeepCount 100
# Copy each of these .prototxt files
# https://drive.google.com/open?id=1wbp6SBQA6PS0JrbK5bw_kHLXo23a0D7x
# inception_v4.prototxt
# pose_estimation.prototxt
# ResNet50_224x224.prototxt
# vgg19_N2.prototxt
# sudo cp  *.prototxt /usr/src/tensorrt/data/googlenet/
cd
unzip prototxt_files-20190525T060337Z-001.zip
cd prototxt_files
sudo cp  *.prototxt /usr/src/tensorrt/data/googlenet/
# ResNet-50
cd /usr/src/tensorrt/bin
./trtexec --output=prob --deploy=../data/googlenet/ResNet50_224x224.prototxt --fp16 --batch=1

# Inception V4
cd /usr/src/tensorrt/bin
./trtexec --output=prob --deploy=../data/googlenet/inception_v4.prototxt --fp16 --batch=1

# VGG-19
# Error: VGG19_N2.prototxt Engine could not be created
# OK: vgg19_N2.prototxt
cd /usr/src/tensorrt/bin
./trtexec --output=prob --deploy=../data/googlenet/vgg19_N2.prototxt --fp16 --batch=1
# ResNet-50
user@user-desktop:/usr/src/tensorrt/bin$ ./trtexec --output=prob --deploy=../data/googlenet/ResNet50_224x224.prototxt --fp16 --batch=1
output: prob
deploy: ../data/googlenet/ResNet50_224x224.prototxt
fp16
batch: 1
Input "data": 3x224x224
Output "prob": 1000x1x1
name=data, bindingIndex=0, buffers.size()=2
name=prob, bindingIndex=1, buffers.size()=2
Average over 10 runs is 26.8465 ms (host walltime is 26.9038 ms, 99% percentile time is 26.9317).
Average over 10 runs is 26.8929 ms (host walltime is 26.9469 ms, 99% percentile time is 26.9891).
Average over 10 runs is 26.8306 ms (host walltime is 26.8847 ms, 99% percentile time is 26.8992).
Average over 10 runs is 26.878 ms (host walltime is 26.9403 ms, 99% percentile time is 26.9517).
Average over 10 runs is 26.8572 ms (host walltime is 26.9188 ms, 99% percentile time is 26.9402).
Average over 10 runs is 26.8464 ms (host walltime is 26.8997 ms, 99% percentile time is 26.9457).
Average over 10 runs is 26.8331 ms (host walltime is 27.0572 ms, 99% percentile time is 26.9302).
Average over 10 runs is 26.8625 ms (host walltime is 27.2524 ms, 99% percentile time is 26.9082).
Average over 10 runs is 26.8953 ms (host walltime is 26.9532 ms, 99% percentile time is 26.979).
Average over 10 runs is 26.8784 ms (host walltime is 26.9333 ms, 99% percentile time is 26.9331).

# Inception V4
user@user-desktop:/usr/src/tensorrt/bin$ ./trtexec --output=prob --deploy=../data/googlenet/inception_v4.prototxt --fp16 --batch=1
output: prob
deploy: ../data/googlenet/inception_v4.prototxt
fp16
batch: 1
Input "data": 3x299x299
Output "prob": 1000x1x1
name=data, bindingIndex=0, buffers.size()=2
name=prob, bindingIndex=1, buffers.size()=2
Average over 10 runs is 93.6142 ms (host walltime is 93.6819 ms, 99% percentile time is 93.7973).
Average over 10 runs is 93.5637 ms (host walltime is 93.6195 ms, 99% percentile time is 93.6502).
Average over 10 runs is 93.6045 ms (host walltime is 93.6617 ms, 99% percentile time is 93.6984).
Average over 10 runs is 93.605 ms (host walltime is 93.6575 ms, 99% percentile time is 93.6692).
Average over 10 runs is 93.607 ms (host walltime is 93.6629 ms, 99% percentile time is 93.6988).
Average over 10 runs is 93.5804 ms (host walltime is 93.6412 ms, 99% percentile time is 93.6714).
Average over 10 runs is 93.5592 ms (host walltime is 93.628 ms, 99% percentile time is 93.6421).
Average over 10 runs is 93.5413 ms (host walltime is 93.6079 ms, 99% percentile time is 93.6686).
Average over 10 runs is 93.6059 ms (host walltime is 93.6678 ms, 99% percentile time is 93.6969).
Average over 10 runs is 93.5855 ms (host walltime is 93.6489 ms, 99% percentile time is 93.6846).

# VGG-19
user@user-desktop:/usr/src/tensorrt/bin$ ./trtexec --output=prob --deploy=../data/googlenet/vgg19_N2.prototxt  --fp16 --batch=1
output: prob
deploy: ../data/googlenet/vgg19_N2.prototxt
fp16
batch: 1
Input "data": 3x224x224
Output "prob": 1000x1x1
name=data, bindingIndex=0, buffers.size()=2
name=prob, bindingIndex=1, buffers.size()=2
Average over 10 runs is 99.4974 ms (host walltime is 99.5659 ms, 99% percentile time is 102.033).
Average over 10 runs is 99.6011 ms (host walltime is 99.6558 ms, 99% percentile time is 100.193).
Average over 10 runs is 99.0806 ms (host walltime is 99.1366 ms, 99% percentile time is 100.239).
Average over 10 runs is 99.3454 ms (host walltime is 99.4097 ms, 99% percentile time is 100.148).
Average over 10 runs is 99.1329 ms (host walltime is 99.2009 ms, 99% percentile time is 99.9607).
Average over 10 runs is 99.4592 ms (host walltime is 99.8207 ms, 99% percentile time is 100.201).
Average over 10 runs is 99.4099 ms (host walltime is 99.4839 ms, 99% percentile time is 100.158).
Average over 10 runs is 99.4908 ms (host walltime is 99.5542 ms, 99% percentile time is 100.186).
Average over 10 runs is 99.2361 ms (host walltime is 99.2971 ms, 99% percentile time is 99.7917).
Average over 10 runs is 99.2987 ms (host walltime is 99.3656 ms, 99% percentile time is 100.093).
# Copy the output_graph.uff model file
# https://drive.google.com/drive/folders/1-eS14TKWACWEaOirSDeetLjIU0h8uOfv?usp=sharing
# Unet_segmentation
# output_graph.uff
cd
unzip Unet_segmentation-20190525T061648Z-001.zip
mv Unet_segmentation/output_graph.uff .

ls -l ~/output*
# -rw-rw-r-- 1 user user 1971389  3月 15 21:19 /home/user/output_graph.uff

# Run the U-Net inference benchmark:
cd /usr/src/tensorrt/bin
sudo ./trtexec --uff=~/output_graph.uff --uffInput=input_1,1,512,512 --output=conv2d_19/Sigmoid --fp16
user@user-desktop:/usr/src/tensorrt/bin$ sudo ./trtexec --uff=~/output_graph.uff --uffInput=input_1,1,512,512 --output=conv2d_19/Sigmoid --fp16                 uff: ~/output_graph.uff
uffInput: input_1,1,512,512
output: conv2d_19/Sigmoid
fp16
UFFParser: Unsupported number of graph 0
Engine could not be created
Engine could not be created
# Copy the pose_estimation.prototxt file
# https://drive.google.com/drive/folders/1-eS14TKWACWEaOirSDeetLjIU0h8uOfv?usp=sharing
# Unet_segmentation
# pose_estimation.prototxt
cd
unzip Unet_segmentation-20190525T061648Z-001.zip
sudo cp ./Unet_segmentation/pose_estimation.prototxt /usr/src/tensorrt/data/googlenet

# Run the OpenPose inference benchmark:
cd /usr/src/tensorrt/bin/
sudo ./trtexec --output=Mconv7_stage2_L2 --deploy=../data/googlenet/pose_estimation.prototxt --fp16 --batch=1
# Pose Estimation
user@user-desktop:/usr/src/tensorrt/bin$ sudo ./trtexec --output=Mconv7_stage2_L2 --deploy=../data/googlenet/pose_estimation.prototxt --fp16 --batch=1
output: Mconv7_stage2_L2
deploy: ../data/googlenet/pose_estimation.prototxt
fp16
batch: 1
Input "data": 3x256x456
Output "Mconv7_stage2_L2": 19x32x57
name=data, bindingIndex=0, buffers.size()=2
name=Mconv7_stage2_L2, bindingIndex=1, buffers.size()=2
Average over 10 runs is 68.7275 ms (host walltime is 68.7982 ms, 99% percentile time is 68.8601).
Average over 10 runs is 68.7505 ms (host walltime is 68.8057 ms, 99% percentile time is 68.825).
Average over 10 runs is 68.7546 ms (host walltime is 68.809 ms, 99% percentile time is 68.8314).
Average over 10 runs is 68.747 ms (host walltime is 68.8016 ms, 99% percentile time is 68.8134).
Average over 10 runs is 68.7875 ms (host walltime is 68.8522 ms, 99% percentile time is 68.8817).
Average over 10 runs is 68.749 ms (host walltime is 68.8054 ms, 99% percentile time is 68.8383).
Average over 10 runs is 68.7815 ms (host walltime is 68.836 ms, 99% percentile time is 68.8755).
Average over 10 runs is 68.7628 ms (host walltime is 68.8161 ms, 99% percentile time is 68.8584).
Average over 10 runs is 68.7647 ms (host walltime is 68.8174 ms, 99% percentile time is 68.8367).
Average over 10 runs is 68.7718 ms (host walltime is 68.8338 ms, 99% percentile time is 68.8393).
# Download the require files to run inference on the Super Resolution neural network.
cd
sudo wget --no-check-certificate 'https://nvidia.box.com/shared/static/a99l8ttk21p3tubjbyhfn4gh37o45rn8.gz' -O Super-Resolution-BSD500.tar.gz

# Unzip the downloaded file
sudo tar -xvf Super-Resolution-BSD500.tar.gz

ONNX=`pwd`
echo $ONNX
# /home/user
ONNX=${ONNX}/Super-Resolution-BSD500/super_resolution_bsd500.onnx
echo $ONNX
# /home/user/Super-Resolution-BSD500/super_resolution_bsd500.onnx

# Run the Super Resolution inferencing benchmark:
cd /usr/src/tensorrt/bin
# sudo ./trtexec --output=output_0 --onnx=<path to the .onnx file in the unzipped folder above> --fp16 --batch=1
sudo ./trtexec --output=output_0 --onnx=${ONNX} --fp16 --batch=1
# Super Resolution
user@user-desktop:/usr/src/tensorrt/bin$ sudo ./trtexec --output=output_0 --onnx=${ONNX} --fp16 --batch=1
output: output_0
onnx: /home/user/Super-Resolution-BSD500/super_resolution_bsd500.onnx
fp16
batch: 1
----------------------------------------------------------------
Input filename:   /home/user/Super-Resolution-BSD500/super_resolution_bsd500.onnx
ONNX IR version:  0.0.3
Opset version:    9
Producer name:    pytorch
Producer version: 0.4
Domain:
Model version:    0
Doc string:
----------------------------------------------------------------
 ----- Parsing of ONNX model /home/user/Super-Resolution-BSD500/super_resolution_bsd500.onnx is Done ----
name=input_0, bindingIndex=0, buffers.size()=3
name=output_0, bindingIndex=1, buffers.size()=3
name=output_0, bindingIndex=1, buffers.size()=3
Average over 10 runs is 64.2781 ms (host walltime is 64.3409 ms, 99% percentile time is 64.4678).
Average over 10 runs is 64.0992 ms (host walltime is 64.7364 ms, 99% percentile time is 64.3531).
Average over 10 runs is 64.1281 ms (host walltime is 64.1892 ms, 99% percentile time is 64.3937).
Average over 10 runs is 64.2557 ms (host walltime is 65.1907 ms, 99% percentile time is 64.4817).
Average over 10 runs is 64.2128 ms (host walltime is 64.9405 ms, 99% percentile time is 64.422).
Average over 10 runs is 64.0247 ms (host walltime is 64.0869 ms, 99% percentile time is 64.0678).
Average over 10 runs is 64.2865 ms (host walltime is 64.71 ms, 99% percentile time is 64.4909).
Average over 10 runs is 64.0215 ms (host walltime is 64.089 ms, 99% percentile time is 64.1427).
Average over 10 runs is 64.2092 ms (host walltime is 64.2709 ms, 99% percentile time is 64.4807).
Average over 10 runs is 64.0827 ms (host walltime is 64.1327 ms, 99% percentile time is 64.2473).
# Install pre-requisite packages

# Download trt-yolo-app
cd ~
git clone https://github.com/NVIDIA-AI-IOT/deepstream_reference_apps.git

# Install other requirements
cd ~/deepstream_reference_apps/yolo
sudo sh prebuild.sh

# Compile and install app
cd apps/trt-yolo
mkdir build && cd build
cmake -D CMAKE_BUILD_TYPE=Release ..
make && sudo make install
cd ../../..

# [ 23%] Building CXX object lib/CMakeFiles/yolo-lib.dir/ds_image.cpp.o
# /home/user/deepstream_reference_apps/yolo/lib/ds_image.cpp: In constructor ‘DsImage::DsImage(const string&, const int&, const int&)’:
# /home/user/deepstream_reference_apps/yolo/lib/ds_image.cpp:49:36: error: ‘CV_LOAD_IMAGE_COLOR’ was not declared in this scope
#      m_OrigImage = cv::imread(path, CV_LOAD_IMAGE_COLOR);
#                                     ^~~~~~~~~~~~~~~~~~~

# For the sample image data set
# https://drive.google.com/drive/folders/1dJzDlQm8Pee0giSYorui_1e0N0bie65t?usp=sharing
# Navigate your terminal to:
cd ~/deepstream_reference_apps/yolo/data

# Open the file “test_images.txt”

# provide the full path to each of the 500 images you downloaded
/home/<username>/Downloads/<image file name>.png

Alternatively, you could provide the path to just one image and copy that line 500 times in that file.

A sample set of images (5 images of varying resolutions, repeated 100 times) along with the test_images.txt file have been uploaded here. You can use this data set if you don’t want to download your own images.

Go to the folder ‘config’ and open file ‘yolov3-tiny.txt'

In the file yolov3-tiny.txt, search for “--precision=kINT8” and replace “kINT8” with “kHALF” to change the inference precision to FP16.

Save the file

# Now run the Tiny YOLO inference:
cd ~/deepstream_reference_apps/yolo
sudo trt-yolo-app --flagfile=config/yolov3-tiny.txt