・2018/08/10
 Raspberry Piに Jupyter Notebookをインストールして拡張子 ipynb形式の IPythonを動かす
(ラズパイに IPython Notebookをインストールして Google DeepDream dream.ipynbを動かす)
Tags: [Raspberry Pi], [電子工作], [ディープラーニング]
● Raspberry Piで Google DeepDreamを動かしてキモイ絵を量産する
Raspberry Piで DeepDreamを動かせる事を知ったので動かしてみます。
Raspberry Piで Google DeepDreamを動かして一時期流行したキモイ絵を量産します。
DeepDream - Wikipedia
DeepDreamで生成した画像の例(Wikipediaより引用)
・DeepDream

● Raspberry Piで Google DeepDreamを動かしてキモイ絵を量産する方法
DeepDreamを動かすには Caffeと言う Deep Learning Frameworkを使用します。
● Raspberry Piで Caffe Deep Learning Frameworkで DeepDreamをする方法
・2018/08/04
【ビルド版】Raspberry Piで DeepDreamを動かしてキモイ絵をモリモリ量産 Caffe Deep Learning Framework
ラズパイで Caffe Deep Learning Frameworkをビルドして Deep Dreamを動かしてキモイ絵を生成する
・2018/08/04
【インストール版】Raspberry Piで DeepDreamを動かしてキモイ絵をモリモリ量産 Caffe Deep Learning
ラズパイで Caffe Deep Learning Frameworkをインストールして Deep Dreamを動かしてキモイ絵を生成する
・2018/08/06
Orange Pi PC 2の 64bitのチカラで DeepDreamしてキモイ絵を高速でモリモリ量産してみるテスト
OrangePi PC2に Caffe Deep Learning Frameworkをビルドして Deep Dreamを動かしてキモイ絵を生成する
●今回動かした Raspberry Pi Raspbian OSのバージョン
RASPBIAN STRETCH WITH DESKTOP
Version:June 2018
Release date: 2018-06-27
Kernel version: 4.14
pi@raspberrypi:~/pytorch $ uname -a
Linux raspberrypi 4.14.50-v7+ #1122 SMP Tue Jun 19 12:26:26 BST 2018 armv7l GNU/Linux
● IPythonとは?
IPython - ウィキペディア
IPython(アイパイソン)はPythonを対話的に実行するためのシェルである。
オリジナルの Python に比較して、型推定を強化し、対話的実行のための文法を追加してあり、コード・ハイライティングおよびタブによる補完が行える。
IPython は SciPy パッケージの一部として公開されている。
IPython
IPython provides a rich architecture for interactive computing
なお、IPythonでググルと「IPython」の代わりに「Jupyter Notebook」と言う単語が引っ掛かりますが、IPythonも Jupyterも関連性が有ります。
The Jupyter Notebook - IPython
The IPython Notebook is now known as the Jupyter Notebook.
Project Jupyter - Home
Caffe - Deep Learning Framework
BVLC/caffe
Caffe: a fast open framework for deep learning. http://caffe.berkeleyvision.org/
BVLC = Berkeley Vision and Learning Center(カリフォルニア大学バークレー校)
GitHub - google/deepdream
Googleの deepdreamは IPythonと言う言語で動きます。
● Raspberry Piに IPython Notebook(現 Jupyter Notebook)を apt-getでインストールする。
# お決まりの sudo apt-get updateで最新状態に更新する
sudo apt-get update

# apt-cache search ipythonで ipythonの名前のパッケージを検索する
apt-cache search ipython
# ipython - Enhanced interactive Python 2 shell
# ipython3 - Enhanced interactive Python 3 shell

# apt-get installで IPythonをインストールする
sudo apt-get -y install ipython
# Setting up ipython (5.1.0-3) ...
# sudo apt-get -y install ipython3
# Setting up ipython3 (5.1.0-3) ...

# apt-cache search notebookで notebookの名前のパッケージを検索する
apt-cache search notebook
# jupyter-notebook - Jupyter interactive notebook
# python-notebook - Jupyter interactive notebook (Python 2)
# python3-notebook - Jupyter interactive notebook (Python 3)

# 必要に応じて apt-get installで Jupyter Notebookをインストールする
# Python Notebookは Jupyter Notebookに変わった
# 同じく apt-get installで指定するパッケージ名も python-notebookから jupyter-notebookに変わった
# sudo apt-get -y install python-notebook
# sudo apt-get -y install python3-notebook
sudo apt-get -y install jupyter-notebook
# Setting up python3-notebook (4.2.3-4) ...
# Setting up jupyter-notebook (4.2.3-4) ...
pi@raspberrypi:~ $ sudo apt-get -y install ipython
The following additional packages will be installed:
  python-backports-shutil-get-terminal-size python-ipython
  python-ipython-genutils python-pathlib2 python-pexpect python-pickleshare
  python-prompt-toolkit python-ptyprocess python-pygments python-simplegeneric
  python-traitlets python-wcwidth

pi@raspberrypi:~ $ ipython --version
5.8.0
● Python 3の IPython Notebookの場合
sudo apt-get -y install ipython3

sudo pip3 install ipython[all]

ipython3 notebook
● Raspberry Piで Google DeepDreamを動かしてキモイ絵を量産する方法
既に Caffe(ビルド版)と IPythonがインストールされている状態とします。
※ Caffeがインストール版の場合は下記を参照してください。
GitHub - google/deepdream
Googleの deepdreamは IPythonと言う言語で動きます。
● Caffe(ビルド版)と IPythonがインストールされている状態とします。
# Caffeにパスを通す
export PYTHONPATH=/home/pi/caffe/python:$PYTHONPATH
export LD_LIBRARY_PATH=/home/pi/caffe/distribute/lib:$LD_LIBRARY_PATH

# Google DeepDreamをダウンロードする
cd
git clone https://github.com/google/deepdream.git
cd deepdream

# Caffeのパスを確認する
ls -l ../caffe/
ls -l ../caffe/models/bvlc_googlenet/

# モデルデータをダウンロードする
wget http://dl.caffe.berkeleyvision.org/bvlc_googlenet.caffemodel -P ../caffe/models/bvlc_googlenet/

# dream.ipynbスクリプトを「信頼」する
ipython trust dream.ipynb

# IPythonを実行する
# ipython notebook

# IPythonの HTTPサーバを外部からもアクセスできる様に IP制限をしない
# IPythonを起動時にブラウザを起動しない(そもそもコマンドラインなのでブラウザを起動できない)
ipython notebook --ip=* --no-browser
deepdreamディレクトリで ipython notebookを実行します。
pi@raspberrypi:~/deepdream $ ipython notebook
[TerminalIPythonApp] WARNING | Subcommand `ipython notebook` is deprecated and will be removed in future versions.
[TerminalIPythonApp] WARNING | You likely want to use `jupyter notebook` in the future
[I 07:46:17.657 NotebookApp] Writing notebook server cookie secret to /run/user/1000/jupyter/notebook_cookie_secret
[I 07:46:17.885 NotebookApp] Serving notebooks from local directory: /home/pi/deepdream
[I 07:46:17.886 NotebookApp] The Jupyter Notebook is running at:
[I 07:46:17.887 NotebookApp] http://localhost:8888/?token=000000000000000000000000000000000000000000000000
[I 07:46:17.889 NotebookApp] Use Control-C to stop this server and shut down all kernels (twice to skip confirmation).
[W 07:46:17.892 NotebookApp] No web browser found: could not locate runnable browser.
[C 07:46:17.894 NotebookApp]

    Copy/paste this URL into your browser when you connect for the first time,
    to login with a token:
        http://localhost:8888/?token=000000000000000000000000000000000000000000000000
The Jupyter Notebook is running at:
http://localhost:8888/?token=000000000000000000000000000000000000000000000000
Shutdown this notebook server (y/[n])? y
[C 07:49:34.349 NotebookApp] Shutdown confirmed
[I 07:49:34.351 NotebookApp] Shutting down 0 kernels
上記の実行時に ipython notebookは廃止だから jupyter notebookを使えと有りますが、ipython notebookで実行すると command not found(そんなコマンド無ぇよ!)となります。
pi@raspberrypi:~/deepdream $ jupyter notebook
-bash: jupyter: command not found
ipython trustで dream.ipynbスクリプトに「信頼」のマークを付けます。
pi@raspberrypi:~/deepdream $ ipython trust dream.ipynb
[TerminalIPythonApp] WARNING | Subcommand `ipython trust` is deprecated and will be removed in future versions.
[TerminalIPythonApp] WARNING | You likely want to use `jupyter trust` in the future
[TrustNotebookApp] Writing notebook-signing key to /home/pi/.local/share/jupyter/notebook_secret
Signing notebook: dream.ipynb
pi@raspberrypi:~/deepdream $ jupyter
-bash: jupyter: command not found
IPython Notebookはデフォルトの状態だと自分の内部からのアクセスしか受け付けません。
IPythonで別のパソコンからの httpアクセスを許可する場合は設定ファイルを書き換えて、外部からの接続を許可する必要があります。
ipython notebook --generate-configで設定ファイルを作成する
pi@raspberrypi:~/deepdream $ ipython notebook --generate-config
[TerminalIPythonApp] WARNING | Subcommand `ipython notebook` is deprecated and will be removed in future versions.
[TerminalIPythonApp] WARNING | You likely want to use `jupyter notebook` in the future
Writing default config to: /home/pi/.jupyter/jupyter_notebook_config.py
Traceback (most recent call last):
  File "<string>", line 1, in <module>
  File "/home/pi/.local/lib/python2.7/site-packages/traitlets/config/application.py", line 658, in launch_instance
    app.start()
  File "/home/pi/.local/lib/python2.7/site-packages/IPython/terminal/ipapp.py", line 351, in start
    return self.subapp.start()
  File "/home/pi/.local/lib/python2.7/site-packages/notebook/notebookapp.py", line 1671, in start
    super(NotebookApp, self).start()
  File "/home/pi/.local/lib/python2.7/site-packages/jupyter_core/application.py", line 260, in start
    raise NoStart()
NoStart

If you suspect this is an IPython bug, please report it at:
    https://github.com/ipython/ipython/issues
or send an email to the mailing list at ipython-dev@python.org

You can print a more detailed traceback right now with "%tb", or use "%debug"
to interactively debug it.

Extra-detailed tracebacks for bug-reporting purposes can be enabled via:
    c.Application.verbose_crash=True
cat /home/pi/.jupyter/jupyter_notebook_config.py

pi@raspberrypi:~/deepdream $ cat /home/pi/.jupyter/jupyter_notebook_config.py | grep "\.ip"
#c.NotebookApp.ip = 'localhost'
#c.ConnectionFileMixin.ip = u''

 下記を書き換えると全ての IPからのアクセスを許可する。
#c.NotebookApp.ip = 'localhost'
c.NotebookApp.ip = '0.0.0.0'

pi@raspberrypi:~/pytorch $ cat /home/pi/.jupyter/jupyter_notebook_config.py | grep open_browser
#c.NotebookApp.open_browser = True

 下記を書き換えると起動時にブラウザを開かない(IPython実行時にブラウザが開くのがウザイ場合やコンソールのコマンドラインからの実行時に都合が良い)
#c.NotebookApp.open_browser = True
c.NotebookApp.open_browser = False

# コマンドラインでサクッっと IPythonの設定ファイルを変更
ipython notebook --generate-config

# コマンドラインでサクッっと IPythonの設定ファイルを変更
echo "c.NotebookApp.ip = '0.0.0.0'" >>~/.jupyter/jupyter_notebook_config.py
echo "c.NotebookApp.open_browser = False" >>~/.jupyter/jupyter_notebook_config.py
tail ~/.jupyter/jupyter_notebook_config.py
pi@raspberrypi:~/deepdream $ ls -l ~/.jupyter/
total 4
-rw-r--r-- 1 pi pi 26 Aug 10 07:46 migrated

pi@raspberrypi:~/deepdream $ cat ~/.jupyter/migrated
2018-08-10T07:46:17.610916

pi@raspberrypi:~/deepdream $ ls -l ~/.ipython/
total 12
drwxr-xr-x 2 pi pi 4096 Aug 10 06:32 extensions
drwxr-xr-x 2 pi pi 4096 Aug 10 06:32 nbextensions
drwxr-xr-x 7 pi pi 4096 Aug 10 07:50 profile_default
上記の設定ファイルを書き換え、IPythonの接続元の IP制限を無くした場合、接続先 HTTPの表記が変化します。
変更前:
http://localhost:8888/?token=000000000000000000000000000000000000000000000000
変更後:
http://(raspberrypi or 127.0.0.1):8888/?token=000000000000000000000000000000000000000000000000
pi@raspberrypi:~/deepdream $ ipython notebook
[TerminalIPythonApp] WARNING | Subcommand `ipython notebook` is deprecated and will be removed in future versions.
[TerminalIPythonApp] WARNING | You likely want to use `jupyter notebook` in the future
[I 08:09:09.472 NotebookApp] Serving notebooks from local directory: /home/pi/deepdream
[I 08:09:09.473 NotebookApp] The Jupyter Notebook is running at:
[I 08:09:09.473 NotebookApp] http://(raspberrypi or 127.0.0.1):8888/?token=000000000000000000000000000000000000000000000000
[I 08:09:09.473 NotebookApp] Use Control-C to stop this server and shut down all kernels (twice to skip confirmation).
[W 08:09:09.475 NotebookApp] No web browser found: could not locate runnable browser.
[C 08:09:09.476 NotebookApp]

    Copy/paste this URL into your browser when you connect for the first time,
    to login with a token:
        http://(raspberrypi or 127.0.0.1):8888/?token=000000000000000000000000000000000000000000000000
設定ファイルの作成や変更が面倒な場合は下記のコマンドラインで指定すれば同じ意味に成ります。
ipython notebook --ip=* --no-browser
パソコンのブラウザから
http://{ラズパイの IPアドレス}:8888/?token=000000000000000000000000000000000000000000000000
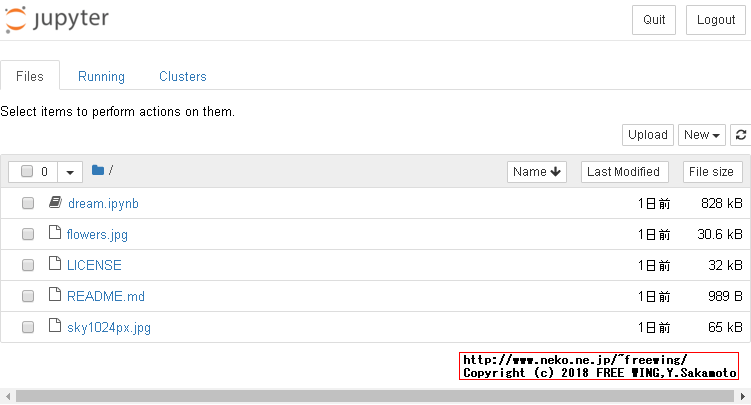
の URLにアクセスすると IPythonの画面が開きます。
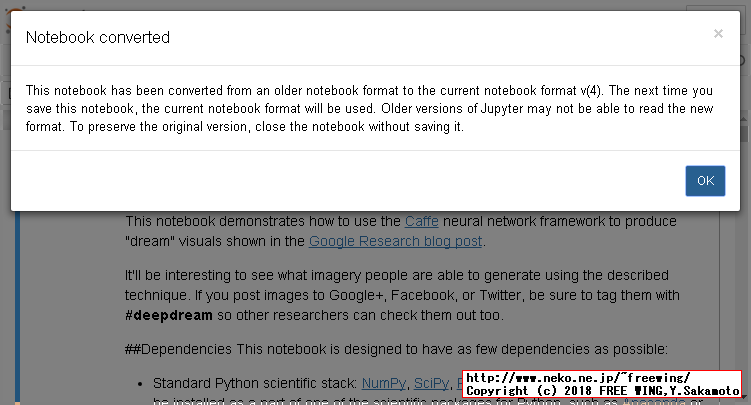
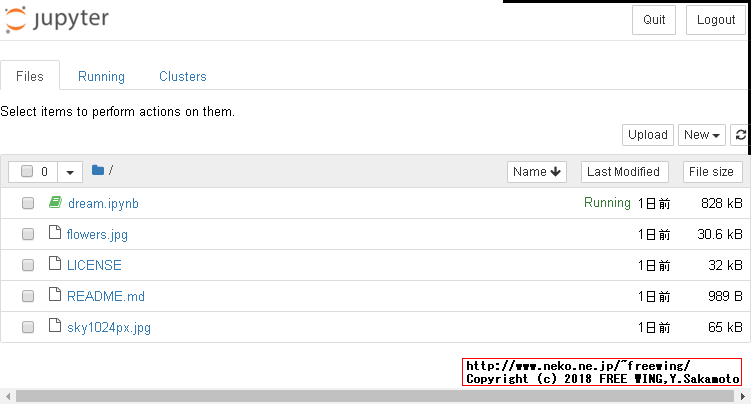
・Raspberry Piで IPython Notebookを動かして、外部のパソコンからアクセスした所
[W 08:11:09.037 NotebookApp] Notebook dream.ipynb is not trusted
[W 08:11:09.257 NotebookApp] 404 GET /nbextensions/widgets/notebook/js/extension.js?v=20180810080909 (192.168.1.203) 64.83ms referer=http://123.234.1.111:8888/notebooks/dream.ipynb
[I 08:11:13.394 NotebookApp] Kernel started: xxxxxxxx-xxxx-xxxx-xxxx-xxxxxxxxxxxx
[I 08:11:15.172 NotebookApp] Adapting to protocol v5.1 for kernel xxxxxxxx-xxxx-xxxx-xxxx-xxxxxxxxxxxx
▲ In[1]:
▲ In[2]:
▲ In[3]:
▲ In[4]:
▲ In[5]:
▲ In[n]:
 の再生マークを順番に押すと DeepDreamを実行します。

▲ In[*]:と括弧の中が*なのは実行中の意味です。
IPythonでスクリプトを動かす場合、再生ボタンを押すという操作がハッキリ言って面倒くさいです。
IPythonはプログラミングやアルゴリズムの勉強でステップ実行しながらその結果をインタラクティブに見ると言う目的には丁度良いでしょうが、「単に動かしたいだけ」の場合には面倒に感じます。
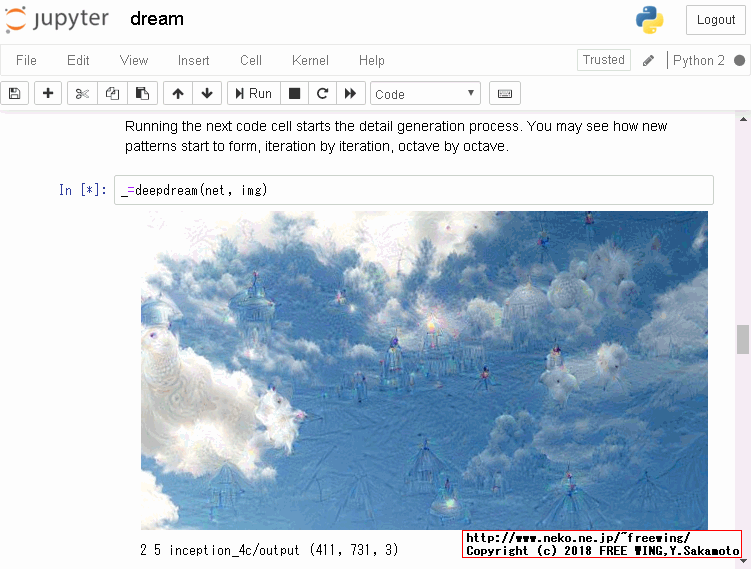
・Raspberry Piで IPython Notebookを動かして、Google DeepDreamを動かした所
・Raspberry Piで IPython Notebookを動かして、Google DeepDreamを動かした所
・Raspberry Piで IPython Notebookを動かして、Google DeepDreamを動かした所
・Raspberry Piで IPython Notebookを動かして、Google DeepDreamを動かした所
・Raspberry Piで IPython Notebookを動かして、Google DeepDreamを動かした所
● Raspberry Piで Google DeepDreamを動かしてキモイ絵を量産する方法
● Caffe(インストール版)と IPythonがインストールされている状態とします。
# お決まりの sudo apt-get updateで最新状態に更新する
sudo apt-get update

# apt-cache search caffeで caffeの名前のパッケージを検索する
apt-cache search caffe

# apt-get installで caffeの CPU版をインストールする
sudo apt-get -y install caffe-cpu

# Python 3の IPython Notebookの場合
sudo apt-get -y install ipython3

# Python 3の IPython Notebookの場合
sudo apt-get -y install python3-notebook

ipython3 --version
# 5.1.0

# Caffeにパスを通す exportの操作は不要

# Google DeepDreamをダウンロードする
cd
git clone https://github.com/google/deepdream.git
cd deepdream

# Caffeのパスを作成する(そこにモデルデータをダウンロードする為)
mkdir -p ../caffe/models/bvlc_googlenet/

# モデルデータをダウンロードする
wget http://dl.caffe.berkeleyvision.org/bvlc_googlenet.caffemodel -P ../caffe/models/bvlc_googlenet/

# deploy.prototxtをダウンロードする
wget https://raw.githubusercontent.com/BVLC/caffe/master/models/bvlc_googlenet/deploy.prototxt -P ../caffe/models/bvlc_googlenet/

ls -l ../caffe/models/bvlc_googlenet/
# -rw-r--r-- 1 pi pi 53533754 Dec 18  2014 bvlc_googlenet.caffemodel
# -rw-r--r-- 1 pi pi    35862 Aug 13 14:21 deploy.prototxt

# dream.ipynbスクリプトを Python3系で動く様に修正する(詳細は下記)
sed -i -e "s/from cStringIO import StringIO/import io/g" dream.ipynb
sed -i -e "s/f = StringIO()/f = io.BytesIO()/g" dream.ipynb
sed -i -e "s/print octave, i, end, vis.shape/print( octave, i, end, vis.shape)/g" dream.ipynb
sed -i -e "s/xrange(/range(/g" dream.ipynb

# dream.ipynbスクリプトを「信頼」する
ipython3 trust dream.ipynb
# Signing notebook: dream.ipynb

# IPythonを実行する
# ipython3 notebook

# IPythonの HTTPサーバを外部からもアクセスできる様に IP制限をしない
# IPythonを起動時にブラウザを起動しない(そもそもコマンドラインなのでブラウザを起動できない)
ipython3 notebook --ip=* --no-browser

悪夢の実行途中(10分程度)で死にます Kernel Restarting The kernel appears to have died .
●悪夢の実行途中で死なない様に sky1024px.jpgの画像を小さくリサイズします
# ImageMagick
sudo apt-get -y install imagemagick

# Resize 1024x575 => 320x180
convert -resize 320x -quality 100 -verbose sky1024px.jpg sky1024px.jpg
pi@raspberrypi:~/deepdream $ convert -resize 320x -quality 100 -verbose sky1024px.jpg sky1024px.jpg
sky1024px.jpg JPEG 1024x575 1024x575+0+0 8-bit sRGB 65KB 0.120u 0:00.119
sky1024px.jpg JPEG 1024x575=>320x180 320x180+0+0 8-bit sRGB 50.9KB 0.210u 0:00.069
● Google DeepDreamの dream.ipynbスクリプトは Python 3系では動かないので修正する
Google DeepDreamの dream.ipynbスクリプトは Python 2系用で、そのままでは Python 3系でエラーが出るので修正して動く様にします。
Python 3系は StringIOが ioに集約された
ImportError: No module named 'cStringIO'
# from cStringIO import StringIO
import io

print文はカッコで括ります。
SyntaxError: Missing parentheses in call to 'print'
print octave, i, end, vis.shape
print( octave, i, end, vis.shape)

StringIO()は io.BytesIO()に文字列置換します。
NameError: name 'StringIO' is not defined
#     f = StringIO()
    f = io.BytesIO()

xrangeは rangeに文字列置換します。(3箇所)
NameError: name 'xrange' is not defined
for i in xrange(octave_n-1):
for i in range(octave_n-1):
● Google DeepDreamの dream.ipynbスクリプトで修正する所
      "from cStringIO import StringIO\n",
      "    f = StringIO()\n",
      "            print octave, i, end, vis.shape\n",
      "for i in xrange(100):\n",
      "    for i in xrange(octave_n-1):\n",
      "        for i in xrange(iter_n):\n",
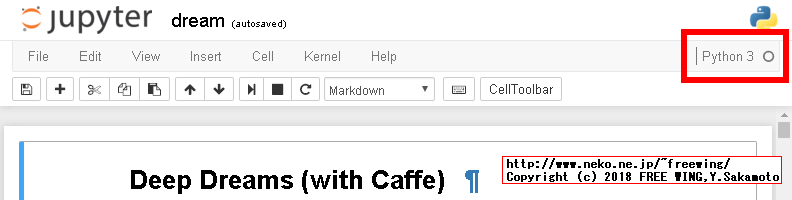
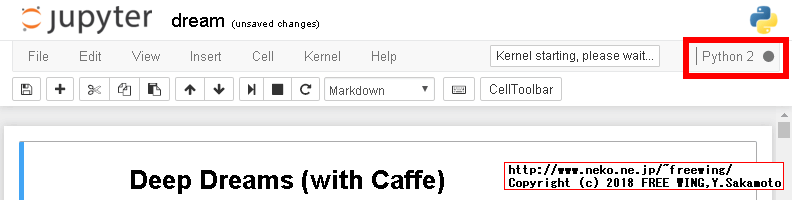
● IPython Notebookで動く Pythonのバージョン(カーネル)を変更する方法
ipynbスクリプトファイルを開いた画面の上部メニューで、
・Kernel
・Change kernel
・Python 2または Python 3を選ぶ
・IPython Notebookで動く Pythonのバージョン(カーネル)を変更する方法
・IPython Notebookで動く Pythonのバージョン(カーネル)を変更する方法
・IPython Notebookで動く Pythonのバージョン(カーネル)を変更する方法
現在実行中の Pythonのバージョンは画面の右上で確認できます。
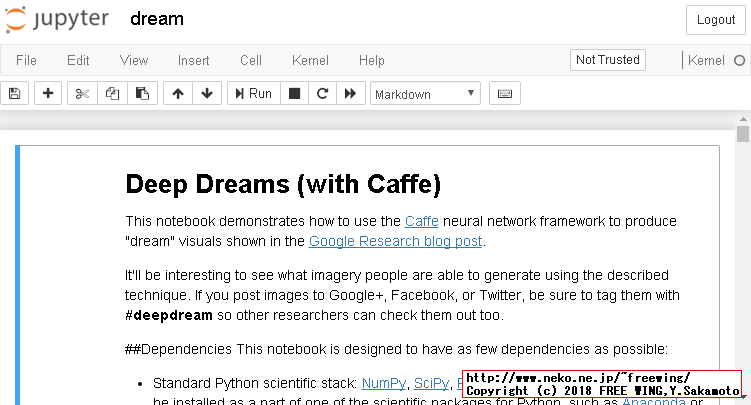
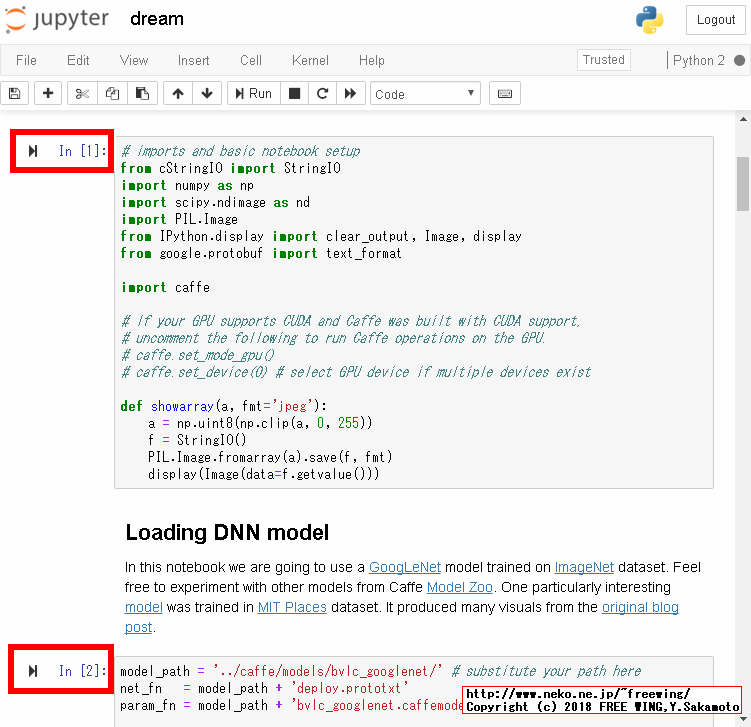
● dream.ipynbのスクリプト部分
# Deep Dreams (with Caffe)
# --- [1]
# imports and basic notebook setup
from cStringIO import StringIO
import numpy as np
import scipy.ndimage as nd
import PIL.Image
from IPython.display import clear_output, Image, display
from google.protobuf import text_format

import caffe

# If your GPU supports CUDA and Caffe was built with CUDA support,
# uncomment the following to run Caffe operations on the GPU.
# caffe.set_mode_gpu()
# caffe.set_device(0) # select GPU device if multiple devices exist

def showarray(a, fmt='jpeg'):
    a = np.uint8(np.clip(a, 0, 255))
    f = StringIO()
    PIL.Image.fromarray(a).save(f, fmt)
    display(Image(data=f.getvalue()))


# Loading DNN model
# --- [2]
model_path = '../caffe/models/bvlc_googlenet/' # substitute your path here
net_fn   = model_path + 'deploy.prototxt'
param_fn = model_path + 'bvlc_googlenet.caffemodel'

# Patching model to be able to compute gradients.
# Note that you can also manually add "force_backward: true" line to "deploy.prototxt".
model = caffe.io.caffe_pb2.NetParameter()
text_format.Merge(open(net_fn).read(), model)
model.force_backward = True
open('tmp.prototxt', 'w').write(str(model))

net = caffe.Classifier('tmp.prototxt', param_fn,
                       mean = np.float32([104.0, 116.0, 122.0]), # ImageNet mean, training set dependent
                       channel_swap = (2,1,0)) # the reference model has channels in BGR order instead of RGB

# a couple of utility functions for converting to and from Caffe's input image layout
def preprocess(net, img):
    return np.float32(np.rollaxis(img, 2)[::-1]) - net.transformer.mean['data']
def deprocess(net, img):
    return np.dstack((img + net.transformer.mean['data'])[::-1])


# Producing dreams
# --- [4]
def objective_L2(dst):
    dst.diff[:] = dst.data

def make_step(net, step_size=1.5, end='inception_4c/output',
              jitter=32, clip=True, objective=objective_L2):
    '''Basic gradient ascent step.'''

    src = net.blobs['data'] # input image is stored in Net's 'data' blob
    dst = net.blobs[end]

    ox, oy = np.random.randint(-jitter, jitter+1, 2)
    src.data[0] = np.roll(np.roll(src.data[0], ox, -1), oy, -2) # apply jitter shift

    net.forward(end=end)
    objective(dst)  # specify the optimization objective
    net.backward(start=end)
    g = src.diff[0]
    # apply normalized ascent step to the input image
    src.data[:] += step_size/np.abs(g).mean() * g

    src.data[0] = np.roll(np.roll(src.data[0], -ox, -1), -oy, -2) # unshift image

    if clip:
        bias = net.transformer.mean['data']
        src.data[:] = np.clip(src.data, -bias, 255-bias)


# --- [5]
def deepdream(net, base_img, iter_n=10, octave_n=4, octave_scale=1.4,
              end='inception_4c/output', clip=True, **step_params):
    # prepare base images for all octaves
    octaves = [preprocess(net, base_img)]
    for i in xrange(octave_n-1):
        octaves.append(nd.zoom(octaves[-1], (1, 1.0/octave_scale,1.0/octave_scale), order=1))

    src = net.blobs['data']
    detail = np.zeros_like(octaves[-1]) # allocate image for network-produced details
    for octave, octave_base in enumerate(octaves[::-1]):
        h, w = octave_base.shape[-2:]
        if octave > 0:
            # upscale details from the previous octave
            h1, w1 = detail.shape[-2:]
            detail = nd.zoom(detail, (1, 1.0*h/h1,1.0*w/w1), order=1)

        src.reshape(1,3,h,w) # resize the network's input image size
        src.data[0] = octave_base+detail
        for i in xrange(iter_n):
            make_step(net, end=end, clip=clip, **step_params)

            # visualization
            vis = deprocess(net, src.data[0])
            if not clip: # adjust image contrast if clipping is disabled
                vis = vis*(255.0/np.percentile(vis, 99.98))
            showarray(vis)
            print octave, i, end, vis.shape
            clear_output(wait=True)

        # extract details produced on the current octave
        detail = src.data[0]-octave_base
    # returning the resulting image
    return deprocess(net, src.data[0])


# --- [6]
img = np.float32(PIL.Image.open('sky1024px.jpg'))
showarray(img)


# --- [7]
_=deepdream(net, img)


# --- [8]
_=deepdream(net, img, end='inception_3b/5x5_reduce')


# --- [9]
net.blobs.keys()


# --- [10]
!mkdir frames
frame = img
frame_i = 0


# --- [11]
h, w = frame.shape[:2]
s = 0.05 # scale coefficient
for i in xrange(100):
    frame = deepdream(net, frame)
    PIL.Image.fromarray(np.uint8(frame)).save("frames/%04d.jpg"%frame_i)
    frame = nd.affine_transform(frame, [1-s,1-s,1], [h*s/2,w*s/2,0], order=1)
    frame_i += 1


# --- [12]
Image(filename='frames/0029.jpg')


# Controlling dreams
# --- [13]
guide = np.float32(PIL.Image.open('flowers.jpg'))
showarray(guide)


# --- [14]
end = 'inception_3b/output'
h, w = guide.shape[:2]
src, dst = net.blobs['data'], net.blobs[end]
src.reshape(1,3,h,w)
src.data[0] = preprocess(net, guide)
net.forward(end=end)
guide_features = dst.data[0].copy()

# --- [53]
def objective_guide(dst):
    x = dst.data[0].copy()
    y = guide_features
    ch = x.shape[0]
    x = x.reshape(ch,-1)
    y = y.reshape(ch,-1)
    A = x.T.dot(y) # compute the matrix of dot-products with guide features
    dst.diff[0].reshape(ch,-1)[:] = y[:,A.argmax(1)] # select ones that match best

_=deepdream(net, img, end=end, objective=objective_guide)
Tags: [Raspberry Pi], [電子工作], [ディープラーニング]
●関連するコンテンツ(この記事を読んだ人は、次の記事も読んでいます)
NVIDIA Jetson Nano 開発者キットを買ってみた。メモリ容量 4GB LPDDR4 RAM
Jetson Nanoで TensorFlow PyTorch Caffe/Caffe2 Keras MXNet等を GPUパワーで超高速で動かす!
Raspberry Piでメモリを馬鹿食いするアプリ用に不要なサービスを停止してフリーメモリを増やす方法
ラズパイでメモリを沢山使用するビルドやアプリ用に不要なサービス等を停止して使えるメインメモリを増やす
【成功版】最新版の Darknetに digitalbrain79版の Darknet with NNPACKの NNPACK処理を適用する
ラズパイで NNPACK対応の最新版の Darknetを動かして超高速で物体検出や DeepDreamの悪夢を見る
【成功版】Raspberry Piで NNPACK対応版の Darknet Neural Network Frameworkをビルドする方法
ラズパイに Darknet NNPACK darknet-nnpackをソースからビルドして物体検出を行なう方法
【成功版】Raspberry Piで Darknet Neural Network Frameworkをビルドする方法
ラズパイに Darknet Neural Network Frameworkを入れて物体検出や悪夢のグロ画像を生成する
【成功版】Raspberry Piに TensorFlow Deep Learning Frameworkをインストールする方法
ラズパイに TensorFlow Deep Learning Frameworkを入れて Google DeepDreamで悪夢を見る方法
Raspberry Piで TensorFlow Deep Learning Frameworkを自己ビルドする方法
ラズパイで TensorFlow Deep Learning Frameworkを自己ビルドする方法
Raspberry Piで Caffe Deep Learning Frameworkで物体認識を行なってみるテスト
ラズパイで Caffe Deep Learning Frameworkを動かして物体認識を行なってみる
【ビルド版】Raspberry Piで DeepDreamを動かしてキモイ絵をモリモリ量産 Caffe Deep Learning Framework
ラズパイで Caffe Deep Learning Frameworkをビルドして Deep Dreamを動かしてキモイ絵を生成する
【インストール版】Raspberry Piで DeepDreamを動かしてキモイ絵をモリモリ量産 Caffe Deep Learning
ラズパイで Caffe Deep Learning Frameworkをインストールして Deep Dreamを動かしてキモイ絵を生成する
Raspberry Piで Caffe2 Deep Learning Frameworkをソースコードからビルドする方法
ラズパイで Caffe 2 Deep Learning Frameworkをソースコードから自己ビルドする方法
Orange Pi PC 2の 64bitのチカラで DeepDreamしてキモイ絵を高速でモリモリ量産してみるテスト
OrangePi PC2に Caffe Deep Learning Frameworkをビルドして Deep Dreamを動かしてキモイ絵を生成する
Raspberry Piで Deep Learningフレームワーク Chainerをインストールしてみる
ラズパイに Deep Learningのフレームワーク Chainerを入れてみた
Raspberry Piで DeepBeliefSDKをビルドして画像認識フレームワークを動かす方法
ラズパイに DeepBeliefSDKを入れて画像の物体認識を行なう
Raspberry Piで Microsoftの ELLをビルドする方法
ラズパイで Microsoftの ELL Embedded Learning Libraryをビルドしてみるテスト、ビルドするだけ
Raspberry Piで MXNet port of SSD Single Shot MultiBoxを動かして画像の物体検出をする方法
ラズパイで MXNet port of SSD Single Shot MultiBox Object Detectorで物体検出を行なってみる
Raspberry Piで Apache MXNet Incubatingをビルドする方法
ラズパイで Apache MXNet Incubatingをビルドしてみるテスト、ビルドするだけ
Raspberry Piで OpenCVの Haar Cascade Object Detectionでリアルタイムにカメラ映像の顔検出を行なってみる
ラズパイで OpenCVの Haar Cascade Object Detection Face & Eyeでリアルタイムでカメラ映像の顔検出をする方法
Raspberry Piで NNPACKをビルドする方法
ラズパイで NNPACKをビルドしてみるテスト、ビルドするだけ
Raspberry Pi 3の Linuxコンソール上で使用する各種コマンドまとめ
ラズパイの Raspbian OSのコマンドラインで使用する便利コマンド、負荷試験や CPUシリアル番号の確認方法等も
[HOME]
|
[BACK]
リンクフリー(連絡不要、ただしトップページ以外は Web構成の変更で移動する場合があります)
Copyright (c)
2018 FREE WING,Y.Sakamoto
Powered by 猫屋敷工房 & HTML Generator
http://www.neko.ne.jp/~freewing/raspberry_pi/raspberry_pi_install_ipython_notebook_ipynb/