・2016/09/09
 Raspberry Pi3に WebRTCの STUN/TRUNサーバと PeerJSサーバをインストールする方法
(ラズパイ3に WebRTCに必要なサーバやアプリの一式をインストールする方法)
Tags: [Raspberry Pi], [電子工作]
● Raspberry Pi 3 Model Bを遂に購入
Raspberry Pi3 Model B RPI2 RPI3
大人気の CPUボードの Raspberry Piに WiFiと Bluetoothが搭載されたモデルが新発売となりました。
以前から Raspberry Pi 2を買おうかどうか迷っていましたが、Raspberry Pi 3 Model Bの発売を機に購入を決意してラズベリアンになる事にしました。
※ ラズパイの OS Raspbianはバージョンが上がる毎に過去の版と OSの内部の作りが変わり、過去に書かれた製作記事(例えば Raspbian Wheezyの時代の記事)がそのままではエラーが出たりして動かない事が有ります。
※ 当方のホームページのラズパイ記事は全て Raspberry Pi 3 Model Bと Raspbian Jessieの組み合わせで動作確認をしております。
(ただし、将来的に新しい Raspbian OSが出た場合に、当方の Raspbian Jessieを基にした内容がそのままでは動かない可能性が有ります。)
※ 2017/08/16から Raspbian OSは Raspbian Jessieから Raspbian Stretchに変わりました。
※ 2019/06/20から Raspbian OSは Raspbian Stretchから Raspbian Busterに変わりました。
Download Raspbian for Raspberry Pi
ちなみに、歴代のバージョンと名称は
| Debian | コードネーム | 年月 | 備考 | (参考)Ubuntuでの該当名称 |
| Debian 11 | Bullseye | 2021/08/14~ | 2021/11からラズパイにリリース | Focal Fossa 20.04 LTS ? |
| Debian 10 | Buster | 2019/06/20~ | 2019/06からラズパイ4対応 | Bionic 18.04 LTS |
| Debian 9 | Stretch | 2017/08/16~ | 2018/03からラズパイ3B+対応 | Xenial 16.04 LTS |
| Debian 8 | Jessie | 2015~ | 2016/02からラズパイ3対応 | Trusty 14.04 LTS |
| Debian 7 | Wheezy | 2013~2016 | | |
| Debian 6.0 | Squeeze | 2011~2014 | | |
| Debian GNU/Linux 5.0 | Lenny | 2009~2012 | | |
● Raspberry Pi3に WebRTCの STUN/TRUNサーバと PeerJSサーバをインストールする方法
なんだか WebRTCと言う物が有るらしいので試しに Raspberry Pi3をサーバにして自前環境で使える様にしてみました。Raspberry Pi3への WebRTCのインストール実験です。
● WebRTCとは?
WebRTC
WebRTC (Web Real-Time Communication)とは World Wide Web Consortium (W3C)が提唱するリアルタイムコミュニケーション用のAPIの定義で、プラグイン無しでウェブブラウザ間のボイスチャット、ビデオチャット、ファイル共有ができる。
WebRTC
● Raspberry Pi3に WebRTCに必要なサーバやアプリの一式をインストールする方法
WebRTCを実現するにはサーバーを用意する必要が有ります。
・Signalingサーバ(ブローカーサーバ)
・ICEサーバ(STUN+TRUNサーバ)
Raspberry Pi3に STUNサーバアプリ coturnと、PeerJSサーバ、PeerJS WebRTCブラウザアプリをインストールします。
GitHub coturn/coturn
Free open source implementation of TURN and STUN Server
rfc5766-turn-serverプロジェクトの進化版
STUN/TURNサーバとして coturnをビルドしてインストールします。
STUN/TURNサーバは総称して ICEと言うらしいです。
coturnをインストールするのが面倒な場合は Googleが提供している STUNサーバ stun:stun.l.google.com:19302を使う方法もある。
GitHub zziuni/stuns STUN server list
● Raspberry Pi3に WebRTCに必要な coturnをインストールする手順
最新のソース(現時点で turnserver-4.5.0.4)を取ってくる。
wget http://coturn.net/turnserver/v4.5.0.4/turnserver-4.5.0.4.tar.gz
tar xvfz turnserver-4.5.0.4.tar.gz
cd turnserver-4.5.0.4
./configure
$ ./configure
ginstall: not found
install is /usr/bin/install
pkill is /usr/bin/pkill
sqlite3: not found
sqlite: not found
Use TMP dir /var/tmp
Compiler: cc
Library option -lsocket cannot be used
Library option -lwldap32 cannot be used
Library option -lwldap64 cannot be used
Library option -lintl cannot be used
Sockets code is fine: no sin_len field present
Ignore IP_RECVERR
Library option -lcrypto cannot be used
ERROR: OpenSSL Crypto development libraries are not installed properly in required location.
Abort.
OpenSSLの開発ライブラリ、sqlite: not found等のエラーが出ているのでインストールします。
※ DBとして SQLiteを使用します。
OpenSSL Crypto development librariesのインストール
sudo apt-get -y install libssl-dev
Err http://mirrordirector.raspbian.org/raspbian/ jessie/main libssl-doc all 1.0.1k-3+deb8u5
404 Not Found [IP: 5.153.225.207 80]
E: Failed to fetch http://mirrordirector.raspbian.org/raspbian/pool/main/o/openssl/libssl-dev_1.0.1k-3+deb8u5_armhf.deb 404 Not Found [IP: 5.153.225.207 80]
404 Not Foundエラーが出るので、sudo apt-get updateする。
sudo apt-get update
ついでに SQLiteもインストールする。
sudo apt-get -y install libssl-dev sqlite3 libsqlite3-dev
再度、./configureする。
./configure
Libevent2 development is not installed properly
ERROR: Libevent2 development libraries are not installed properly in required location.
となるので Libevent2 developmentをインストールする。
sudo apt-get -y install libevent-dev
再度、./configureする。
./configure
$ ./configure
ginstall: not found
install is /usr/bin/install
pkill is /usr/bin/pkill
sqlite3 is /usr/bin/sqlite3
Use TMP dir /var/tmp
Compiler: cc
Library option -lsocket cannot be used
Library option -lwldap32 cannot be used
Library option -lwldap64 cannot be used
Library option -lintl cannot be used
Sockets code is fine: no sin_len field present
Ignore IP_RECVERR
Crypto SSL lib found.
SSL lib found.
Libevent2 development found.
Libevent2 runtime found.
Libevent2 runtime 'extra' found.
Libevent2 openssl found.
Libevent2 pthreads found.
SQLite library found.
SQLite development found.
POSTGRESQL DEVELOPMENT LIBRARY (libpq.a) AND/OR HEADER (libpq-fe.h)
ARE NOT INSTALLED PROPERLY ON THIS SYSTEM.
THAT'S OK BUT THE TURN SERVER IS BUILDING WITHOUT POSTGRESQL DATABASE SUPPORT.
MYSQL DEVELOPMENT LIBRARY (libmysqlclient) AND/OR HEADER (mysql.h)
ARE NOT INSTALLED PROPERLY ON THIS SYSTEM.
THAT'S OK BUT THE TURN SERVER IS BUILDING WITHOUT MYSQL DATABASE SUPPORT.
MONGODB DEVELOPMENT LIBRARIES (libmongoc-1.0 and libbson-1.0) AND/OR HEADER (mongoc.h)
ARE NOT INSTALLED PROPERLY ON THIS SYSTEM.
THAT'S OK BUT THE TURN SERVER IS BUILDING WITHOUT MONGODB SUPPORT.
HIREDIS DEVELOPMENT LIBRARY (libhiredis.*) AND/OR HEADERS (hiredis/*.h)
ARE NOT INSTALLED PROPERLY ON THIS SYSTEM.
THAT'S OK BUT THE TURN SERVER IS BUILDING WITHOUT REDIS SUPPORT.
PREFIX=/usr/local LOCALSTATEDIR=/usr/local/var OSLIBS= -L/usr/local/lib/ -L/usr/local/lib/ -lrt -lnsl -lresolv -pthread -lcrypto -lssl -levent_core -levent_extra -levent_openssl -levent_pthreads -lsqlite3 -Wl,-rpath,/usr/local/lib/ -Wl,-rpath,/usr/local/lib/ -Wl,-rpath,/usr/local/lib DBLIBS= -lsqlite3 OSCFLAGS=-g -Wall -Wno-deprecated-declarations -Wextra -Wformat-security -Wnested-externs -Wstrict-prototypes -Wmissing-prototypes -Wpointer-arith -Wcast-qual -I/usr/local/include -I/usr/local/include/ -I/usr/local/include -DTURN_HAS_DAEMON -DINSTALL_PREFIX=/usr/local -DTURNDB=/usr/local/var/db/turndb DBCFLAGS=
Makefile created: success.
./configureできたので、makeしてインストールする。
make
sudo make install
コマンドラインコピペ用
sudo apt-get update
sudo apt-get -y install libssl-dev sqlite3 libsqlite3-dev libevent-dev

wget http://coturn.net/turnserver/v4.5.0.4/turnserver-4.5.0.4.tar.gz
tar xvfz turnserver-4.5.0.4.tar.gz
cd turnserver-4.5.0.4
./configure

make
sudo make install
cat /usr/local/share/doc/turnserver/postinstall.txt
==================================================================
1) If you system supports automatic start-up system daemon services,
the, to enable the turnserver as an automatically started system
service, you have to:
a) Create and edit /etc/turnserver.conf or
/usr/local/etc/turnserver.conf .
Use /usr/local/etc/turnserver.conf.default as an example.
b) For user accounts settings: set up SQLite or PostgreSQL or
MySQL or MongoDB or Redis database for user accounts.
Use /usr/local/share/turnserver/schema.sql as SQL database schema,
or use /usr/local/share/turnserver/schema.userdb.redis as Redis
database schema description and/or
/usr/local/share/turnserver/schema.stats.redis
as Redis status & statistics database schema description.
If you are using SQLite, the default database location is in
/var/db/turndb or in /usr/local/var/db/turndb or in /var/lib/turn/turndb.
c) add whatever is necessary to enable start-up daemon for the
/usr/local/bin/turnserver.
2) If you do not want the turnserver to be a system service,
then you can start/stop it "manually", using the "turnserver"
executable with appropriate options (see the documentation).
3) To create database schema, use schema in file
/usr/local/share/turnserver/schema.sql.
4) For additional information, run:
$ man turnserver
$ man turnadmin
$ man turnutils
==================================================================
$ which turnserver
/usr/local/bin/turnserver
coturnの設定ファイルを作成
sudo cp /usr/local/etc/turnserver.conf.default /usr/local/etc/turnserver.conf
有効な設定内容を確認する
cat /usr/local/etc/turnserver.conf | grep -v "^$" | grep -v "^#"
sudo nano /usr/local/etc/turnserver.conf
下記を追加する。
listening-port=3478
listening-ip={ラズパイの IPアドレス}
verbose
no-tls
no-dtls
stun-only
syslog
※ syslogを有効にするとログが syslogに出力される。
コマンドラインコピペ用
sudo bash -c "echo \# STUN ONLY > /usr/local/etc/turnserver.conf"
sudo bash -c "echo listening-port=3478 >> /usr/local/etc/turnserver.conf"
sudo bash -c "echo listening-ip={ラズパイの IPアドレス} >> /usr/local/etc/turnserver.conf"
sudo bash -c "echo verbose >> /usr/local/etc/turnserver.conf"
sudo bash -c "echo no-tls >> /usr/local/etc/turnserver.conf"
sudo bash -c "echo no-dtls >> /usr/local/etc/turnserver.conf"
sudo bash -c "echo stun-only >> /usr/local/etc/turnserver.conf"
sudo bash -c "echo syslog >> /usr/local/etc/turnserver.conf"
● coturnを実行してみる
とりあえず coturnを実行してみるテスト。
$ sudo turnserver -v
0: log file opened: /var/log/turn_19828_2016-09-10.log
0:
RFC 3489/5389/5766/5780/6062/6156 STUN/TURN Server
Version Coturn-4.5.0.4 'dan Eider'
0:
Max number of open files/sockets allowed for this process: 65536
0:
Due to the open files/sockets limitation,
max supported number of TURN Sessions possible is: 32500 (approximately)
0:
==== Show him the instruments, Practical Frost: ====
0: TLS supported
0: DTLS supported
0: DTLS 1.2 is not supported
0: TURN/STUN ALPN is not supported
0: Third-party authorization (oAuth) supported
0: GCM (AEAD) supported
0: OpenSSL compile-time version: OpenSSL 1.0.1t 3 May 2016
0:
0: SQLite supported, default database location is /usr/local/var/db/turndb
0: Redis is not supported
0: PostgreSQL is not supported
0: MySQL is not supported
0: MongoDB is not supported
0:
0: Default Net Engine version: 3 (UDP thread per CPU core)
=====================================================
0: Config file found: /usr/local/etc/turnserver.conf
0: Listener address to use: {ラズパイの IPアドレス}
0: Config file found: /usr/local/etc/turnserver.conf
0: Domain name:
0: Default realm:
0: Relay address to use: {ラズパイの IPアドレス}
0: pid file created: /var/run/turnserver.pid
0: IO method (main listener thread): epoll (with changelist)
0: WARNING: I cannot support STUN CHANGE_REQUEST functionality because only one IP address is provided
0: Wait for relay ports initialization...
0: relay {ラズパイの IPアドレス} initialization...
0: relay {ラズパイの IPアドレス} initialization done
0: Relay ports initialization done
0: IO method (general relay thread): epoll (with changelist)
0: turn server id=0 created
0: IO method (general relay thread): epoll (with changelist)
0: turn server id=1 created
0: IO method (general relay thread): epoll (with changelist)
0: turn server id=2 created
0: IO method (general relay thread): epoll (with changelist)
0: turn server id=3 created
0: IPv4. UDP listener opened on: {ラズパイの IPアドレス}:3478
0: Total General servers: 4
0: IO method (auth thread): epoll (with changelist)
0: IO method (auth thread): epoll (with changelist)
0: SQLite DB connection success: /usr/local/var/db/turndb
0: IO method (admin thread): epoll (with changelist)
0: IPv4. CLI listener opened on : 127.0.0.1:5766
0: IPv4. SCTP listener opened on : {ラズパイの IPアドレス}:3478
0: IPv4. TCP listener opened on : {ラズパイの IPアドレス}:3478
0: IPv4. TCP listener opened on : {ラズパイの IPアドレス}:3478
0: IPv4. TCP listener opened on : {ラズパイの IPアドレス}:3478
0: IPv4. TCP listener opened on : {ラズパイの IPアドレス}:3478
^C
CTRL+Cで中断する。
● SkyWayアプリ
この状態で SkyWayアプリを Androidで動かしてみる。
SkyWayのサイトで開発者登録をして APIキーを発行して SDKとサンプルアプリをダウンロードする。
SkyWay
SkyWay GETTING STARTED
GitHub nttcom/SkyWay-Android-SDK
GitHub nttcom/SkyWay-Android-Sample
turnサーバの利用について
※ SkyWayサービスは SkyWayのシグナリングサーバと合わせてご利用頂く必要があります。お客様が構築したpeerjs-serverと、SkyWayのTURNサーバを組み合わせてご利用いただくことはできません。
1) SkyWayのサイトで開発者登録
2) SkyWayのサイトで APIキーを発行
3) SkyWayの SDKをダウンロード
4) SkyWayの Android用サンプルアプリをダウンロード
5) サンプルアプリの APIキー部分を編集する。
※ Domain部分は適当な文字列で良い(例の場合は Androidとしている)
6) STUNサーバとしてラズパイの coturnの STUNサーバを使う様にサンプルアプリに設定を追加する。
        // Please check this page. >> https://skyway.io/ds/
        PeerOption options = new PeerOption();

        //Enter your API Key.
        options.key = "xxxxxxxx-YOUR-API-KEY-xxxxxxxxxxxx";
        //Enter your registered Domain.
        options.domain = "Android";

        // SKWPeer has many options. Please check the document. >> http://nttcom.github.io/skyway/docs/
        IceConfig configStun = new IceConfig();
        configStun.url = "stun:{ラズパイの IPアドレス}:3478";

        // PeerOption public ArrayList<IceConfig> config;
        options.config = new ArrayList<IceConfig>();
        options.config.add(configStun);

        _peer = new Peer(context, options);
        setPeerCallback(_peer);
これで SkyWayのサンプルアプリの APKを作成して Android上で動かすと、coturnの画面出力で下記の様に出てくる。
8: handle_udp_packet: New UDP endpoint: local addr {ラズパイの IPアドレス}:3478, remote addr 192.168.1.123:51586
8: session 002000000000000001: realm <> user <>: incoming packet BINDING processed, success
8: handle_udp_packet: New UDP endpoint: local addr {ラズパイの IPアドレス}:3478, remote addr 192.168.1.123:44013
8: session 002000000000000002: realm <> user <>: incoming packet BINDING processed, success
8: handle_udp_packet: New UDP endpoint: local addr {ラズパイの IPアドレス}:3478, remote addr 192.168.1.123:52716
coturnのユーザー管理は下記のコマンドでできるが、TURNサーバとして使用しないので設定しなくても大丈夫。
sudo turnadmin -a -u <ユーザ名> -r <realm> -p <パスワード>
sudo turnadmin -l
● PeerServerのインストール
GitHub peers/peerjs-server
PeerServer: A server for PeerJS
PEERJS The PeerJS library
sudo apt-get -y install nodejs npm
sudo npm -g install peer
$ which nodejs
/usr/bin/nodejs
$ which node
/usr/bin/node
$ which peerjs
/usr/local/bin/peerjs
$ which peer
無し
コマンドラインコピペ用
sudo apt-get -y install nodejs npm
sudo npm -g install peer
which nodejs
which node
which peerjs
●
試しに peerjsを起動してみる。
peerjs --port 9000 --key webrtc_key --path /webrtc_path --debug
Started PeerServer on 0.0.0.0, port: 9000, path: /webrtc_path (v. 0.2.8)
^C
CTRL+Cで中断する。
特にエラー表示が出なければ大丈夫で peerjsサーバは動いています。
Webアプリケーションを用意する。
peerjsのサンプルアプリ(HTML+JavaScript)を動かすので Webサーバをインストールします。
Webサーバは軽量、高速と言われている nginxにします。
sudo apt-get -y install nginx
peerjsの Webアプリを gitから cloneする
GitHub peers/peerjs
PeerJS: Simple peer-to-peer with WebRTC
sudo apt-get -y install git
git clone https://github.com/peers/peerjs.git
ls -l ./peerjs
-rw-r--r-- 1 pi pi 5735 Sep 10 11:15 changelog.md
drwxr-xr-x 2 pi pi 4096 Sep 10 11:15 dist
drwxr-xr-x 2 pi pi 4096 Sep 10 11:15 docs
drwxr-xr-x 3 pi pi 4096 Sep 10 11:15 examples
-rw-r--r-- 1 pi pi 1122 Sep 10 11:15 Gruntfile.js
drwxr-xr-x 2 pi pi 4096 Sep 10 11:15 lib
-rw-r--r-- 1 pi pi 1108 Sep 10 11:15 LICENSE
-rw-r--r-- 1 pi pi 59 Sep 10 11:15 Makefile
-rw-r--r-- 1 pi pi 698 Sep 10 11:15 package.json
-rw-r--r-- 1 pi pi 2350 Sep 10 11:15 README.md
drwxr-xr-x 2 pi pi 4096 Sep 10 11:15 test
ls -l /var/www/html/
-rw-r--r-- 1 root root 867 Sep 10 11:14 index.nginx-debian.html
/var/www/html/に peerjsの Webアプリをコピーする。
sudo cp -R ./peerjs/examples/videochat/ /var/www/html/
sudo cp -R ./peerjs/dist/ /var/www/html/
ls -l /var/www/html/
drwxr-xr-x 2 root root 4096 Sep 10 11:18 dist
-rw-r--r-- 1 root root 867 Sep 10 11:14 index.nginx-debian.html
drwxr-xr-x 2 root root 4096 Sep 10 11:18 videochat
sudo nano /var/www/html/videochat/index.html
// PeerJS object
var peer = new Peer({ key: 'lwjd5qra8257b9', debug: 3});
を
下記に書き換える。
var peer = new Peer({ host: '{ラズパイの IPアドレス}', port: 9000,
key: 'webrtc_key', path: '/webrtc_path', debug: 3,
config: {'iceServers': [
{ url: 'stun:{ラズパイの IPアドレス}:3478' },
]}
});
※ stun:stun.l.google.com:19302を使う場合は
var peer = new Peer({ host: '{ラズパイの IPアドレス}', port: 9000,
key: 'webrtc_key', path: '/webrtc_path', debug: 3,
config: {'iceServers': [
{ url: 'stun:stun.l.google.com:19302' },
]}
});
sudo service nginx restart
コマンドラインコピペ用
sudo apt-get -y install nginx git

git clone https://github.com/peers/peerjs.git

sudo cp -R ./peerjs/examples/videochat/ /var/www/html/
sudo cp -R ./peerjs/dist/ /var/www/html/
ls -l /var/www/html/

sudo nano /var/www/html/videochat/index.html
●
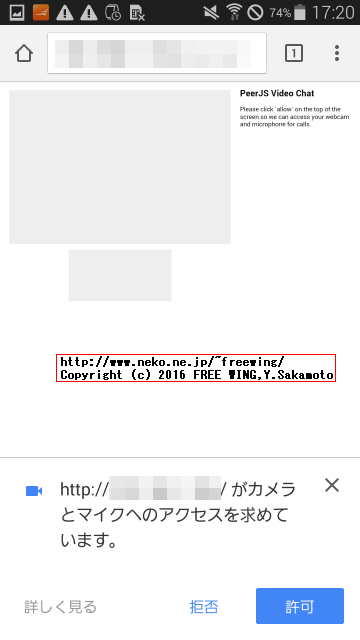
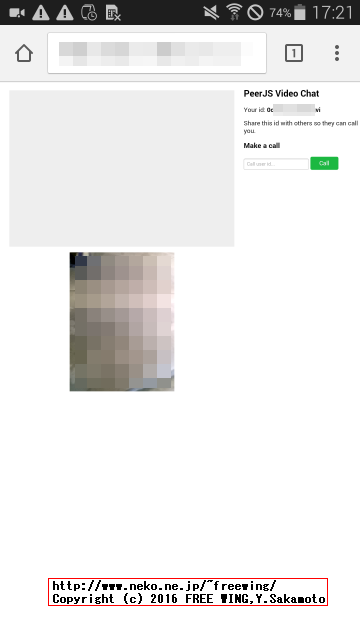
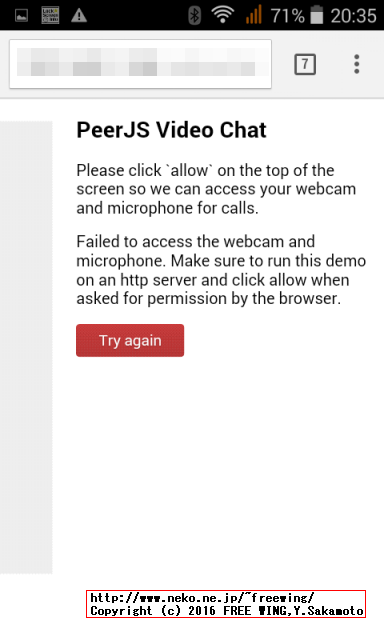
http://{ラズパイの IPアドレス}/videochat/
にブラウザでアクセスする。
Androidスマホの場合は標準ブラウザではなく Chromeブラウザの方が動く確立が高い。
au SCL23 Chromeブラウザ OK
au SOL21 Chromeブラウザ OK
au SOL24 Chromeブラウザ OK
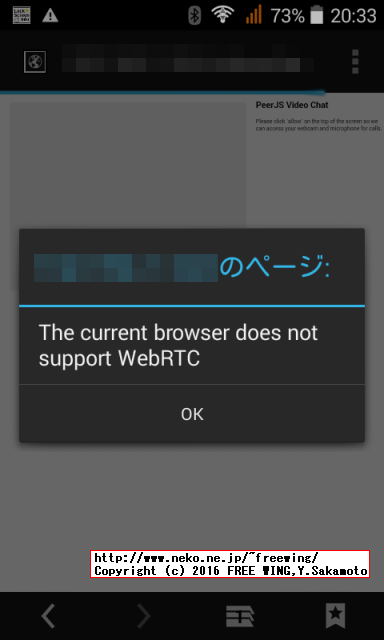
ASUS Z200 Chromeブラウザ NG
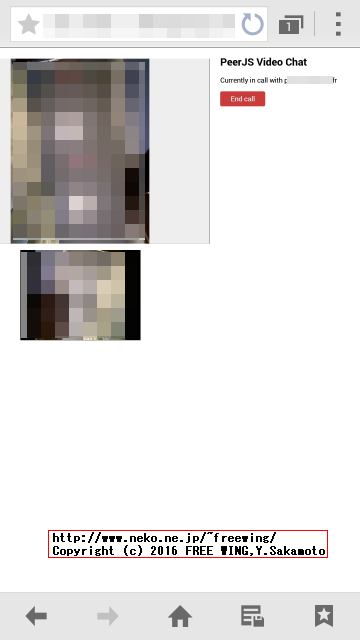
やったー、ラズパイで WebRTCサーバ(STUN + PeerJS)が動いたー!
・au SCL23 Chromeブラウザ OK WebRTC + coturn + PeerJS

peerjsサーバへのアクセスがあると下記の様に表示が出ます。
$ peerjs --port 9000 --key webrtc_key --path /webrtc_path --debug
Started PeerServer on 0.0.0.0, port: 9000, path: /webrtc_path (v. 0.2.8)
OFFER from plxa6yrKg2Vw0zfr to jmozm352FvAz6r00
CANDIDATE from plxa6yrKg2Vw0zfr to jmozm352FvAz6r00
CANDIDATE from plxa6yrKg2Vw0zfr to jmozm352FvAz6r00
CANDIDATE from plxa6yrKg2Vw0zfr to jmozm352FvAz6r00
CANDIDATE from plxa6yrKg2Vw0zfr to jmozm352FvAz6r00
CANDIDATE from plxa6yrKg2Vw0zfr to jmozm352FvAz6r00
CANDIDATE from plxa6yrKg2Vw0zfr to jmozm352FvAz6r00
CANDIDATE from plxa6yrKg2Vw0zfr to jmozm352FvAz6r00
CANDIDATE from plxa6yrKg2Vw0zfr to jmozm352FvAz6r00
ANSWER from jmozm352FvAz6r00 to plxa6yrKg2Vw0zfr
CANDIDATE from jmozm352FvAz6r00 to plxa6yrKg2Vw0zfr
CANDIDATE from jmozm352FvAz6r00 to plxa6yrKg2Vw0zfr
CANDIDATE from jmozm352FvAz6r00 to plxa6yrKg2Vw0zfr
CANDIDATE from jmozm352FvAz6r00 to plxa6yrKg2Vw0zfr
Socket closed: sjcxZoT8gtfyldi0
Socket closed: plxa6yrKg2Vw0zfr
Socket closed: jmozm352FvAz6r00
Socket closed: uy3BvczGp9e2vs4i
^C
ラズパイを WebRTCサーバとして運用する場合は別途 coturnと peerjsの自動起動の設定が必要です。
とりあえず、ラズパイ起動後にコマンドラインで末尾に &付きで実行する方法。
末尾に &を付けるとコマンドをバックグラウンドで実行します。
また、>/dev/null 2>&1のリダイレクト指定で標準出力とエラー出力を捨てています。
sudo turnserver -v >/dev/null 2>&1 &
peerjs --port 9000 --key webrtc_key --path /webrtc_path --debug >/dev/null 2>&1 &
Raspberry Pi3を無線アクセスポイントにする その3の方法と同じ /etc/rc.localに直接起動コマンドを記述しちゃう方法。
・2016/09/02
Raspberry Pi 3に内蔵の WiFiを使った無線LANアクセスポイント化 WiFiルータ化 hostapd + isc-dhcp-server編
ラズパイを無線LANアクセスポイントにする方法(詐欺サイト+アダルトサイトブロック機能付き)
cat /etc/rc.local
#!/bin/sh -e
#
# rc.local
#
# This script is executed at the end of each multiuser runlevel.
# Make sure that the script will "exit 0" on success or any other
# value on error.
#
# In order to enable or disable this script just change the execution
# bits.
#
# By default this script does nothing.

# Print the IP address
_IP=$(hostname -I) || true
if [ "$_IP" ]; then
  printf "My IP address is %s\n" "$_IP"
fi

exit 0
exit 0の行の上に起動コマンドを割り込ませる。
sudo nano /etc/rc.local
~ 略 ~
fi

sudo turnserver -v >/dev/null 2>&1 &
peerjs --port 9000 --key webrtc_key --path /webrtc_path --debug >/dev/null 2>&1 &

exit 0
コマンドラインのコピペで簡単に追記部分を変更したい人向け。
sudo sed -i -e "s/^exit 0/\nsudo turnserver -v >\/dev\/null 2>\&1 \&\npeerjs --port 9000 --key webrtc_key --path \/webrtc_path --debug >\/dev\/null 2>\&1 \&\n\nexit 0/" /etc/rc.local
cat /etc/rc.local
● au SCL23 Chromeブラウザ OK WebRTC + coturn + PeerJS
・au SCL23 Chromeブラウザ OK WebRTC + coturn + PeerJS
● ASUS Z200 標準ブラウザ NG WebRTC + coturn + PeerJS
・ASUS Z200 標準ブラウザ NG WebRTC + coturn + PeerJS
● ASUS Z200 Chromeブラウザ NG WebRTC + coturn + PeerJS
・ASUS Z200 Chromeブラウザ NG WebRTC + coturn + PeerJS
● io.skyway.Peer
package="io.skyway.Peer"
android:versionCode="6"
android:versionName="1.0.6"

package io.skyway.Peer;
public class PeerOption
{
  public Peer.PeerTypeEnum type;
  public String key;
  public String host;
  public int port;
  public String path;
  public Boolean secure;
  public ArrayList<IceConfig> config;
  public Peer.DebugLevelEnum debug;
  public String domain;
  public boolean turn;
  public boolean vp8hwcodec;
  public boolean opensles;

package io.skyway.Peer;
public class IceConfig
{
  public String url;
  public String username;
  public String credential;
● Chrome
chrome://webrtc-internals/
chrome://flags/
WebRTC でのハードウェアによる動画デコード Chrome OS, Android
WebRTC において、プラットフォーム ハードウェアを使った動画ストリームのデコードをサポートします。 #disable-webrtc-hw-decoding
WebRTC でのハードウェアによる動画エンコード Chrome OS, Android
WebRTC において、プラットフォーム ハードウェアを使った動画ストリームのエンコードをサポートします。 #disable-webrtc-hw-encoding
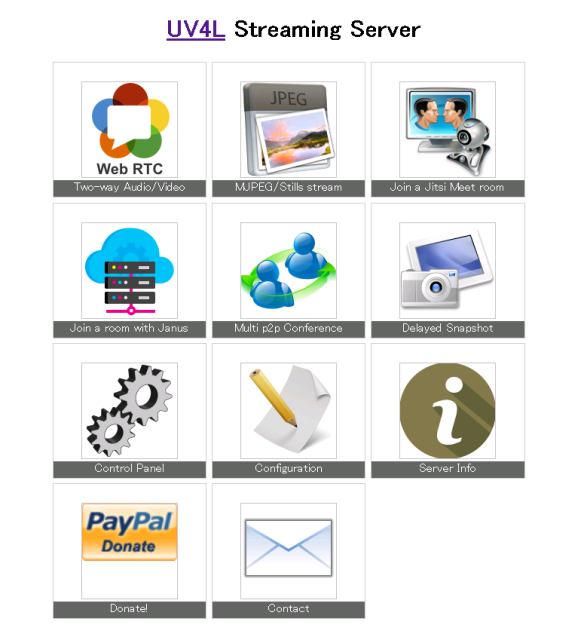
● How to install UV4L on Raspbian Jessie for Raspberry Pi
WebRTCでググルと UV4Lと言うのも出てくるのでラズパイ3で試してみます。
Video4Linux2-compliant
UV4L User space Video4Linux collection Installation
curl http://www.linux-projects.org/listing/uv4l_repo/lrkey.asc | sudo apt-key add -
# sudo nano /etc/apt/sources.list
# deb http://www.linux-projects.org/listing/uv4l_repo/raspbian/ jessie main
sudo bash -c "echo deb http://www.linux-projects.org/listing/uv4l_repo/raspbian/ jessie main >> /etc/apt/sources.list"
sudo apt-get update
sudo apt-get -y install uv4l uv4l-raspicam
sudo apt-get -y install uv4l-raspicam-extras
# enable camera
sudo raspi-config
# updating the firmware
sudo rpi-update
uv4l --help --driver raspicam --driver-help
sleep 5
uv4l --driver raspicam --auto-video_nr --width 640 --height 480 --encoding jpeg
sleep 5
dd if=/dev/video0 of=snapshot.jpeg bs=11M count=1
sleep 5
sudo pkill uv4l
sudo apt-get -y install uv4l-server uv4l-uvc uv4l-xscreen uv4l-mjpegstream uv4l-dummy
sudo apt-get -y install uv4l-webrtc
sudo service uv4l_raspicam restart
sudo apt-get -y install uv4l-xmpp-bridge
sudo reboot
http://{ラズパイの IPアドレス}:8080/
・UV4L Streaming Server WebRTC Raspberry Pi
----
● UV4L Raspberry Piで USB接続の WebCamを使用する方法
UV4L Raspberry Piで USBウェブカメラを使用する方法
# Bus 001 Device 005: ID 046d:0825 Logitech, Inc. Webcam C270が WebCamera
$ lsusb
Bus 001 Device 005: ID 046d:0825 Logitech, Inc. Webcam C270
Bus 001 Device 004: ID 1a40:0101 Terminus Technology Inc. 4-Port HUB
Bus 001 Device 003: ID 0424:ec00 Standard Microsystems Corp. SMSC9512/9514 Fast Ethernet Adapter
Bus 001 Device 002: ID 0424:9514 Standard Microsystems Corp.
Bus 001 Device 001: ID 1d6b:0002 Linux Foundation 2.0 root hub
046d:0825をメモしておく。
$ sudo nano /etc/uv4l/uv4l-uvc.conf
ファイルを編集して下記行を追加する。
# device-id = <vid>:<pid>
# alternative to 'device-path', vendor and product identifiers of the USB device
device-id = 046d:0825
$ cat /etc/uv4l/uv4l-uvc.conf | grep -v "^#" | grep -v "^$"
driver = uvc
auto-video_nr = yes
frame-buffers = 4
device-id = 046d:0825
server-option = --port=8090
マイク入力を有効にする。
マイクデバイスを確認する。
$ arecord -l
**** List of CAPTURE Hardware Devices ****
card 1: U0x46d0x825 [USB Device 0x46d:0x825], device 0: USB Audio [USB Audio]
Subdevices: 1/1
Subdevice #0: subdevice #0
$ amixer sget Mic -c 1
Simple mixer control 'Mic',0
Capabilities: cvolume cvolume-joined cswitch cswitch-joined
Capture channels: Mono
Limits: Capture 0 - 16
Mono: Capture 12 [75%] [24.00dB] [on]
$ amixer sset Mic 16 -c 1
Simple mixer control 'Mic',0
Capabilities: cvolume cvolume-joined cswitch cswitch-joined
Capture channels: Mono
Limits: Capture 0 - 16
Mono: Capture 16 [100%] [30.00dB] [on]
$ sudo nano /etc/asound.conf
ファイルを新規作成して下記を記述して再起動する。
pcm.!default {
type asym
playback.pcm "plug:hw:0"
capture.pcm "plug:dsnoop:1"
}
$ sudo reboot
マイクデバイスを確認する。
$ arecord -l
**** List of CAPTURE Hardware Devices ****
card 1: U0x46d0x825 [USB Device 0x46d:0x825], device 0: USB Audio [USB Audio]
Subdevices: 1/1
Subdevice #0: subdevice #0
マイクデバイスを確認時に下記のエラー表示になる場合は /etc/asound.confファイルを疑う。
$ arecord -l
**** List of CAPTURE Hardware Devices ****
ALSA lib conf.c:1697:(snd_config_load1) _toplevel_:2:14:Unexpected char
ALSA lib conf.c:3417:(config_file_open) /etc/asound.conf may be old or corrupted: consider to remove or fix it
ALSA lib conf.c:3339:(snd_config_hooks_call) function snd_config_hook_load returned error: Invalid argument
ALSA lib conf.c:3788:(snd_config_update_r) hooks failed, removing configuration
arecord: device_list:277: control open (0): Invalid argument
ALSA lib conf.c:1697:(snd_config_load1) _toplevel_:2:14:Unexpected char
ALSA lib conf.c:3417:(config_file_open) /etc/asound.conf may be old or corrupted: consider to remove or fix it
ALSA lib conf.c:3339:(snd_config_hooks_call) function snd_config_hook_load returned error: Invalid argument
ALSA lib conf.c:3788:(snd_config_update_r) hooks failed, removing configuration
arecord: device_list:277: control open (1): Invalid argument
USBカメラを使用した場合は UV4Lのポートが 8090に変更になる。
http://{ラズパイの IPアドレス}:8090/
cat /proc/asound/cards
aplay -l
俺専用ラズパイ3初期設定
# ラズパイの時刻設定を JST(日本標準時間)にする
sudo mv /etc/localtime /etc/localtime.org
sudo ln -sf /usr/share/zoneinfo/Asia/Tokyo /etc/localtime

# ラズパイの IPv6を無効化
sudo bash -c "echo \# Disable IPV6 >> /etc/sysctl.conf"
sudo bash -c "echo net.ipv6.conf.all.disable_ipv6 = 1 >> /etc/sysctl.conf"

# ===
# 初期設定 UARTボーレート安定化、GPIO-I2C有効化、ACT-LEDをハートビート動作
echo export HISTCONTROL=ignoreboth >> ~/.bashrc
sudo bash -c "echo core_freq=250 >> /boot/config.txt"
sudo bash -c "echo dtparam=act_led_trigger=heartbeat >> /boot/config.txt"
sudo bash -c "echo dtoverlay=i2c-gpio >> /boot/config.txt"
cat /boot/config.txt

# ===
# swapの廃止(apt-get removeしないと再起動時に swapが復活する)
sudo dphys-swapfile swapoff
sudo apt-get -y remove dphys-swap
free

# ===
# RAMディスクの作成 32MB
sudo bash -c "echo \# Make RAM Disk and Store tmp files. >> /etc/fstab"
sudo bash -c "echo tmpfs /tmp tmpfs defaults,size=32m,noatime,mode=1777 0 0 >> /etc/fstab"
sudo bash -c "echo tmpfs /var/tmp tmpfs defaults,size=32m,noatime,mode=1777 0 0 >> /etc/fstab"

# ===
# シャットダウンとリブートをキー入力短縮用に簡易コマンド化
cd
bash -c "echo sudo shutdown -h now > sd"
chmod +x sd
sudo mv sd /usr/local/bin/
bash -c "echo sudo reboot > rb"
chmod +x rb
sudo mv rb /usr/local/bin/

# ===
# ラズパイを最新の状態にする
bash -c "echo \#\!/bin/sh > update.sh"
bash -c "echo df -h >> update.sh"
bash -c "echo sudo apt-get update >> update.sh"
bash -c "echo sudo apt-get -y upgrade >> update.sh"
bash -c "echo sudo apt-get -y dist-upgrade >> update.sh"
bash -c "echo echo \$\'\\\a\' >> update.sh"
bash -c "echo df -h >> update.sh"
chmod +x update.sh
./update.sh
sudo reboot
# Filesystem      Size  Used Avail Use% Mounted on
# /dev/root       3.6G  2.3G  1.2G  67% /
● How to install UV4L on Raspbian Jessie for Raspberry Pi
WebRTCでググルと Janus WebRTC Gatewayと言うのも出てくるのでラズパイ3で試してみます。
Janus WebRTC Gateway
Janus is a WebRTC Gateway developed by Meetecho conceived to be a general purpose one.
Building a Raspberry Pi 2 WebRTC camera
USBカメラを接続して lsubで接続を確認する。
$ lsusb
Bus 001 Device 005: ID 0733:0401 ViewQuest Technologies, Inc. CS330 Webcam
Bus 001 Device 006: ID 046d:0825 Logitech, Inc. Webcam C270
Bus 001 Device 004: ID 1a40:0101 Terminus Technology Inc. 4-Port HUB
Bus 001 Device 003: ID 0424:ec00 Standard Microsystems Corp. SMSC9512/9514 Fast Ethernet Adapter
Bus 001 Device 002: ID 0424:9514 Standard Microsystems Corp.
Bus 001 Device 001: ID 1d6b:0002 Linux Foundation 2.0 root hub
0733:0401は Intelの大昔の CS330 Webカメラ(CCD 30万画素、黒画面映像で使えない)
046d:0825は Logicoolの Webカメラ(使える)
# --- update
sudo aptitude update
# --- install module
sudo aptitude -y install libmicrohttpd-dev libjansson-dev libnice-dev libssl-dev libsrtp-dev libsofia-sip-ua-dev libglib2.0-dev libopus-dev libogg-dev libini-config-dev libcollection-dev pkg-config gengetopt libtool automake dh-autoreconf
# --- git janus-gateway
git clone https://github.com/meetecho/janus-gateway.git
cd janus-gateway
sh autogen.sh
./configure --disable-websockets --disable-data-channels --disable-rabbitmq --disable-docs --prefix=/opt/janus
make
sudo make install
sudo make configs
# --- 必要に応じて janus.plugin.streaming.cfgの設定ファイルを作成する
sudo nano janus.plugin.streaming.cfg
# --- install gstreamer 1.0
# apt-cache search gstreamer1.0
# gstreamer1.0-plugins-bad
sudo aptitude -y install gstreamer1.0
sudo aptitude -y install gstreamer1.0-omx gstreamer1.0-tools gstreamer1.0-plugins-good
sudo apt-get -y install gstreamer1.0-pulseaudio
which gst-launch-1.0
# /usr/bin/gst-launch-1.0
# --- install nginx
sudo aptitude -y install nginx
# sudo cp -r /opt/janus/share/janus/demos/ /usr/share/nginx/www/
sudo cp -r /opt/janus/share/janus/demos/ /var/www/html/
ls -l /var/www/html/
# */
sudo service nginx start
# --- テストパターン
# --- janus-gateway TEST PATTERN
cd ~/janus-gateway
cd ./plugins/streams/; ./test_gstreamer_1.sh
# 別のターミナルを開いて実行する
# This starts the Janus WebRTC gateway.
/opt/janus/bin/janus -F /opt/janus/etc/janus/
# パソコンのブラウザから下記の URLにアクセスする
http:///demos/
# [Demos] -> [Streaming]
# -> [Start] -> [Watch or Listen]
# -> [Opus/VP8 live stream coming from gstreamer (live)]を選択する
# 10~20秒程度でテスト画像と音が出る。
# --- テストパターンを [Ctrl+C]で停止して下記を実行する
# USB Camera
gst-launch-1.0 -v v4l2src device=/dev/video0 ! videoscale ! \
video/x-raw,width=640,height=480,framerate=10/1 ! \
videoscale ! videorate ! videoconvert ! timeoverlay ! \
vp8enc error-resilient=true ! \
rtpvp8pay ! udpsink host=127.0.0.1 port=5004
# 10~20秒程度でテスト画像が出る。音の出し方は不明。
# タイムラグがひどくて使い物にならない。設定が悪い?
# Raspberry camera
# Enable Camera / Reboot
sudo raspi-config
# Raspberry camera
raspivid --verbose --nopreview -hf -vf --width 640 --height 480 \
--framerate 15 --bitrate 1000000 --profile baseline --timeout 0 -o - | \
gst-launch-1.0 -v fdsrc ! h264parse ! \
rtph264pay config-interval=1 pt=96 ! \
udpsink host=127.0.0.1 port=8004
# 映像が出ない?
Tags: [Raspberry Pi], [電子工作]
●関連するコンテンツ(この記事を読んだ人は、次の記事も読んでいます)
FWinSdCardImager SDカード イメージ書き込みアプリ、ラズパイの Raspbian OS、Jetson Nanoの Ubuntuの書き込みに便利
ラズパイや Jetson Nano等のワンボードマイコン等への OSイメージの書き込みが簡単にできる
FWinPiFinder ラズベリーパイ IPアドレス発見アプリ。ARPコマンドでラズパイの IPアドレスを探索発見する
Raspberry Piや NVIDIA Jetson Nano等の IPアドレスを MACアドレスの OUI部分を使用して発見する
Raspberry Pi 3系のトラブルであるある第一位の電源トラブル、低電圧警報に関する情報のまとめ
ラズパイ3B系での低電圧警報に関する情報まとめ、コマンドラインやログファイルから低電圧を検知する方法
Raspberry Piで CPUの脆弱性 Spectreと Meltdownの脆弱性をチェックする方法
ラズパイで 2018年初頭に大騒ぎになったスペクターとメルトダウンの CPUの脆弱性をチェックする方法
Raspberry Pi Zero Wを海外通販の Pimoroni等での購入方法、購入できる通販ショップ一覧まとめ
ラズパイゼロW ワイヤレスモデルを海外通販でサクッと簡単に個人輸入で入手。技適通過でも国内販売は常に品切れ
Raspberry Pi 3で安定して使える相性の無い最適な microSDカードの種類のまとめ
ラズパイ3で安定して使える microSDカードを購入する Teamと SanDiskは絶対に買わない
Raspberry Pi 3 Model Bに専用カメラモジュール RaspiCamを接続する方法
ラズパイに専用カメラモジュールを接続して Raspbianで写真の静止画撮影や動画を録画する方法
Raspberry Pi 3の Linuxコンソール上で使用する各種コマンドまとめ
ラズパイの Raspbian OSのコマンドラインで使用する便利コマンド、負荷試験や CPUシリアル番号の確認方法等も
Raspberry Pi 3公式フォーラムの FAQの内容の日本語訳
ラズパイ公式フォーラムの「The Raspberry Pi 3 Model B Q&A thread」の日本語訳
Raspberry Pi 3で GPIO端子の I2C機能を有効化する方法
ラズパイ3の GPIO端子の I2C機能を有効にして各種センサーを繋げる方法まとめ
大人気の CPUボード、Raspberry Pi 3 Model Bで作ってみよう
Raspberry Piの開発環境の構築やタッチパネル付き液晶ディスプレイや各種センサーの使い方まとめ
Raspberry Pi関連はこちらへまとめました
下記以外にも多数のラズパイ関係の記事が有ります。
(I2C制御、GPIO制御、1-Wire制御、シリアル通信、日本語音声合成、日本語音声認識、中国語音声合成、MeCab 形態素解析エンジン、赤外線リモコン制御、秋月 I2C液晶モジュール、KeDei 3.5インチ液晶、HDMI 5インチ液晶、NFCカードリーダ、コマンドライン操作方法等)
Espressif ESP8266 Arduino互換でスケッチが使える ESP-12Eモジュール基板
Espressif ESP8266 ESP-12-E NodeMCU V1 ESP12 CP2102
BangGood通販はドローン以外にも面白い商品がまだまだ有った(電子工作編)
レーザー彫刻機、カラー液晶の DIYオシロ、Arduinoや Raspberry Pi用の小型カラー液晶
[HOME]
|
[BACK]
リンクフリー(連絡不要、ただしトップページ以外は Web構成の変更で移動する場合があります)
Copyright (c)
2016 FREE WING,Y.Sakamoto
Powered by 猫屋敷工房 & HTML Generator
http://www.neko.ne.jp/~freewing/raspberry_pi/raspberry_pi_3_webrtc_coturn_peerjs/