・2017/05/01
 Raspberry Pi 3で Bitcoinのフルノード bitcoindを立てる
(ラズパイでの採掘は非現実的なので bitcoin coreで bitcoindのフルノードを立てます)
Tags: [Raspberry Pi], [電子工作]
● Raspberry Pi 3 Model Bを遂に購入
Raspberry Pi3 Model B RPI2 RPI3
大人気の CPUボードの Raspberry Piに WiFiと Bluetoothが搭載されたモデルが新発売となりました。
以前から Raspberry Pi 2を買おうかどうか迷っていましたが、Raspberry Pi 3 Model Bの発売を機に購入を決意してラズベリアンになる事にしました。
※ ラズパイの OS Raspbianはバージョンが上がる毎に過去の版と OSの内部の作りが変わり、過去に書かれた製作記事(例えば Raspbian Wheezyの時代の記事)がそのままではエラーが出たりして動かない事が有ります。
※ 当方のホームページのラズパイ記事は全て Raspberry Pi 3 Model Bと Raspbian Jessieの組み合わせで動作確認をしております。
(ただし、将来的に新しい Raspbian OSが出た場合に、当方の Raspbian Jessieを基にした内容がそのままでは動かない可能性が有ります。)
※ 2017/08/16から Raspbian OSは Raspbian Jessieから Raspbian Stretchに変わりました。
※ 2019/06/20から Raspbian OSは Raspbian Stretchから Raspbian Busterに変わりました。
Download Raspbian for Raspberry Pi
ちなみに、歴代のバージョンと名称は
| Debian | コードネーム | 年月 | 備考 | (参考)Ubuntuでの該当名称 |
| Debian 11 | Bullseye | 2021/08/14~ | 2021/11からラズパイにリリース | Focal Fossa 20.04 LTS ? |
| Debian 10 | Buster | 2019/06/20~ | 2019/06からラズパイ4対応 | Bionic 18.04 LTS |
| Debian 9 | Stretch | 2017/08/16~ | 2018/03からラズパイ3B+対応 | Xenial 16.04 LTS |
| Debian 8 | Jessie | 2015~ | 2016/02からラズパイ3対応 | Trusty 14.04 LTS |
| Debian 7 | Wheezy | 2013~2016 | | |
| Debian 6.0 | Squeeze | 2011~2014 | | |
| Debian GNU/Linux 5.0 | Lenny | 2009~2012 | | |
● Raspberry Pi 3で Bitcoinのフルノードを立てる
Download Bitcoin Core
bitcoin/bitcoin - Bitcoin Core integration/staging tree
フルノードの最低条件
・Desktop or laptop hardware running recent versions of Windows, Mac OS X, or Linux.
・125 gigabytes of free disk space
・2 gigabytes of memory (RAM)
・A broadband Internet connection with upload speeds of at least 400 kilobits (50 kilobytes) per second
・An unmetered connection, a connection with high upload limits, or a connection you regularly monitor to ensure it doesn’t exceed its upload limits. It’s common for full nodes on high-speed connections to use 200 gigabytes upload or more a month. Download usage is around 20 gigabytes a month, plus around an additional 100 gigabytes the first time you start your node.
・6 hours a day that your full node can be left running. (You can do other things with your computer while running a full node.) More hours would be better, and best of all would be if you can run your node continuously.
https://github.com/bitcoin/bitcoin/blob/master/doc/build-unix.md
の手順を見ながらラズパイ3で Bitcoin Coreをコンパイルして bitcoind bitcoin daemonを動かします。
● ラジパイ3の最適化、使用メモリを減らす
フルノードの最低条件はメモリ 2GBとなっています。ラズパイのメモリは 1GBなので足りません。
そこで、GPUに割り振られているメモリを減らします。
64MB -> 16MBで増加量はたったの 48MBですが、悪あがきと気休めで増やします。
/boot/config.txt
の
gpu_mem=xx
と言う指定が有ったら
gpu_mem=16
に書き換える。
無い場合は
gpu_mem=16
を追加する。
sudo nano /boot/config.txt
gpu_mem=16
cat /boot/config.txt | grep gpu_mem
上記の設定をコマンドラインのコピペでサクッと設定する方法。
# config.txtファイルをローカルにコピーする
cp /boot/config.txt .

# sedコマンドで gpu_mem設定行を削除する
sed -i -e "/^gpu_mem=[0-9].*/d" config.txt

# gpu_mem設定行を追加する
echo "" >> config.txt
echo "# gpu_mem 16MB" >> config.txt
echo "gpu_mem=16" >> config.txt

# config.txtファイルを /boot/にコピーする
sudo cp config.txt /boot/

# grepで設定値と設定内容を確認する。
cat /boot/config.txt | grep gpu_mem
● Raspberry Pi 3で Bitcoinのフルノードを立てる
apt-getで bitcoindパッケージをインストールする方法。
※ コマンドラインツールの bitcoin-cliがインストールされません。
sudo apt-get install bitcoind
● Raspberry Pi 3で Bitcoinのフルノードを立てる(共通手順)
Bitcoin Core v0.14.1 2017/04/20
# Bitcoin Coreのコンパイルに必要な依存関係の有るアプリやライブラリをインストールします。
sudo apt-get -y install libtool autoconf
sudo apt-get -y install libboost-system-dev libboost-filesystem-dev libboost-chrono-dev libboost-program-options-dev libboost-test-dev libboost-thread-dev
sudo apt-get -y install libssl-dev libevent-dev

# Bitcoin Coreのソースリストを GitHubからダウンロードします。
cd
git clone https://github.com/bitcoin/bitcoin.git
● Raspberry Pi 3で Bitcoinのフルノードを立てる(ウォレット機能無し、GUI画面無し)
ウォレット機能無し、GUI画面無し
# Bitcoin Coreのソースリストのディレクトリに移動します。
cd
cd bitcoin
./autogen.sh

# --disable-wallet ウォレット機能無し
# --without-gui GUI画面無し
./configure --disable-wallet --without-gui

# Bitcoin Coreのセルフチェック
make check

# Bitcoin Coreのコンパイル
make

# Bitcoin Coreのインストール
sudo make install
pi@raspberrypi:~/bitcoin $ ./configure --disable-wallet --without-gui

Options used to compile and link:
  with wallet   = no
  with gui / qt = no
  with zmq      = no
  with test     = yes
  with bench    = yes
  with upnp     = auto
  debug enabled = no
  werror        = no

  target os     = linux
  build os      =

  CC            = gcc
  CFLAGS        = -g -O2
  CPPFLAGS      =  -DHAVE_BUILD_INFO -D__STDC_FORMAT_MACROS -D_FILE_OFFSET_BITS=64
  CXX           = g++ -std=c++11
  CXXFLAGS      = -g -O2 -Wall -Wextra -Wformat -Wvla -Wformat-security -Wno-unused-parameter
  LDFLAGS       =

pi@raspberrypi:~/bitcoin $ make check

Making check in src
make[1]: Entering directory '/home/pi/bitcoin/src'
make[2]: Entering directory '/home/pi/bitcoin/src'
make[3]: Entering directory '/home/pi/bitcoin'
make[3]: Leaving directory '/home/pi/bitcoin'
make  check-TESTS check-local
make[3]: Entering directory '/home/pi/bitcoin/src'
make[4]: Entering directory '/home/pi/bitcoin/src'
make[5]: Entering directory '/home/pi/bitcoin'
make[5]: Leaving directory '/home/pi/bitcoin'
PASS: test/test_bitcoin
make[5]: Entering directory '/home/pi/bitcoin/src'
make[6]: Entering directory '/home/pi/bitcoin/src'
make[7]: Entering directory '/home/pi/bitcoin'
make[7]: Leaving directory '/home/pi/bitcoin'
make[6]: Leaving directory '/home/pi/bitcoin/src'
make[5]: Leaving directory '/home/pi/bitcoin/src'
============================================================================
Testsuite summary for Bitcoin Core 0.14.99
============================================================================
# TOTAL: 1
# PASS:  1
# SKIP:  0
# XFAIL: 0
# FAIL:  0
# XPASS: 0
# ERROR: 0
============================================================================
make[4]: Leaving directory '/home/pi/bitcoin/src'
Running test/util/bitcoin-util-test.py...
/usr/bin/python3.4 ../test/util/bitcoin-util-test.py
make[4]: Entering directory '/home/pi/bitcoin/src/secp256k1'
  CC       src/tests-tests.o
  CCLD     tests
  CC       src/exhaustive_tests-tests_exhaustive.o
  CCLD     exhaustive_tests
make  check-TESTS
make[5]: Entering directory '/home/pi/bitcoin/src/secp256k1'
make[6]: Entering directory '/home/pi/bitcoin/src/secp256k1'
PASS: tests
PASS: exhaustive_tests
make[7]: Entering directory '/home/pi/bitcoin/src/secp256k1'
make[7]: Leaving directory '/home/pi/bitcoin/src/secp256k1'
============================================================================
Testsuite summary for libsecp256k1 0.1
============================================================================
# TOTAL: 2
# PASS:  2
# SKIP:  0
# XFAIL: 0
# FAIL:  0
# XPASS: 0
# ERROR: 0
============================================================================
make[6]: Leaving directory '/home/pi/bitcoin/src/secp256k1'
make[5]: Leaving directory '/home/pi/bitcoin/src/secp256k1'
make[4]: Leaving directory '/home/pi/bitcoin/src/secp256k1'
make[4]: Entering directory '/home/pi/bitcoin/src/univalue'
  CXX      test/test_unitester-unitester.o
  CXXLD    test/unitester
make  check-TESTS
make[5]: Entering directory '/home/pi/bitcoin/src/univalue'
make[6]: Entering directory '/home/pi/bitcoin/src/univalue'
PASS: test/unitester
make[7]: Entering directory '/home/pi/bitcoin/src/univalue'
make  all-am
make[8]: Entering directory '/home/pi/bitcoin/src/univalue'
make[8]: Leaving directory '/home/pi/bitcoin/src/univalue'
make[7]: Leaving directory '/home/pi/bitcoin/src/univalue'
============================================================================
Testsuite summary for univalue 1.0.2
============================================================================
# TOTAL: 1
# PASS:  1
# SKIP:  0
# XFAIL: 0
# FAIL:  0
# XPASS: 0
# ERROR: 0
============================================================================
make[6]: Leaving directory '/home/pi/bitcoin/src/univalue'
make[5]: Leaving directory '/home/pi/bitcoin/src/univalue'
make[4]: Leaving directory '/home/pi/bitcoin/src/univalue'
make[3]: Leaving directory '/home/pi/bitcoin/src'
make[2]: Leaving directory '/home/pi/bitcoin/src'
make[1]: Leaving directory '/home/pi/bitcoin/src'
Making check in doc/man
make[1]: Entering directory '/home/pi/bitcoin/doc/man'
make[1]: Nothing to be done for 'check'.
make[1]: Leaving directory '/home/pi/bitcoin/doc/man'
make[1]: Entering directory '/home/pi/bitcoin'
make[1]: Nothing to be done for 'check-am'.
make[1]: Leaving directory '/home/pi/bitcoin'
● Raspberry Pi 3で Bitcoinのフルノードを立てる(ウォレット機能有り BerkeleyDB 5.3)
ウォレット機能を有効にするには BerkeleyDBの DBアプリが必要です。
BerkeleyDB 5.3は互換性が有りませんが、--with-incompatible-bdbオプションで対応できます。
BerkeleyDB 5.3
# 上記の共通手順で Bitcoin Coreのコンパイルに必要な依存関係の有るアプリやライブラリをインストールします。
# Bitcoin Coreのソースリストを GitHubからダウンロードします。

# BerkeleyDB 5.3
sudo apt-get -y install libdb-dev libdb++-dev

cd
cd bitcoin
./autogen.sh

./configure --without-gui --with-incompatible-bdb

make check

make

sudo make install
pi@raspberrypi:~/bitcoin $ ./configure --without-gui --with-incompatible-bdb

# configure: WARNING: Found Berkeley DB other than 4.8; wallets opened by this build will not be portable!

Options used to compile and link:
  with wallet   = yes
  with gui / qt = no
  with zmq      = no
  with test     = yes
  with bench    = yes
  with upnp     = auto
  debug enabled = no
  werror        = no

  target os     = linux
  build os      =

  CC            = gcc
  CFLAGS        = -g -O2
  CPPFLAGS      =  -DHAVE_BUILD_INFO -D__STDC_FORMAT_MACROS -D_FILE_OFFSET_BITS=64
  CXX           = g++ -std=c++11
  CXXFLAGS      = -g -O2 -Wall -Wextra -Wformat -Wvla -Wformat-security -Wno-unused-parameter
  LDFLAGS       =
● Raspberry Pi 3で Bitcoinのフルノードを立てる(ウォレット機能有り BerkeleyDB 4.8)
ウォレット機能を有効にするには BerkeleyDBの DBアプリが必要です。
Bitcoin Coreは BerkeleyDB 4.8の使用を推奨しています。
Berkeley DB 4.8
# 上記の共通手順で Bitcoin Coreのコンパイルに必要な依存関係の有るアプリやライブラリをインストールします。
# Bitcoin Coreのソースリストを GitHubからダウンロードします。

cd
cd bitcoin

# Berkeley DB 4.8
# It is recommended to use Berkeley DB 4.8. If you have to build it yourself:
BITCOIN_ROOT=$(pwd)

# Pick some path to install BDB to, here we create a directory within the bitcoin directory
BDB_PREFIX="${BITCOIN_ROOT}/db4"
mkdir -p $BDB_PREFIX

# Fetch the source and verify that it is not tampered with
wget 'http://download.oracle.com/berkeley-db/db-4.8.30.NC.tar.gz'
echo '12edc0df75bf9abd7f82f821795bcee50f42cb2e5f76a6a281b85732798364ef  db-4.8.30.NC.tar.gz' | sha256sum -c
# -> db-4.8.30.NC.tar.gz: OK
tar -xzvf db-4.8.30.NC.tar.gz

# Build the library and install to our prefix
cd db-4.8.30.NC/build_unix/
#  Note: Do a static build so that it can be embedded into the executable, instead of having to find a .so at runtime
../dist/configure --enable-cxx --disable-shared --with-pic --prefix=$BDB_PREFIX
make install

# Configure Bitcoin Core to use our own-built instance of BDB
cd $BITCOIN_ROOT
./autogen.sh
./configure LDFLAGS="-L${BDB_PREFIX}/lib/" CPPFLAGS="-I${BDB_PREFIX}/include/" --without-gui
# (other args...)

# checking for Berkeley DB C++ headers... default
# checking for main in -ldb_cxx-4.8... yes

make check

make

sudo make install
pi@raspberrypi:~/bitcoin $ ./configure LDFLAGS="-L${BDB_PREFIX}/lib/" CPPFLAGS="-I${BDB_PREFIX}/include/" --without-gui

# checking for Berkeley DB C++ headers... default
# checking for main in -ldb_cxx-4.8... yes

Options used to compile and link:
  with wallet   = yes
  with gui / qt = no
  with zmq      = no
  with test     = yes
  with bench    = yes
  with upnp     = auto
  debug enabled = no
  werror        = no

  target os     = linux
  build os      =

  CC            = gcc
  CFLAGS        = -g -O2
  CPPFLAGS      = -I/home/pi/bitcoin/db4/include/ -DHAVE_BUILD_INFO -D__STDC_FORMAT_MACROS -D_FILE_OFFSET_BITS=64
  CXX           = g++ -std=c++11
  CXXFLAGS      = -g -O2 -Wall -Wextra -Wformat -Wvla -Wformat-security -Wno-unused-parameter
  LDFLAGS       = -L/home/pi/bitcoin/db4/lib/
● Raspberry Pi 3で Bitcoinのフルノードを立てる(ウォレット機能有り BerkeleyDB 4.8)
GUI画面を有効にするには Qtライブラリが必要です。
Bitcoin Coreは Qt 5の使用を推奨しています。
Qt 5
# 上記の共通手順で Bitcoin Coreのコンパイルに必要な依存関係の有るアプリやライブラリをインストールします。
# Bitcoin Coreのソースリストを GitHubからダウンロードします。

# Qt 5
sudo apt-get -y install libqt5gui5 libqt5core5a libqt5dbus5 qttools5-dev qttools5-dev-tools libprotobuf-dev protobuf-compiler
sudo apt-get -y install libqrencode-dev

cd
cd bitcoin
./autogen.sh

./configure --disable-wallet

make check

make

sudo make install
pi@raspberrypi:~/bitcoin $ ./configure --disable-wallet

Options used to compile and link:
  with wallet   = no
  with gui / qt = yes
    qt version  = 5
    with qr     = yes
  with zmq      = no
  with test     = yes
  with bench    = yes
  with upnp     = auto
  debug enabled = no
  werror        = no

  target os     = linux
  build os      =

  CC            = gcc
  CFLAGS        = -g -O2
  CPPFLAGS      =  -DHAVE_BUILD_INFO -D__STDC_FORMAT_MACROS -D_FILE_OFFSET_BITS=64
  CXX           = g++ -std=c++11
  CXXFLAGS      = -g -O2 -Wall -Wextra -Wformat -Wvla -Wformat-security -Wno-unused-parameter
  LDFLAGS       =
pi@raspberrypi:~/bitcoin $ make check

Making check in src

make  check-TESTS check-local
make[3]: Entering directory '/home/pi/bitcoin/src'
make[4]: Entering directory '/home/pi/bitcoin/src'
make[5]: Entering directory '/home/pi/bitcoin'
make[5]: Leaving directory '/home/pi/bitcoin'
make[5]: Entering directory '/home/pi/bitcoin/src/secp256k1'
make[5]: Leaving directory '/home/pi/bitcoin/src/secp256k1'
PASS: test/test_bitcoin
PASS: qt/test/test_bitcoin-qt
make[5]: Entering directory '/home/pi/bitcoin/src'
make[6]: Entering directory '/home/pi/bitcoin/src'
make[7]: Entering directory '/home/pi/bitcoin'
make[7]: Leaving directory '/home/pi/bitcoin'
make[7]: Entering directory '/home/pi/bitcoin/src/secp256k1'
make[7]: Leaving directory '/home/pi/bitcoin/src/secp256k1'
make[6]: Leaving directory '/home/pi/bitcoin/src'
make[5]: Leaving directory '/home/pi/bitcoin/src'
============================================================================
Testsuite summary for Bitcoin Core 0.14.99
============================================================================
# TOTAL: 2
# PASS:  2
# SKIP:  0
# XFAIL: 0
# FAIL:  0
# XPASS: 0
# ERROR: 0
============================================================================
make[4]: Leaving directory '/home/pi/bitcoin/src'
Running test/util/bitcoin-util-test.py...
/usr/bin/python3.4 ../test/util/bitcoin-util-test.py
make[4]: Entering directory '/home/pi/bitcoin/src/secp256k1'
  CC       src/tests-tests.o
  CCLD     tests
  CC       src/exhaustive_tests-tests_exhaustive.o
  CCLD     exhaustive_tests
make  check-TESTS
make[5]: Entering directory '/home/pi/bitcoin/src/secp256k1'
make[6]: Entering directory '/home/pi/bitcoin/src/secp256k1'
PASS: tests
PASS: exhaustive_tests
make[7]: Entering directory '/home/pi/bitcoin/src/secp256k1'
make[7]: Leaving directory '/home/pi/bitcoin/src/secp256k1'
============================================================================
Testsuite summary for libsecp256k1 0.1
============================================================================
# TOTAL: 2
# PASS:  2
# SKIP:  0
# XFAIL: 0
# FAIL:  0
# XPASS: 0
# ERROR: 0
============================================================================
make[6]: Leaving directory '/home/pi/bitcoin/src/secp256k1'
make[5]: Leaving directory '/home/pi/bitcoin/src/secp256k1'
make[4]: Leaving directory '/home/pi/bitcoin/src/secp256k1'
make[4]: Entering directory '/home/pi/bitcoin/src/univalue'
  CXX      test/test_unitester-unitester.o
  CXXLD    test/unitester
make  check-TESTS
make[5]: Entering directory '/home/pi/bitcoin/src/univalue'
make[6]: Entering directory '/home/pi/bitcoin/src/univalue'
PASS: test/unitester
make[7]: Entering directory '/home/pi/bitcoin/src/univalue'
make  all-am
make[8]: Entering directory '/home/pi/bitcoin/src/univalue'
make[8]: Leaving directory '/home/pi/bitcoin/src/univalue'
make[7]: Leaving directory '/home/pi/bitcoin/src/univalue'
============================================================================
Testsuite summary for univalue 1.0.2
============================================================================
# TOTAL: 1
# PASS:  1
# SKIP:  0
# XFAIL: 0
# FAIL:  0
# XPASS: 0
# ERROR: 0
============================================================================
● Raspberry Pi 3で Bitcoinのフルノードを立てる(UPnP機能有り miniupnpc)
ルーター越え(Firewall-jumping)の機能として UPnP機能を有効にします。
MiniUPnP
# 上記の共通手順で Bitcoin Coreのコンパイルに必要な依存関係の有るアプリやライブラリをインストールします。
# Bitcoin Coreのソースリストを GitHubからダウンロードします。

# MiniUPnP
sudo apt-get -y install libminiupnpc-dev

cd
cd bitcoin
./autogen.sh

./configure --disable-wallet --without-gui --with-miniupnpc --enable-upnp-default

make check

make

sudo make install
Options used to compile and link:
  with wallet   = no
  with gui / qt = no
  with zmq      = no
  with test     = yes
  with bench    = yes
  with upnp     = yes
  debug enabled = no
  werror        = no

  target os     = linux
  build os      =

  CC            = gcc
  CFLAGS        = -g -O2
  CPPFLAGS      =  -DHAVE_BUILD_INFO -D__STDC_FORMAT_MACROS -D_FILE_OFFSET_BITS=64
  CXX           = g++ -std=c++11
  CXXFLAGS      = -g -O2 -Wall -Wextra -Wformat -Wvla -Wformat-security -Wno-unused-parameter
  LDFLAGS       =
● Bitcoin Coreのコマンドライン
$ which bitcoind
/usr/local/bin/bitcoind
$ which bitcoin-cli
/usr/local/bin/bitcoin-cli
$ bitcoin-cli -version
Bitcoin Core RPC client version v0.14.99.0-35da2ae
$ bitcoin-cli getinfo
{
"version": 149900,
"protocolversion": 70015,
"blocks": 2368,
"timeoffset": 0,
"connections": 7,
"proxy": "",
"difficulty": 1,
"testnet": false,
"relayfee": 0.00001000,
"errors": "This is a pre-release test build - use at your own risk - do not use for mining or merchant applications"
}
$ bitcoin-cli listtransactions
$ bitcoin-cli stop
$ bitcoind -testnet -daemon
$ ls -l ~/.bitcoin/bitcoin.conf
Bitcoin.conf Configuration File
$ bitcoin-qt -datadir=/home/pi/.bitcoin
$ mkdir /home/pi/bitcoinData
$ bitcoin-cli -datadir=/home/pi/bitcoinData getinfo
● GCCコンパイルの高速化、ccache
ccache - a fast C/C++ compiler cache
2回目以降のコンパイルを高速化します。
コンパイルの総量よりキャッシュサイズの方が大きい必要が有ります。
sudo apt-get install ccache

export USE_CCACHE=1
export CCACHE_DIR=/root/.ccache

export CC='ccache gcc'
export CXX='ccache g++'

# ccacheのバージョン
ccache --version

# ccacheの設定ファイル
cat ~/.ccache/ccache.conf

# ccacheの現在の状態を表示
ccache -s

# ccacheのキャッシュサイズの指定
ccache -M 256M

# ccacheのキャッシュの完全クリア
ccache -C
# ccacheのバージョン
ccache --version

ccache version 3.1.12

Copyright (C) 2002-2007 Andrew Tridgell
Copyright (C) 2009-2016 Joel Rosdahl

This program is free software; you can redistribute it and/or modify it under
the terms of the GNU General Public License as published by the Free Software
Foundation; either version 3 of the License, or (at your option) any later
version.

pi@raspberrypi:~ $ cat ~/.ccache/ccache.conf
cat: /home/pi/.ccache/ccache.conf: No such file or directory

pi@raspberrypi:~ $ ccache -s
cache directory                     /root/.ccache
cache hit (direct)                     0
cache hit (preprocessed)               0
cache miss                             0
files in cache                         0
cache size                             0 Kbytes
max cache size                       1.0 Gbytes

pi@raspberrypi:~ $ ccache -C
Cleared cache
● Bitcoin Classic Full Node
bitcoinclassic/bitcoinclassic - Bitcoin Classic integration/staging tree https://bitcoinclassic.com
sudo apt update
sudo apt upgrade -y
sudo apt-get -y install build-essential autoconf libtool autotools-dev pkg-config libssl-dev libboost-dev libboost-chrono-dev libboost-filesystem-dev libboost-program-options-dev libboost-system-dev libboost-test-dev libboost-thread-dev libcurl3-gnutls-dev
# ERROR configure: error: libevent not found.
sudo apt-get -y install libevent-dev

# ERROR ./wallet/db.h:21:20: fatal error: db_cxx.h: No such file or directory
sudo apt-get -y install libdb++-dev

# ERROR //usr/lib/arm-linux-gnueabihf/libboost_atomic.so.1.55.0: error adding symbols: DSO missing from command line
# libboost-all-dev
sudo apt-get -y install libboost-atomic-dev

sudo apt-get -y install git

cd
git clone https://github.com/bitcoinclassic/bitcoinclassic.git

cd
cd bitcoinclassic

./autogen.sh
./configure --disable-wallet

make check

make

sudo make install
make

# Bitcoin Classicはメモリ不足でコンパイルできない。→ 下記の方法でできました?
virtual memory exhausted: Cannot allocate memory
Makefile:3778: recipe for target 'libbitcoin_server_a-main.o' failed
# Raspbian Jessie Liteではどうかな?
$make
  CXX      libbitcoin_server_a-main.o

cc1plus: out of memory allocating 3713512 bytes after a total of 36225024 bytes
Makefile:3778: recipe for target 'libbitcoin_server_a-main.o' failed
make[2]: *** [libbitcoin_server_a-main.o] Error 1

# まだ、メモリ不足のエラーが出るよ。

$ free
             total       used       free     shared    buffers     cached
Mem:        947732      35508     912224          0       1176       7392
-/+ buffers/cache:      26940     920792
Swap:       102396      14180      88216
# swap領域のサイズを増やす 100MBを 1024MB

sudo dphys-swapfile swapoff

sudo nano /etc/dphys-swapfile
CONF_SWAPSIZE=1024

sudo dphys-swapfile setup
sudo dphys-swapfile swapon

$ free
             total       used       free     shared    buffers     cached
Mem:        947732     919208      28524       6352       3636     865704
-/+ buffers/cache:      49868     897864
Swap:      1048572          0    1048572

$ make

# Raspbian Jessie Lite + CONF_SWAPSIZE=1024でソースからコンパイルできそう
# [PROBLEM] DSO missing from command line

make[3]: Leaving directory '/home/pi/bitcoinclassic/src/secp256k1'
  CXXLD    bitcoind
/usr/bin/ld: bitcoind-bitcoind.o: undefined reference to symbol '_ZN5boost7atomics6detail8lockpool12get_lock_forEPVKv'
collect2: error: ld returned 1 exit status
Makefile:2696: recipe for target 'bitcoind' failed
make[2]: *** [bitcoind] Error 1

# [SOLVED] LIBS="-lboost_atomic" ./configureで configureすれば解決
LIBS="-lboost_atomic" ./configure --disable-wallet

make check

make

sudo make install

# Raspbian Jessie Lite + CONF_SWAPSIZE=1024でソースからコンパイルできた!
・以下はメモリ不足でコンパイルエラー時の過去のメモ
bitcoinclassic/bitcoinclassic - Download Bitcoin Classic v1.2.5 April 25, 2017
上記の通りメモリ不足でコンパイルできなかったので、公式の GitHubからバイナリをダウンロードして動かします。
bitcoin-1.2.5-armhf-cli.deb
Raspberry Pi debian (deb) Debian用の DEBパッケージ
bitcoin-1.2.5-armhf-cli.tar.gz
ARM-hf (raspberry-pi)
● Bitcoin XT、Bitcoin Unlimited等のその他の Bitcoinノード
Bitcoin XT - 従来の Bitcoinのデータの内部構造を拡張して、ビットコインの将来的な発行量の増加にも対応したもの。従来のビットコイン取引所のデータとは互換性が無い。
従来のブロックチェーンのサイズ = 1MB
Bitcoin XTのブロックチェーンのサイズ = 8MB
Bitcoin XT
bitcoinxt/bitcoinxt - Bitcoin XT release G is being developed in master
Bitcoin Unlimited - Bitcoin XTと同様にデータの内部構造を拡張したもの。拡張は動的(可変的)に行なわれる。
Bitcoin Unlimited
Bitcoin Unlimited Official
BitcoinUnlimited/BitcoinUnlimited - Bitcoin Unlimited integration/staging tree
● Bitcoinウォレット Electrum
Electrum Bitcoin Wallet
Electrum is a lightweight Bitcoin client .
Latest release: Electrum-2.8.2
Electrum Electrum Bitcoin Wallet
Electrum
spesmilo/electrum - Electrum; Bitcoin thin client
cd
git clone git://github.com/spesmilo/electrum.git

cd
cd electrum

sudo python setup.py install

# apt-cache search pyqt4
sudo apt-get -y install pyqt4-dev-tools python-qt4
cd
cd electrum
pyrcc4 icons.qrc -o gui/qt/icons_rc.py

sudo apt-get -y install protobuf-compiler
protoc --proto_path=lib/ --python_out=lib/ lib/paymentrequest.proto

sudo apt-get -y install python-pycurl gettext
./contrib/make_locale
# Easy installation - Linux
# Install dependencies:
sudo apt-get install python-qt4 python-pip

# Install Electrum:
sudo pip2 install https://download.electrum.org/2.8.2/Electrum-2.8.2.tar.gz
$ which electrum
/usr/local/bin/electrum
$ electrum -g text
$ electrum version
2.8.3
$ electrum -h
usage: electrum [-h] [-v] [-D ELECTRUM_PATH] [-P] [-w WALLET_PATH] [--testnet]
                [--segwit] [--nolnet]
                <command> ...

positional arguments:
  <command>
    gui                 Run GUI (default)
    daemon              Run Daemon
    addrequest          Create a payment request
    broadcast           Broadcast a transaction to the network
    check_seed          Check that a seed was generated with given entropy
    clearrequests       Remove all payment requests
    commands            List of commands
    create              Create a new wallet
    createmultisig      Create multisig address
    decrypt             Decrypt a message encrypted with a public key
    deserialize         Deserialize a serialized transaction
    dumpprivkeys        Deprecated
    encrypt             Encrypt a message with a public key
    freeze              Freeze address
    getaddressbalance   Return the balance of any address
    getaddresshistory   Return the transaction history of any address
    getaddressunspent   Returns the UTXO list of any address
    getalias            Retrieve alias
    getbalance          Return the balance of your wallet
    getconfig           Return a configuration variable
    getmasterprivate    Get master private key
    getmerkle           Get Merkle branch of a transaction included in a block
    getmpk              Get master public key
    getprivatekeys      Get private keys of addresses
    getproof            Get Merkle branch of an address in the UTXO set
    getpubkeys          Return the public keys for a wallet address
    getrequest          Return a payment request
    getseed             Get seed phrase
    getservers          Return the list of available servers
    gettransaction      Retrieve a transaction
    getunusedaddress    Returns the first unused address
    getutxoaddress      Get the address of a UTXO
    help
    history             Wallet history
    importprivkey       Import a private key
    is_synchronized     return wallet synchronization status
    ismine              Check if address is in wallet
    listaddresses       List wallet addresses
    listcontacts        Show your list of contacts
    listrequests        List the payment requests you made
    listunspent         List unspent outputs
    make_seed           Create a seed
    notify              Watch an address
    password            Change wallet password
    payto               Create a transaction
    paytomany           Create a multi-output transaction
    restore             Restore a wallet from text
    rmrequest           Remove a payment request
    searchcontacts      Search through contacts, return matching entries
    serialize           Create a transaction from json inputs
    setconfig           Set a configuration variable
    setlabel            Assign a label to an item
    signmessage         Sign a message with a key
    signrequest         Sign payment request with an OpenAlias
    signtransaction     Sign a transaction
    sweep               Sweep private keys
    unfreeze            Unfreeze address
    validateaddress     Check that an address is valid
    verifymessage       Verify a signature
    version             Return the version of electrum

optional arguments:
  -h, --help            show this help message and exit

global options:
  -v, --verbose         Show debugging information
  -D ELECTRUM_PATH, --dir ELECTRUM_PATH
                        electrum directory
  -P, --portable        Use local 'electrum_data' directory
  -w WALLET_PATH, --wallet WALLET_PATH
                        wallet path
  --testnet             Use Testnet
  --segwit              The Wizard will create Segwit seed phrases (Testnet
                        only).
  --nolnet              Use Nolnet

Run 'electrum help <command>' to see the help for a command
● その他の暗号通貨
・ Dogecoin
Dogecoin
Dogecoin is an open source peer-to-peer digital currency, favored by Shiba Inus worldwide.
dogecoin/dogecoin - very currency
・ LiteCoin
LiteCoin
GLOBAL DECENTRALIZED CURRENCY Based on Blockchain Technology
pooler/cpuminer - CPU miner for Litecoin and Bitcoin
● Litecoinと Dogecoinの採掘 ラズパイの CPUで採掘
cd
git clone https://github.com/pooler/cpuminer.git

cd
cd cpuminer

./autogen.sh
./configure CFLAGS="-O3"

make check

# コンパイル
make

# でき上がった採掘プログラム minerdをインストールする
sudo make install

which minerd
# /usr/local/bin/minerd

# start the miner
minerd --url=your.minerpool.org  --user=username --pass=password
● Raspberry Piで Litecoin Supernode Full nodeを構築
Litecoin Core 0.13.99
折角なので Litecoinの Supernodeをコンパイルします。
https://github.com/litecoin-project/litecoin.git
sudo apt-get -y install build-essential libtool autotools-dev automake pkg-config libssl-dev libevent-dev bsdmainutils
sudo apt-get -y install libboost-system-dev libboost-filesystem-dev libboost-chrono-dev libboost-program-options-dev libboost-test-dev libboost-thread-dev
# sudo apt-get -y install libboost-all-dev
sudo apt-get -y install libminiupnpc-dev
sudo apt-get -y install libzmq3-dev

cd
git clone https://github.com/litecoin-project/litecoin.git

cd
cd litecoin
./autogen.sh
./configure --disable-wallet --without-gui --without-miniupnpc

make check

make

sudo make install
● Raspberry Piで Dogecoin Full nodeを構築
Dogecoin Core 1.10.0
折角なので Dogecoinの Full nodeをコンパイルします。
https://github.com/dogecoin/dogecoin/blob/master/doc/build-unix.md
https://github.com/dogecoin/dogecoin.git
sudo apt-get -y install build-essential libtool autotools-dev autoconf pkg-config libssl-dev
sudo apt-get -y install libboost-all-dev libdb5.1-dev libdb5.1++-dev
sudo apt-get -y install libminiupnpc-dev
sudo apt-get -y install libqt5gui5 libqt5core5a libqt5dbus5 qttools5-dev qttools5-dev-tools libprotobuf-dev protobuf-compiler
sudo apt-get -y install libqrencode-dev

cd
git clone https://github.com/dogecoin/dogecoin.git
cd
cd dogecoin

./autogen.sh

./configure --disable-wallet --disable-hardening --without-gui

make check

make

sudo make install
/usr/include/arm-linux-gnueabihf/qt5/QtCore/qglobal.h:1034:4: error: #error "You must build your code with position independent code if Qt was built with -reduce-relocations. " "Compile your code with -fPIC or -fPIE."
 #  error "You must build your code with position independent code if Qt was built with -reduce-relocations. "\
    ^
Makefile:5850: recipe for target 'qt/qt_dogecoin_qt-bitcoin.o' failed

CXXFLAGS=-fPIC ./configure
./configure --help

Some influential environment variables:
  CXX         C++ compiler command
  CXXFLAGS    C++ compiler flags
  LDFLAGS     linker flags, e.g. -L<lib dir> if you have libraries in a
              nonstandard directory <lib dir>
  LIBS        libraries to pass to the linker, e.g. -l<library>
  CPPFLAGS    (Objective) C/C++ preprocessor flags, e.g. -I<include dir> if
              you have headers in a nonstandard directory <include dir>
./autogen.sh
CXXFLAGS=-fPIC ./configure --disable-wallet --disable-hardening

$ cat Makefile | grep CXXFLAGS
CXXFLAGS = -fPIC
OBJCXXFLAGS =

make check

make

sudo make install
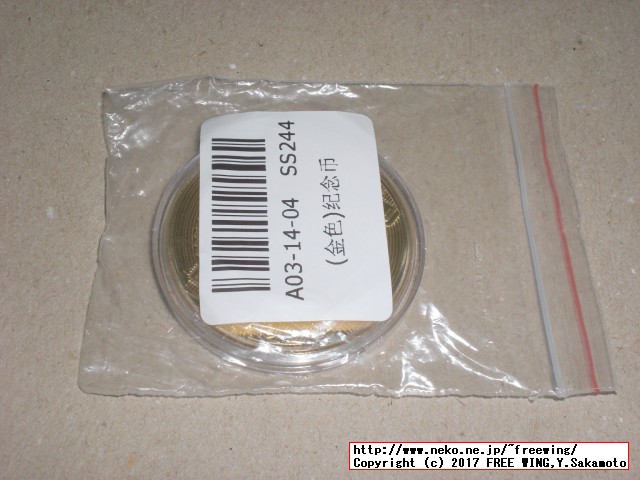
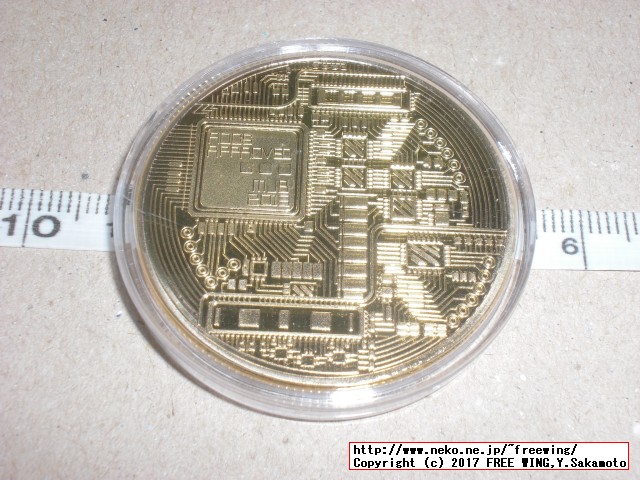
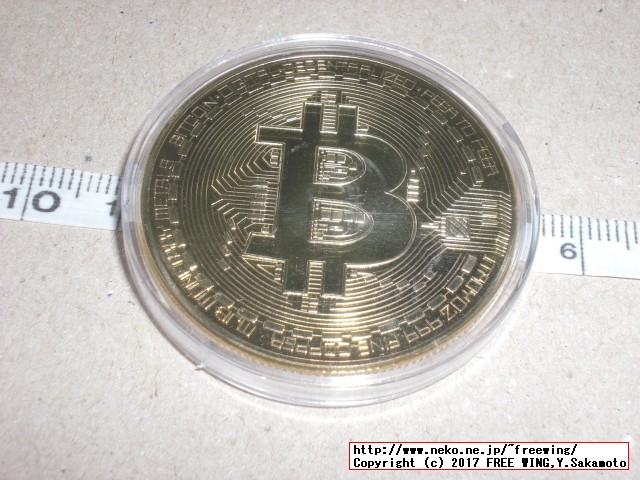
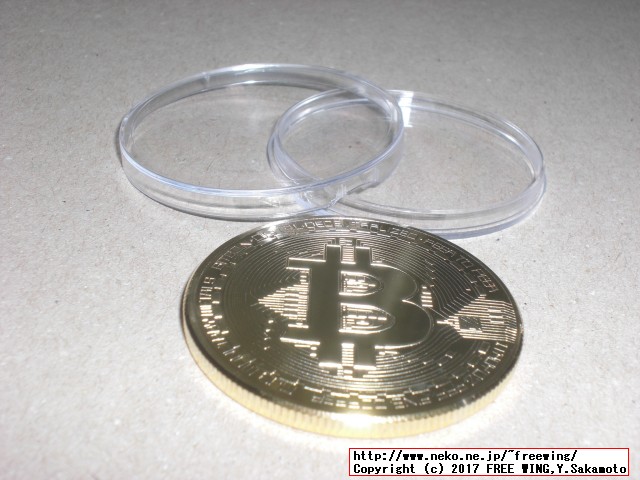
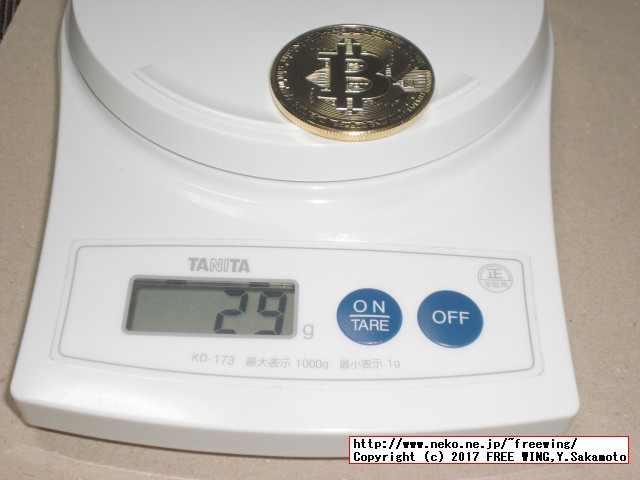
●ビットコイン BTCのコインのオモチャ

ビットコイン BitCoin 仮想通貨 (ゴールド)
ASIN: B01J98E4MI
コレクション用のレプリカコイン
・ビットコイン BTCのコインのオモチャ

・ビットコイン BTCのコインのオモチャ
・ビットコイン BTCのコインのオモチャ
・ビットコイン BTCのコインのオモチャ
・ビットコイン BTCのコインのオモチャ
Tags: [Raspberry Pi], [電子工作]
●関連するコンテンツ(この記事を読んだ人は、次の記事も読んでいます)
FWinSdCardImager SDカード イメージ書き込みアプリ、ラズパイの Raspbian OS、Jetson Nanoの Ubuntuの書き込みに便利
ラズパイや Jetson Nano等のワンボードマイコン等への OSイメージの書き込みが簡単にできる
FWinPiFinder ラズベリーパイ IPアドレス発見アプリ。ARPコマンドでラズパイの IPアドレスを探索発見する
Raspberry Piや NVIDIA Jetson Nano等の IPアドレスを MACアドレスの OUI部分を使用して発見する
Raspberry Pi 3系のトラブルであるある第一位の電源トラブル、低電圧警報に関する情報のまとめ
ラズパイ3B系での低電圧警報に関する情報まとめ、コマンドラインやログファイルから低電圧を検知する方法
Raspberry Piで CPUの脆弱性 Spectreと Meltdownの脆弱性をチェックする方法
ラズパイで 2018年初頭に大騒ぎになったスペクターとメルトダウンの CPUの脆弱性をチェックする方法
Raspberry Pi Zero Wを海外通販の Pimoroni等での購入方法、購入できる通販ショップ一覧まとめ
ラズパイゼロW ワイヤレスモデルを海外通販でサクッと簡単に個人輸入で入手。技適通過でも国内販売は常に品切れ
Raspberry Pi 3で安定して使える相性の無い最適な microSDカードの種類のまとめ
ラズパイ3で安定して使える microSDカードを購入する Teamと SanDiskは絶対に買わない
Raspberry Pi 3 Model Bに専用カメラモジュール RaspiCamを接続する方法
ラズパイに専用カメラモジュールを接続して Raspbianで写真の静止画撮影や動画を録画する方法
Raspberry Pi 3の Linuxコンソール上で使用する各種コマンドまとめ
ラズパイの Raspbian OSのコマンドラインで使用する便利コマンド、負荷試験や CPUシリアル番号の確認方法等も
Raspberry Pi 3公式フォーラムの FAQの内容の日本語訳
ラズパイ公式フォーラムの「The Raspberry Pi 3 Model B Q&A thread」の日本語訳
Raspberry Pi 3で GPIO端子の I2C機能を有効化する方法
ラズパイ3の GPIO端子の I2C機能を有効にして各種センサーを繋げる方法まとめ
大人気の CPUボード、Raspberry Pi 3 Model Bで作ってみよう
Raspberry Piの開発環境の構築やタッチパネル付き液晶ディスプレイや各種センサーの使い方まとめ
Raspberry Pi関連はこちらへまとめました
下記以外にも多数のラズパイ関係の記事が有ります。
(I2C制御、GPIO制御、1-Wire制御、シリアル通信、日本語音声合成、日本語音声認識、中国語音声合成、MeCab 形態素解析エンジン、赤外線リモコン制御、秋月 I2C液晶モジュール、KeDei 3.5インチ液晶、HDMI 5インチ液晶、NFCカードリーダ、コマンドライン操作方法等)
Espressif ESP8266 Arduino互換でスケッチが使える ESP-12Eモジュール基板
Espressif ESP8266 ESP-12-E NodeMCU V1 ESP12 CP2102
BangGood通販はドローン以外にも面白い商品がまだまだ有った(電子工作編)
レーザー彫刻機、カラー液晶の DIYオシロ、Arduinoや Raspberry Pi用の小型カラー液晶
[HOME]
|
[BACK]
リンクフリー(連絡不要、ただしトップページ以外は Web構成の変更で移動する場合があります)
Copyright (c)
2017 FREE WING,Y.Sakamoto
Powered by 猫屋敷工房 & HTML Generator
http://www.neko.ne.jp/~freewing/raspberry_pi/raspberry_pi_3_bitcoin_full_node/