・2020/06/28
 Jetson Nano、Xavier NXに Vino VNC Remote接続をして、Jetsonには何も画面を繋がないで GUIアプリを動かす!
(NVIDIA Jetsonを完全 HEADLESS MODEで VNC接続でリモート デスクトップ接続をして GUI環境で使う、VNCサーバを自動起動する方法)
Tags: [Raspberry Pi], [電子工作], [ディープラーニング]
● Jetson Nano、Jetson Xavier NXの便利スクリプト
・2020/07/03

【2020年版】NVIDIA Jetson Nano、Jetson Xavier NXの便利スクリプト
Jetsonの面倒な初期設定やミドルウェアのインストールを bashスクリプトの実行だけで簡単にできます
● Jetson Nano、Jetson Xavier NX 開発者キットを電源と USBケーブルだけの接続で最初の初期設定を行なう方法
・2020/06/28
Jetson Nano、Xavier NX 開発者キットを電源と USBケーブルだけの接続で最初の初期設定を行なう方法
NVIDIA Jetson Nano、Xavier NX Developer Kit HEADLESS MODE Setup、ヘッドレス セットアップ
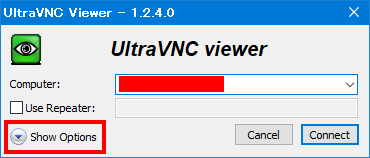
● Windows用 VNCクライアントアプリ Ultra VNC remote access tools
VNC (Virtual Network Computing) Remote Desktop
VNCリモートデスクトップ環境に接続する VNCクライアント(子供側)アプリ。
Ultra VNC remote access tools
UltraVNC is free for ALL usage .
ALL=this include commercial usage
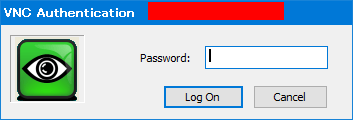
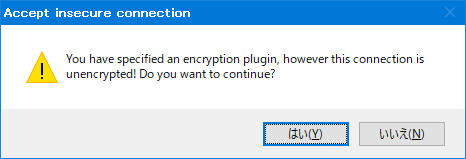
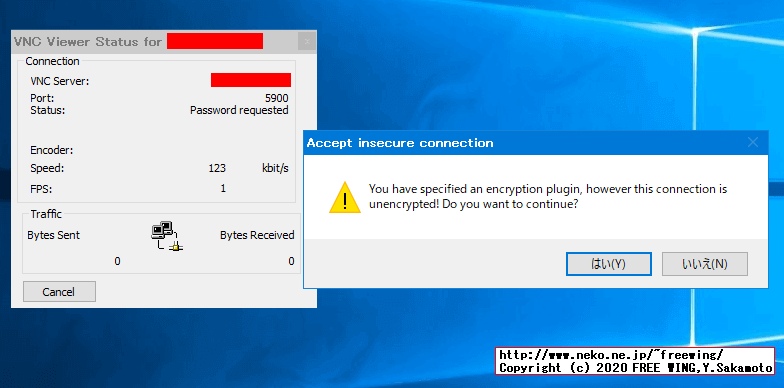
● Windowsから Vino VNC Serverへの接続で「セキュリティ タイプが未サポート」のエラーで接続できない場合の対処方法
"Server did not offer supported security type"
VNCの暗号化処理がバグっているので「暗号化」が「有効」だと認証情報が「一致」しない
(2020年現在でも修正していない!!)
Windowsクライアントと接続する場合は VNCサーバ側の「暗号化」を「無効」にする必要があります。
VNC accessible from non-linux machines only with encryption disabled Bug #1281250
Bug 981984 - Can't connect to Vino, except with Vinagre
 I've checked this can set require-encryption value to false.
 暗号化を無効にしてOK require-encryption = false

gsettings set org.gnome.Vino require-encryption false
● Enable Vino VNC and Auto Start Vino VNC Server for NVIDIA Jetson
Setup VNC server on the Jetson developer kit
Jetsonの Jetpackには VNCサーバとして Vino VNCサーバがインストールされています。
ただし、初期状態では無効になっているので「有効」にする必要があります。
また、Windowsクライアントと接続する場合は「暗号化」を「無効」にする必要があります。
=======================================================================
                            README-vnc
                          Linux for Tegra
               Configuring VNC from the command-line
=======================================================================

A VNC server allows access to the graphical display of a Linux for Tegra system
over the network. This allows you to work physically remote from the Linux for
Tegra system, and avoids the need to connect an HDMI display, USB keyboard, or
mouse.
下記のスクリプトで Vino VNCサーバの初期設定、VNCサービスの自動起動を行ないます。
パスワードは "password"で設定しています。
※ VNC接続のパスワードの最大文字長は VNCプロトコルの制約で「8文字」です
inst_Vino_VNC.sh
#!/bin/bash
# L4T-README
# README-vnc.txt
# ----------------------------------------------------------------------
echo "Installing the VNC Server"
# ----------------------------------------------------------------------
# It is expected that the VNC server software is pre-installed.
# Execute the following commands to ensure that it is:
sudo apt update
sudo apt install vino
sudo apt install nano
# ----------------------------------------------------------------------
echo "Enabling the VNC Server"
# ----------------------------------------------------------------------
# Execute the following commands to enable the VNC server:
# Enable the VNC server to start each time you log in
sudo ln -s ../vino-server.service \
/usr/lib/systemd/user/graphical-session.target.wants
# Configure the VNC server
gsettings set org.gnome.Vino prompt-enabled false
gsettings set org.gnome.Vino require-encryption false
# Set a password to access the VNC server
# Replace thepassword with your desired password
gsettings set org.gnome.Vino authentication-methods "['vnc']"
# gsettings set org.gnome.Vino vnc-password $(echo -n 'thepassword'|base64)
# gsettings set org.gnome.Vino vnc-password $(echo -n 'max8char'|base64)
gsettings set org.gnome.Vino vnc-password $(echo -n 'password'|base64)
# ----------------------------------------------------------------------
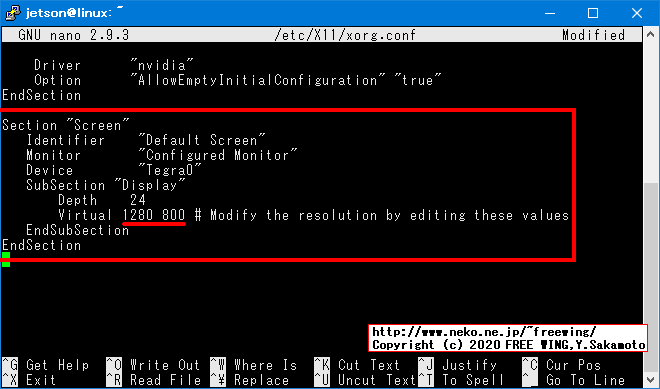
echo "Setting the Desktop Resolution"
# ----------------------------------------------------------------------
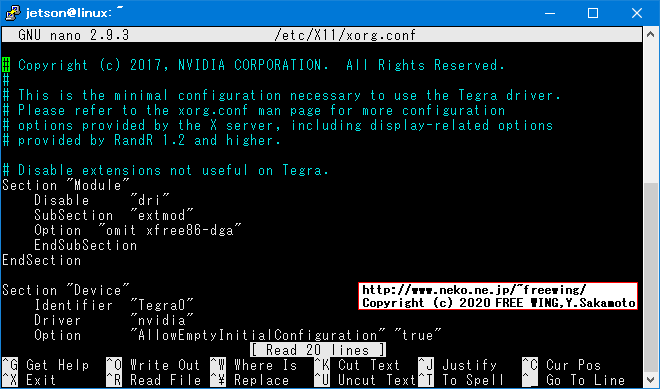
# sudo nano /etc/X11/xorg.conf
cat - << EOS > xorg_tmp.conf
Section "Screen"
Identifier "Default Screen"
Monitor "Configured Monitor"
Device "Tegra0"
SubSection "Display"
Depth 24
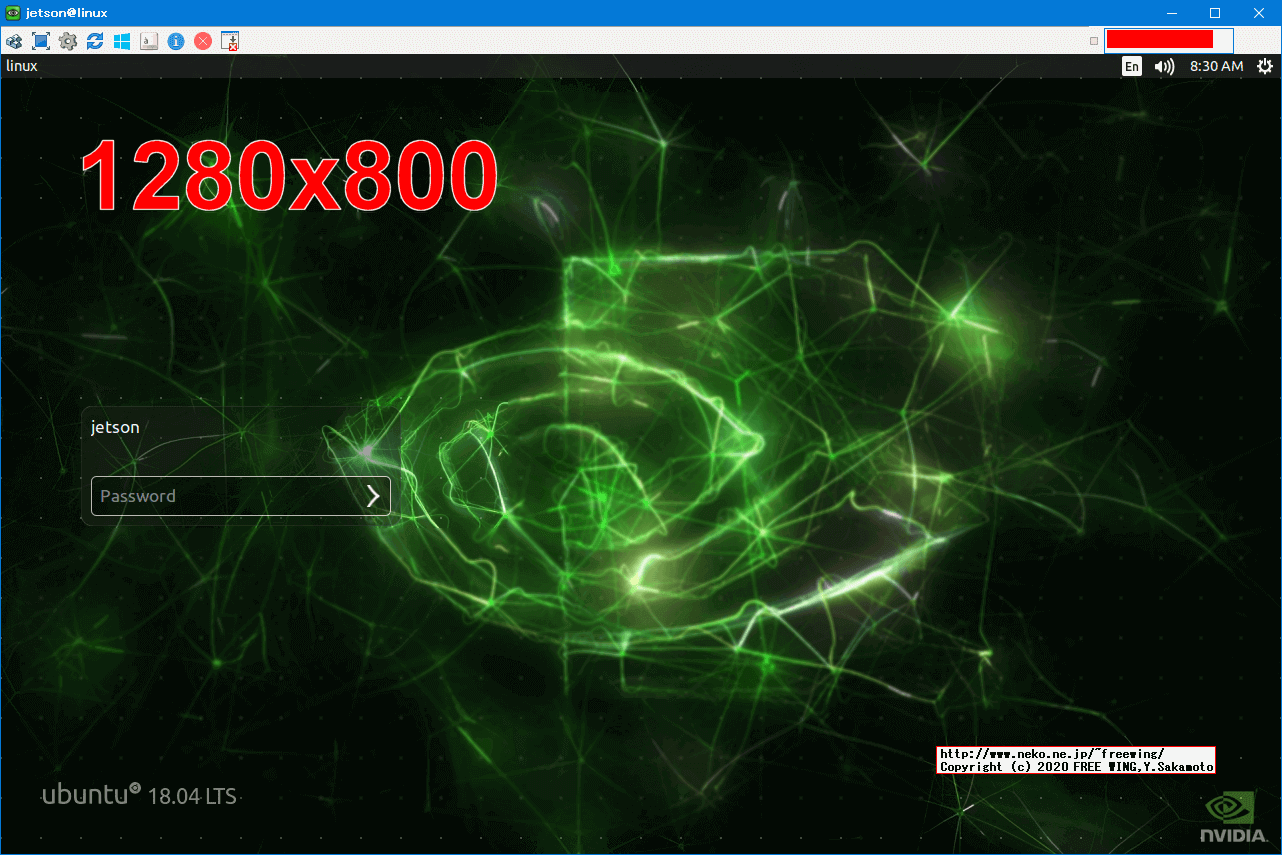
Virtual 1280 800 # Modify the resolution by editing these values
EndSubSection
EndSection
EOS
cat /etc/X11/xorg.conf xorg_tmp.conf > xorg.conf
rm xorg_tmp.conf
sudo cp xorg.conf /etc/X11/xorg.conf
rm xorg.conf
cat /etc/X11/xorg.conf
# ===
echo "Enable Automatic Login"
# The VNC server is only available after you have logged in to Jetson locally.
# If you wish VNC to be available automatically,
# use the system settings application to enable automatic login.
# GDM GNOME Display Manager
# sudo nano /etc/gdm3/custom.conf
# /etc/gdm3/custom.conf
# AutomaticLoginEnable = true
# AutomaticLogin = user1
cp /etc/gdm3/custom.conf .
sed -i 's/^# AutomaticLoginEnable/AutomaticLoginEnable/' custom.conf
sed -i "s/^AutomaticLoginEnable=False/AutomaticLoginEnable = true/" custom.conf
sed -i "s/^# AutomaticLogin = .*/AutomaticLogin = $(whoami)/" custom.conf
sudo cp custom.conf /etc/gdm3/custom.conf
rm custom.conf
cat /etc/gdm3/custom.conf
# Reboot the system so that the settings take effect
# ===
# sudo reboot
echo '---'
echo "Reboot the system so that the settings take effect"
echo ''
echo "sudo reboot"
# ===
# ===
cd $SCRIPT_DIR
if [ -e ../bell.sh ]; then
chmod +x ../bell.sh
bash ../bell.sh
fi
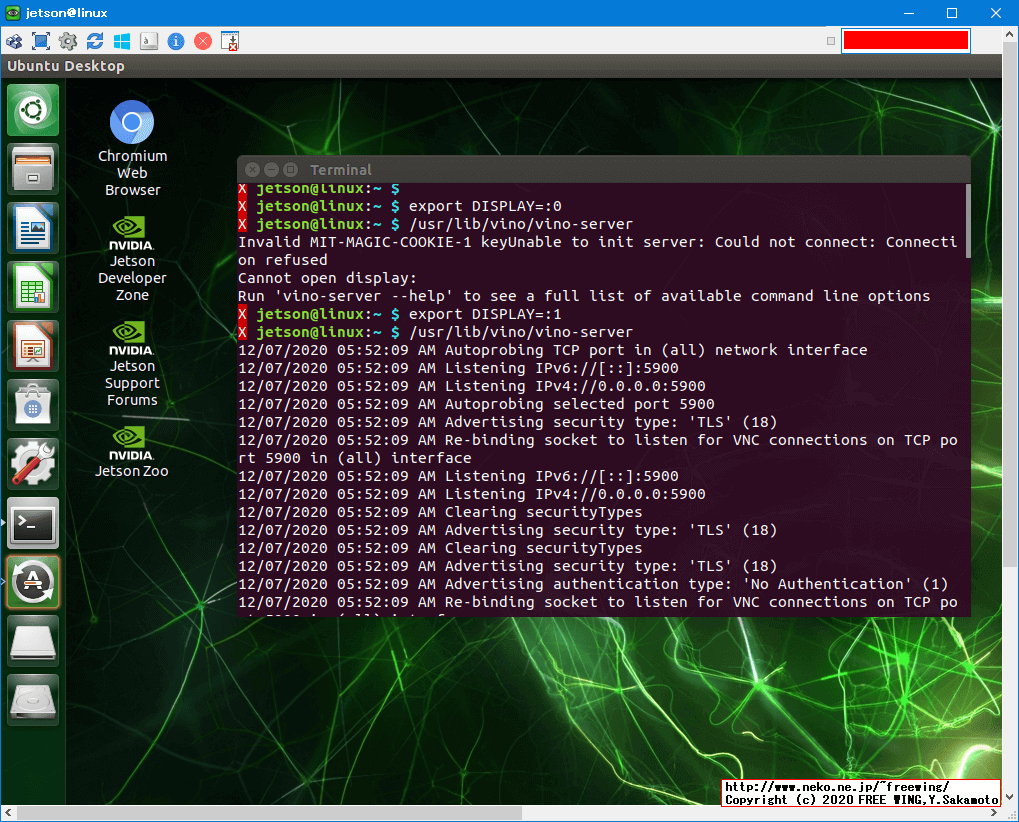
● Vino VNCサーバが動いているかの確認方法、ポート 5900の LISTENを確認する
ss -lnt | grep 5900
VNC Client側の暗号化 Encrypt設定は不要。
・NVIDIA Jetson Enable Vino VNC and Auto Start Vino VNC Server for Jetson
VNC Client側の暗号化 Encrypt設定は不要。
●私の環境では下記の操作は不要だった
# LightDM
# sudo nano /etc/lightdm/lightdm.conf
# /etc/lightdm/lightdm.conf
# [SeatDefaults]
# autologin-user=jetson
cp /etc/lightdm/lightdm.conf .
sed -i "s/^autologin-user=.*/autologin-user=$(whoami)/" lightdm.conf
sudo cp lightdm.conf /etc/lightdm/lightdm.conf
rm lightdm.conf
cat /etc/lightdm/lightdm.conf

# UUID
# nmcli connection show
# NAME                UUID                                  TYPE      DEVICE
# Wired connection 1  11111111-2222-3333-4444-555555555555  ethernet  eth0
# l4tbr0              88888888-8888-8888-8888-888888888888  bridge    l4tbr0

# dconf write /org/gnome/settings-daemon/plugins/sharing/vino-server/enabled-connections "['11111111-2222-3333-4444-555555555555']"

# dconf read /org/gnome/settings-daemon/plugins/sharing/vino-server/enabled-connections
# ss -lnt | grep 5900

# export DISPLAY=:0
# /usr/lib/vino/vino-server

# export DISPLAY=:1
# /usr/lib/vino/vino-server

# gsettings list-recursively org.gnome.Vino
●私の環境では下記の操作は不要だった
sudo nano /usr/share/glib-2.0/schemas/org.gnome.Vino.gschema.xml
sudo glib-compile-schemas /usr/share/glib-2.0/schemas
<schemalist>
  <schema id='org.gnome.Vino' path='/org/gnome/desktop/remote-access/'>

...

    <key name='enabled' type='b'>
      <summary>Enable remote access to the desktop</summary>
        <description>
          If true, allows remote access to the desktop via the RFB
          protocol. Users on remote machines may then connect to the
          desktop using a VNC viewer.
        </description>
      <default>false</default>
    </key>
●私の環境では下記の操作は不要だった
・NVIDIA Jetson Enable Vino VNC and Auto Start Vino VNC Server for Jetson
● Raspberry Pi OS Raspbianの場合の VNC リモートデスクトップ環境の有効化
・2020/06/28
Raspberry Pi OS Raspbianの場合の VNC リモートデスクトップ環境の有効化
ラズパイで RealVNCサーバを有効にして HDMI接続無しに GUIアプリを動かす方法
Tags: [Raspberry Pi], [電子工作], [ディープラーニング]
●関連するコンテンツ(この記事を読んだ人は、次の記事も読んでいます)
【2020年版】NVIDIA Jetson Nano、Jetson Xavier NXの便利スクリプト
Jetsonの面倒な初期設定やミドルウェアのインストールを bashスクリプトの実行だけで簡単にできます
【2020年】Jetson Xavier NX 開発者キットが安かったので衝動買いした件、標準販売価格5万円が4万4千円!
【ザビエル元年】Jetson Xavier NX 開発者キットを最安値で購入で、しかも国内在庫で注文から翌日で到着、ザビエル開封レビュー
【2020年版】NVIDIA Jetson用に最新の CMake 3.17.3をビルドしてインストールする方法
2020年の JetPack 4.4になっても CMakeのバージョンが 3.10.2と古く OpenPoseのビルドでエラー発生の原因
【2020年版】NVIDIA JetPack 4.4 DP Developer Previewで OpenPoseのビルドエラーの対策方法
Jetson Nano、Jetson Xavier NX 開発者キット + JetPack 4.4 DPで OpenPoseをビルドする手順
Jetson Nano、Jetson Xavier NX 開発者キット TensorFlow on Jetson Platform
NVIDIA Jetson Nano、Jetson Xavier NX Developer TensorFlow on Jetson Platform
NVIDIA Jetson Nano 開発者キットを買ってみた。メモリ容量 4GB LPDDR4 RAM
Jetson Nanoで TensorFlow PyTorch Caffe/Caffe2 Keras MXNet等を GPUパワーで超高速で動かす!
【2020年版】NVIDIA Jetson Nanoの初期設定、最高速で動かす設定、空きメモリを増やす方法等
2020年の JetPack 4.4になっても nvccのパスがデフォルトで通って無いとか、初期設定が必要です
【2020年版】NVIDIA Jetson Nano JetPackのバージョン情報まとめ、JetPack 4.4は仕様変更の影響が大きい
最新の JetPackでは 2019年当時の殆どの記事の内容がそのままではエラーが出て動かない様になりました
【2020年版】NVIDIA Jetson Nano対応の FFmpegをビルドする手順
NVIDIA Jetson Nano対応の FFmpegをビルドする手順、x264と x265にも対応
【2020年版】NVIDIA Jetson Nano対応の OpenPoseをビルドする手順
NVIDIA Jetson Nano対応の OpenPoseをビルドする手順
NVIDIA Jetson Nanoで OpenCV 3をビルドしてインストールする方法、NVCaffe等の OpenCV 4未対応を動かす
NVIDIA Jetson Nanoに「古い」 OpenCV 3.4.10をビルドしてインストールする方法
NVIDIA Jetson Nanoで Visual Studio Code Open Sourceをビルドして実行する
NVIDIA Jetson Nanoで VSCode Open Source Code - OSSをビルドして実行する、1.35.0
【2020年版】NVIDIA Jetson Nanoで TensorFlowの StyleGANを動かして、顔画像を生成
NVIDIA Jetson Nano JetPack StyleGAN、敵対的生成ネットワーク AIで自然な顔画像を生成する
【2020年版】NVIDIA Jetson Nanoで StyleGANの改良版の StyleGAN2で自然な画像を生成
NVIDIA Jetson Nano JetPack StyleGAN2、敵対的生成ネットワーク AIで自然な顔画像を生成する
【2020年版】Jetson Nanoで StyleGANを動かして可愛い美少女のアニメ顔を大量生産する方法
【俺の嫁】Jetson Nanoで StyleGANと StyleGAN2のそれぞれで、敵対的生成ネットワーク AIでアニメ顔を生成
【メモリ8GB】Raspberry Pi 4 Model B 8GBを KSYで最安値で購入。ベンチマークレビュー
【技適取得】ラズパイ4B 8GBモデルを入手。従来の Pi3、Pi3B+と速度比較
【Vulkan】Raspberry Pi 4 Model Bで Vulkanドライバをビルドして 3Dグラフィックのデモを動かす
【v3dv】ラズパイ4Bで Vulkan APIを動かす、VK_ICD_FILENAMES broadcom_icd.armv7l.json
PIP機能付きの 4K対応の 4入力 1出力の HDMIセレクターを買ってみた、HDMI機器が複数有る場合に便利
ピクチャ イン ピクチャ機能付き 4K入力対応の 4入力 1出力 HDMI切り換え機 HDSFX0401P
EDID保持機能付きの 4K対応の 4入力 2出力の マトリックス切り替え HDMIセレクター、液晶画面 2台と使用で最強
TESmart HMA0402A30 マトリックス切り替えで液晶画面 2台に接続できて更に EDID保持の便利機能付き HDMI切り換え機
[HOME]
|
[BACK]
リンクフリー(連絡不要、ただしトップページ以外は Web構成の変更で移動する場合があります)
Copyright (c)
2020 FREE WING,Y.Sakamoto
Powered by 猫屋敷工房 & HTML Generator
http://www.neko.ne.jp/~freewing/raspberry_pi/nvidia_jetson_enable_vino_vnc_server_headless_mode/