|
|
|
|
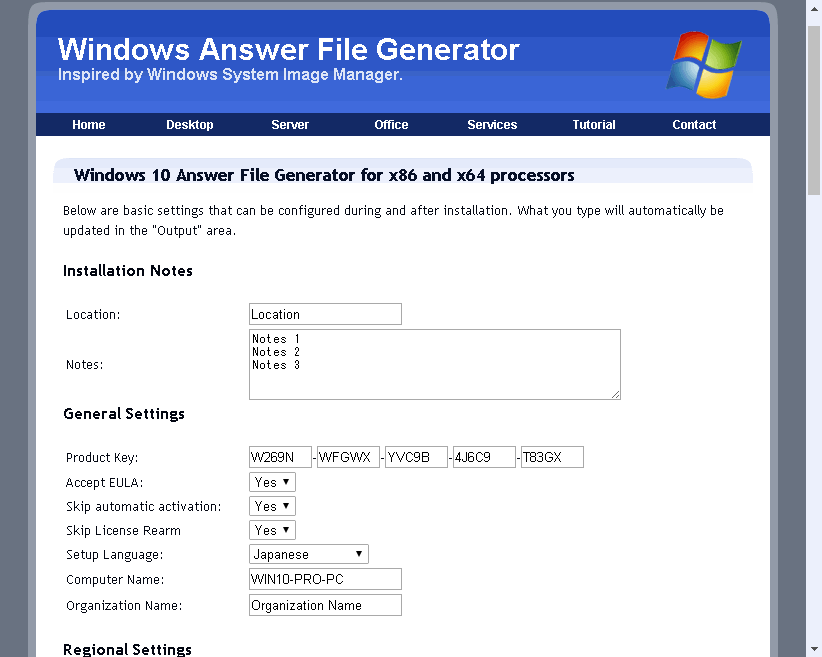
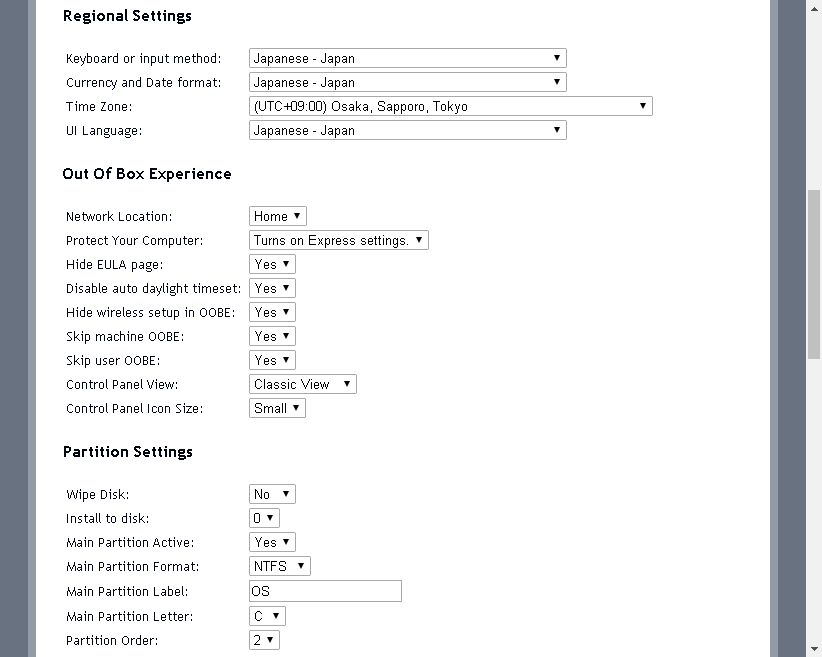
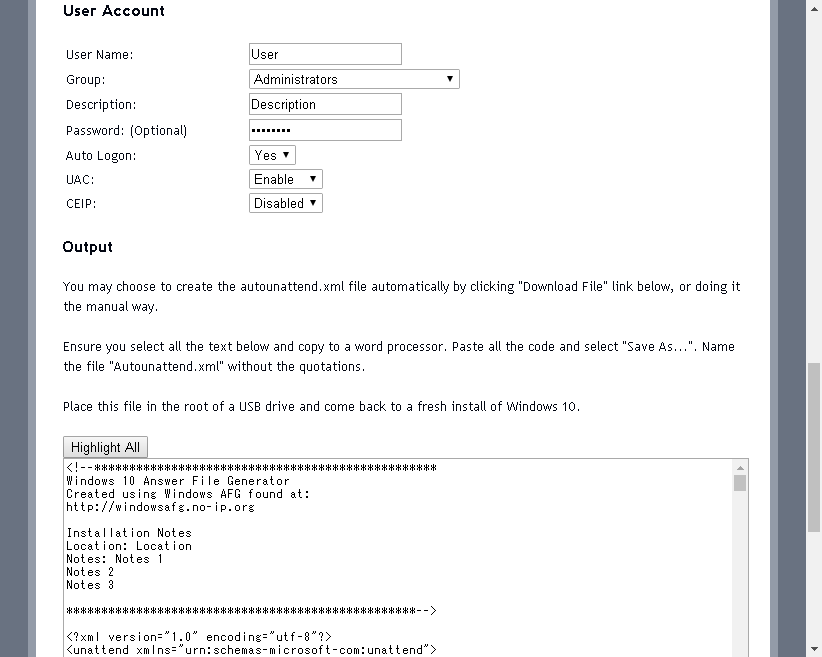
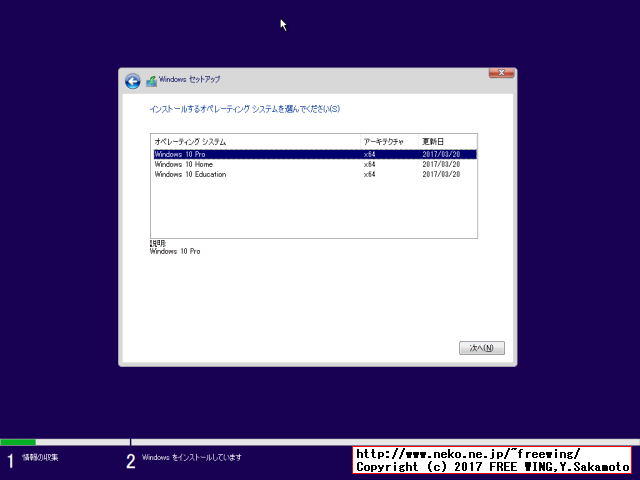
General Settings
 Product key,Windowsのエディションの種類の選択を限定する目的にも利用できる
 Accept EULA
 Skip License Rearm
 Setup Language
 Computer Name
 Organization Name

UserData - technet

UserData - msdn


Regional Settings
 Keyboard or input method
 Currency and Date format
 Time Zone
 User Interface Language

Out Of Box Experience (OOBE)
 Network Location
 - NetworkLocation

 Protect Your Computer
 - ProtectYourPC

 Hide EULA page
 - HideEULAPage

 Disable auto daylight timeset
 - DisableAutoDaylightTimeSet

 Hide wireless setup in OOBE
 - HideWirelessSetupInOOBE

 Skip machine OOBE
 - SkipMachineOOBE

 Skip user OOBE
 - SkipUserOOBE

 Control Panel View
 - FirstLogonCommands記述による reg addコマンド実行
 Control Panel Icon Size
 - FirstLogonCommands記述による reg addコマンド実行

Partition Settings
 Wipe Disk
 Install to disk
 Main Partition Active
 Main Partition Format
 Main Partition Label
 Main Partition Letter
 Partition Order

User Account
 User Name
 Group
 Description
 Password(Optional)
 Auto Logon
 UAC
 CEIP
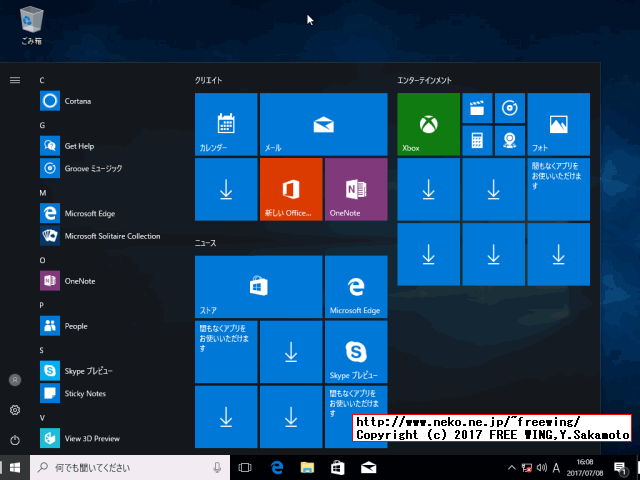
 このデスクトップアイコンから開く時に昔ながらのデザインでコンパネが開きます。
・Desktop Icon Control Panel
reg add HKCU\Software\Microsoft\Windows\CurrentVersion\Explorer\HideDesktopIcons\NewStartPanel /v "{5399E694-6CE5-4D6C-8FCE-1D8870FDCBA0}" /t REG_DWORD /d "0" /f
また、<FirstLogonCommands>の記述方法としては参考にできます。
<!--*************************************************
Windows 10 Answer File Generator
Created using Windows AFG found at:
http://www.windowsafg.com
Installation Notes
Location: Location
Notes: Notes 1
Notes 2
Notes 3
**************************************************-->
<?xml version="1.0" encoding="utf-8"?>
<unattend
xmlns="urn:schemas-microsoft-com:unattend">
<!-- windowsPE -->
<settings pass="windowsPE">
<!-- Microsoft-Windows-International-Core-WinPE -->
<component name="Microsoft-Windows-International-Core-WinPE" processorArchitecture="x86" publicKeyToken="31bf3856ad364e35" language="neutral" versionScope="nonSxS"
xmlns:wcm="http://schemas.microsoft.com/WMIConfig/2002/State"
xmlns:xsi="http://www.w3.org/2001/XMLSchema-instance">
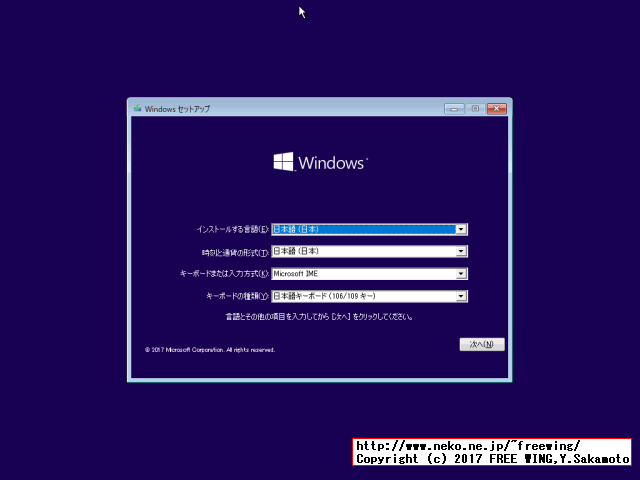
<SetupUILanguage>
<UILanguage>ja-JP</UILanguage>
</SetupUILanguage>
0411:{03B5835F-F03C-411B-9CE2-AA23E1171E36}{A76C93D9-5523-4E90-AAFA-4DB112F9AC76}
<SystemLocale>ja-JP</SystemLocale>
<UILanguage>ja-JP</UILanguage>
<UILanguageFallback>ja-JP</UILanguageFallback>
<UserLocale>ja-JP</UserLocale>
</component>
<component name="Microsoft-Windows-International-Core-WinPE" processorArchitecture="amd64" publicKeyToken="31bf3856ad364e35" language="neutral" versionScope="nonSxS"
xmlns:wcm="http://schemas.microsoft.com/WMIConfig/2002/State"
xmlns:xsi="http://www.w3.org/2001/XMLSchema-instance">
<SetupUILanguage>
<UILanguage>ja-JP</UILanguage>
</SetupUILanguage>
0411:{03B5835F-F03C-411B-9CE2-AA23E1171E36}{A76C93D9-5523-4E90-AAFA-4DB112F9AC76}
<SystemLocale>ja-JP</SystemLocale>
<UILanguage>ja-JP</UILanguage>
<UILanguageFallback>ja-JP</UILanguageFallback>
<UserLocale>ja-JP</UserLocale>
</component>
<!-- Microsoft-Windows-Setup -->
<component name="Microsoft-Windows-Setup" processorArchitecture="x86" publicKeyToken="31bf3856ad364e35" language="neutral" versionScope="nonSxS"
xmlns:wcm="http://schemas.microsoft.com/WMIConfig/2002/State"
xmlns:xsi="http://www.w3.org/2001/XMLSchema-instance">
<DiskConfiguration>
<Disk wcm:action="add">
<CreatePartitions>
<CreatePartition wcm:action="add">
<Order>1</Order>
<Type>Primary</Type>
<Size>100</Size>
</CreatePartition>
<CreatePartition wcm:action="add">
<Extend>true</Extend>
<Order>2</Order>
<Type>Primary</Type>
</CreatePartition>
</CreatePartitions>
<ModifyPartitions>
<ModifyPartition wcm:action="add">
<Active>true</Active>
<Format>NTFS</Format>
<Label>System Reserved</Label>
<Order>1</Order>
<PartitionID>1</PartitionID>
<TypeID>0x27</TypeID>
</ModifyPartition>
<ModifyPartition wcm:action="add">
<Active>true</Active>
<Format>NTFS</Format>
<Label>OS</Label>
<Letter>C</Letter>
<Order>2</Order>
<PartitionID>2</PartitionID>
</ModifyPartition>
</ModifyPartitions>
<DiskID>0</DiskID>
<WillWipeDisk>false</WillWipeDisk>
</Disk>
</DiskConfiguration>
<ImageInstall>
<OSImage>
<InstallTo>
<DiskID>0</DiskID>
<PartitionID>2</PartitionID>
</InstallTo>
<InstallToAvailablePartition>false</InstallToAvailablePartition>
</OSImage>
</ImageInstall>
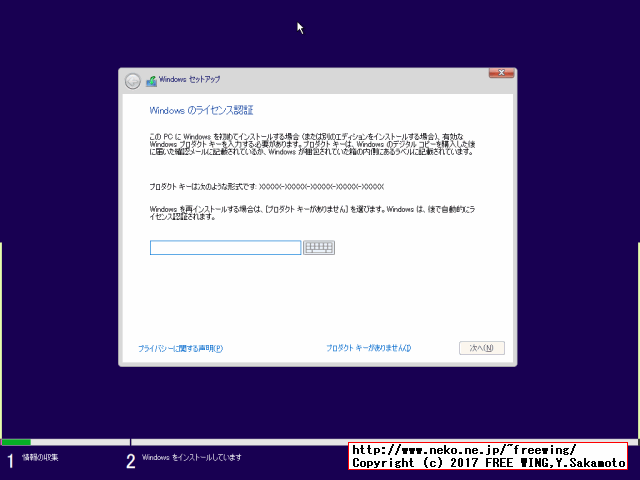
<UserData>
<AcceptEula>true</AcceptEula>
<FullName>User</FullName>
<Organization>Organization Name</Organization>
<ProductKey>
<Key>W269N-WFGWX-YVC9B-4J6C9-T83GX</Key>
</ProductKey>
</UserData>
</component>
<component name="Microsoft-Windows-Setup" processorArchitecture="amd64" publicKeyToken="31bf3856ad364e35" language="neutral" versionScope="nonSxS"
xmlns:wcm="http://schemas.microsoft.com/WMIConfig/2002/State"
xmlns:xsi="http://www.w3.org/2001/XMLSchema-instance">
<DiskConfiguration>
<Disk wcm:action="add">
<CreatePartitions>
<CreatePartition wcm:action="add">
<Order>1</Order>
<Type>Primary</Type>
<Size>100</Size>
</CreatePartition>
<CreatePartition wcm:action="add">
<Extend>true</Extend>
<Order>2</Order>
<Type>Primary</Type>
</CreatePartition>
</CreatePartitions>
<ModifyPartitions>
<ModifyPartition wcm:action="add">
<Active>true</Active>
<Format>NTFS</Format>
<Label>System Reserved</Label>
<Order>1</Order>
<PartitionID>1</PartitionID>
<TypeID>0x27</TypeID>
</ModifyPartition>
<ModifyPartition wcm:action="add">
<Active>true</Active>
<Format>NTFS</Format>
<Label>OS</Label>
<Letter>C</Letter>
<Order>2</Order>
<PartitionID>2</PartitionID>
</ModifyPartition>
</ModifyPartitions>
<DiskID>0</DiskID>
<WillWipeDisk>false</WillWipeDisk>
</Disk>
</DiskConfiguration>
<ImageInstall>
<OSImage>
<InstallTo>
<DiskID>0</DiskID>
<PartitionID>2</PartitionID>
</InstallTo>
<InstallToAvailablePartition>false</InstallToAvailablePartition>
</OSImage>
</ImageInstall>
<UserData>
<AcceptEula>true</AcceptEula>
<FullName>User</FullName>
<Organization>Organization Name</Organization>
<ProductKey>
<Key>W269N-WFGWX-YVC9B-4J6C9-T83GX</Key>
</ProductKey>
</UserData>
</component>
</settings>
<!-- offlineServicing -->
<settings pass="offlineServicing">
<component name="Microsoft-Windows-LUA-Settings" processorArchitecture="x86" publicKeyToken="31bf3856ad364e35" language="neutral" versionScope="nonSxS"
xmlns:wcm="http://schemas.microsoft.com/WMIConfig/2002/State"
xmlns:xsi="http://www.w3.org/2001/XMLSchema-instance">
<EnableLUA>true</EnableLUA>
</component>
</settings>
<settings pass="offlineServicing">
<component name="Microsoft-Windows-LUA-Settings" processorArchitecture="amd64" publicKeyToken="31bf3856ad364e35" language="neutral" versionScope="nonSxS"
xmlns:wcm="http://schemas.microsoft.com/WMIConfig/2002/State"
xmlns:xsi="http://www.w3.org/2001/XMLSchema-instance">
<EnableLUA>true</EnableLUA>
</component>
</settings>
<!-- generalize -->
<settings pass="generalize">
<component name="Microsoft-Windows-Security-SPP" processorArchitecture="x86" publicKeyToken="31bf3856ad364e35" language="neutral" versionScope="nonSxS"
xmlns:wcm="http://schemas.microsoft.com/WMIConfig/2002/State"
xmlns:xsi="http://www.w3.org/2001/XMLSchema-instance">
<SkipRearm>1</SkipRearm>
</component>
</settings>
<settings pass="generalize">
<component name="Microsoft-Windows-Security-SPP" processorArchitecture="amd64" publicKeyToken="31bf3856ad364e35" language="neutral" versionScope="nonSxS"
xmlns:wcm="http://schemas.microsoft.com/WMIConfig/2002/State"
xmlns:xsi="http://www.w3.org/2001/XMLSchema-instance">
<SkipRearm>1</SkipRearm>
</component>
</settings>
<!-- specialize -->
<settings pass="specialize">
<component name="Microsoft-Windows-International-Core" processorArchitecture="x86" publicKeyToken="31bf3856ad364e35" language="neutral" versionScope="nonSxS"
xmlns:wcm="http://schemas.microsoft.com/WMIConfig/2002/State"
xmlns:xsi="http://www.w3.org/2001/XMLSchema-instance">
0411:{03B5835F-F03C-411B-9CE2-AA23E1171E36}{A76C93D9-5523-4E90-AAFA-4DB112F9AC76}
<SystemLocale>ja-JP</SystemLocale>
<UILanguage>ja-JP</UILanguage>
<UILanguageFallback>ja-JP</UILanguageFallback>
<UserLocale>ja-JP</UserLocale>
</component>
<component name="Microsoft-Windows-International-Core" processorArchitecture="amd64" publicKeyToken="31bf3856ad364e35" language="neutral" versionScope="nonSxS"
xmlns:wcm="http://schemas.microsoft.com/WMIConfig/2002/State"
xmlns:xsi="http://www.w3.org/2001/XMLSchema-instance">
0411:{03B5835F-F03C-411B-9CE2-AA23E1171E36}{A76C93D9-5523-4E90-AAFA-4DB112F9AC76}
<SystemLocale>ja-JP</SystemLocale>
<UILanguage>ja-JP</UILanguage>
<UILanguageFallback>ja-JP</UILanguageFallback>
<UserLocale>ja-JP</UserLocale>
</component>
<component name="Microsoft-Windows-Security-SPP-UX" processorArchitecture="x86" publicKeyToken="31bf3856ad364e35" language="neutral" versionScope="nonSxS"
xmlns:wcm="http://schemas.microsoft.com/WMIConfig/2002/State"
xmlns:xsi="http://www.w3.org/2001/XMLSchema-instance">
<SkipAutoActivation>true</SkipAutoActivation>
</component>
<component name="Microsoft-Windows-Security-SPP-UX" processorArchitecture="amd64" publicKeyToken="31bf3856ad364e35" language="neutral" versionScope="nonSxS"
xmlns:wcm="http://schemas.microsoft.com/WMIConfig/2002/State"
xmlns:xsi="http://www.w3.org/2001/XMLSchema-instance">
<SkipAutoActivation>true</SkipAutoActivation>
</component>
<component name="Microsoft-Windows-SQMApi" processorArchitecture="x86" publicKeyToken="31bf3856ad364e35" language="neutral" versionScope="nonSxS"
xmlns:wcm="http://schemas.microsoft.com/WMIConfig/2002/State"
xmlns:xsi="http://www.w3.org/2001/XMLSchema-instance">
<CEIPEnabled>0</CEIPEnabled>
</component>
<component name="Microsoft-Windows-SQMApi" processorArchitecture="amd64" publicKeyToken="31bf3856ad364e35" language="neutral" versionScope="nonSxS"
xmlns:wcm="http://schemas.microsoft.com/WMIConfig/2002/State"
xmlns:xsi="http://www.w3.org/2001/XMLSchema-instance">
<CEIPEnabled>0</CEIPEnabled>
</component>
<component name="Microsoft-Windows-Shell-Setup" processorArchitecture="x86" publicKeyToken="31bf3856ad364e35" language="neutral" versionScope="nonSxS"
xmlns:wcm="http://schemas.microsoft.com/WMIConfig/2002/State"
xmlns:xsi="http://www.w3.org/2001/XMLSchema-instance">
<ComputerName>WIN10-PRO-PC</ComputerName>
<ProductKey>W269N-WFGWX-YVC9B-4J6C9-T83GX</ProductKey>
</component>
<component name="Microsoft-Windows-Shell-Setup" processorArchitecture="amd64" publicKeyToken="31bf3856ad364e35" language="neutral" versionScope="nonSxS"
xmlns:wcm="http://schemas.microsoft.com/WMIConfig/2002/State"
xmlns:xsi="http://www.w3.org/2001/XMLSchema-instance">
<ComputerName>WIN10-PRO-PC</ComputerName>
<ProductKey>W269N-WFGWX-YVC9B-4J6C9-T83GX</ProductKey>
</component>
</settings>
<!-- oobeSystem -->
<settings pass="oobeSystem">
<component name="Microsoft-Windows-Shell-Setup" processorArchitecture="x86" publicKeyToken="31bf3856ad364e35" language="neutral" versionScope="nonSxS"
xmlns:wcm="http://schemas.microsoft.com/WMIConfig/2002/State"
xmlns:xsi="http://www.w3.org/2001/XMLSchema-instance">
<AutoLogon>
<Password>
<Value>Password</Value>
<PlainText>true</PlainText>
</Password>
<Enabled>true</Enabled>
<Username>User</Username>
</AutoLogon>
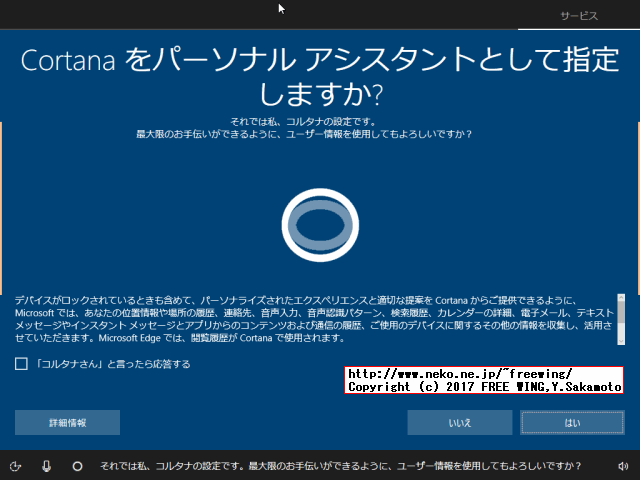
<OOBE>
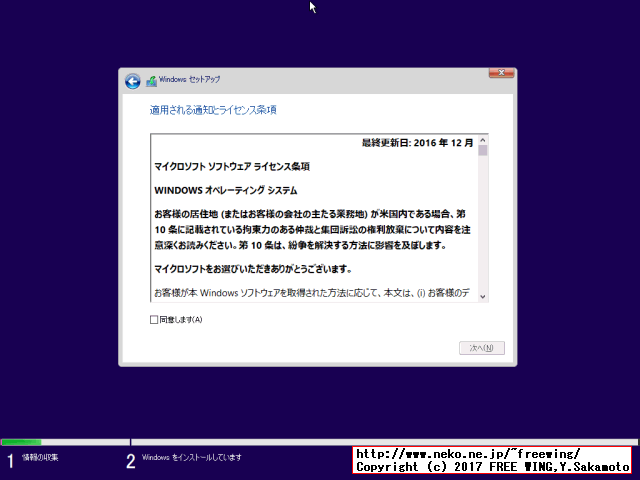
<HideEULAPage>true</HideEULAPage>
<HideOEMRegistrationScreen>true</HideOEMRegistrationScreen>
<HideOnlineAccountScreens>true</HideOnlineAccountScreens>
<HideWirelessSetupInOOBE>true</HideWirelessSetupInOOBE>
<NetworkLocation>Home</NetworkLocation>
<SkipUserOOBE>true</SkipUserOOBE>
<SkipMachineOOBE>true</SkipMachineOOBE>
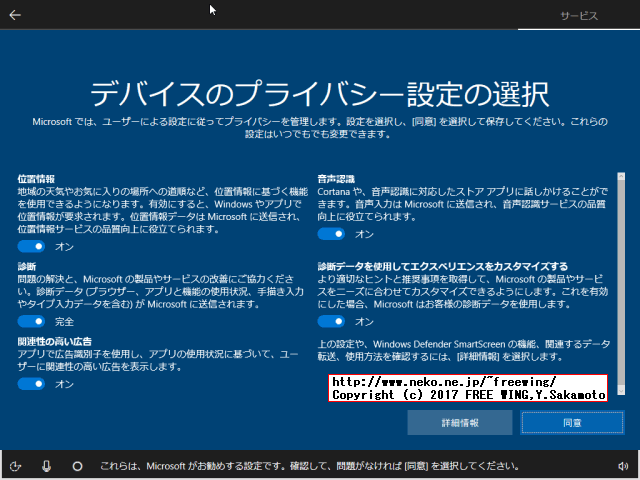
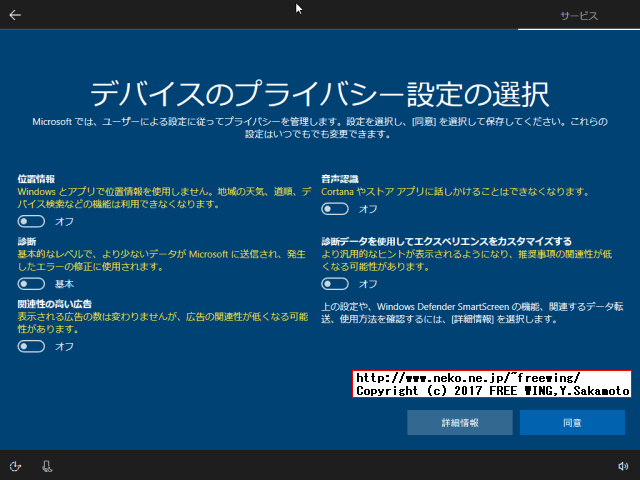
<ProtectYourPC>1</ProtectYourPC>
</OOBE>
<UserAccounts>
<LocalAccounts>
<LocalAccount wcm:action="add">
<Password>
<Value>Password</Value>
<PlainText>true</PlainText>
</Password>
<Description>Description</Description>
<DisplayName>User</DisplayName>
<Group>Administrators</Group>
<Name>User</Name>
</LocalAccount>
</LocalAccounts>
</UserAccounts>
<RegisteredOrganization>Organization Name</RegisteredOrganization>
<RegisteredOwner>User</RegisteredOwner>
<DisableAutoDaylightTimeSet>true</DisableAutoDaylightTimeSet>
<FirstLogonCommands>
<SynchronousCommand wcm:action="add">
<Description>Control Panel View</Description>
<Order>1</Order>
<CommandLine>reg add "HKEY_CURRENT_USER\Software\Microsoft\Windows\CurrentVersion\Explorer\ControlPanel" /v StartupPage /t REG_DWORD /d 1 /f</CommandLine>
<RequiresUserInput>true</RequiresUserInput>
</SynchronousCommand>
<SynchronousCommand wcm:action="add">
<Order>2</Order>
<Description>Control Panel Icon Size</Description>
<RequiresUserInput>false</RequiresUserInput>
<CommandLine>reg add "HKEY_CURRENT_USER\Software\Microsoft\Windows\CurrentVersion\Explorer\ControlPanel" /v AllItemsIconView /t REG_DWORD /d 1 /f</CommandLine>
</SynchronousCommand>
</FirstLogonCommands>
<TimeZone>Tokyo Standard Time</TimeZone>
</component>
<component name="Microsoft-Windows-Shell-Setup" processorArchitecture="amd64" publicKeyToken="31bf3856ad364e35" language="neutral" versionScope="nonSxS"
xmlns:wcm="http://schemas.microsoft.com/WMIConfig/2002/State"
xmlns:xsi="http://www.w3.org/2001/XMLSchema-instance">
<AutoLogon>
<Password>
<Value>Password</Value>
<PlainText>true</PlainText>
</Password>
<Enabled>true</Enabled>
<Username>User</Username>
</AutoLogon>
<OOBE>
<HideEULAPage>true</HideEULAPage>
<HideOEMRegistrationScreen>true</HideOEMRegistrationScreen>
<HideOnlineAccountScreens>true</HideOnlineAccountScreens>
<HideWirelessSetupInOOBE>true</HideWirelessSetupInOOBE>
<NetworkLocation>Home</NetworkLocation>
<SkipUserOOBE>true</SkipUserOOBE>
<SkipMachineOOBE>true</SkipMachineOOBE>
<ProtectYourPC>1</ProtectYourPC>
</OOBE>
<UserAccounts>
<LocalAccounts>
<LocalAccount wcm:action="add">
<Password>
<Value>Password</Value>
<PlainText>true</PlainText>
</Password>
<Description>Description</Description>
<DisplayName>User</DisplayName>
<Group>Administrators</Group>
<Name>User</Name>
</LocalAccount>
</LocalAccounts>
</UserAccounts>
<RegisteredOrganization>Organization Name</RegisteredOrganization>
<RegisteredOwner>User</RegisteredOwner>
<DisableAutoDaylightTimeSet>true</DisableAutoDaylightTimeSet>
<FirstLogonCommands>
<SynchronousCommand wcm:action="add">
<Description>Control Panel View</Description>
<Order>1</Order>
<CommandLine>reg add "HKEY_CURRENT_USER\Software\Microsoft\Windows\CurrentVersion\Explorer\ControlPanel" /v StartupPage /t REG_DWORD /d 1 /f</CommandLine>
<RequiresUserInput>true</RequiresUserInput>
</SynchronousCommand>
<SynchronousCommand wcm:action="add">
<Order>2</Order>
<Description>Control Panel Icon Size</Description>
<RequiresUserInput>false</RequiresUserInput>
<CommandLine>reg add "HKEY_CURRENT_USER\Software\Microsoft\Windows\CurrentVersion\Explorer\ControlPanel" /v AllItemsIconView /t REG_DWORD /d 1 /f</CommandLine>
</SynchronousCommand>
</FirstLogonCommands>
<TimeZone>Tokyo Standard Time</TimeZone>
</component>
</settings>
</unattend>
HDDのパーティション構成や Windowsをインストールする場所を自動設定する設定ブロック。

   <DiskConfiguration>
    ~ 略 ~
   </DiskConfiguration>
   <ImageInstall>
    ~ 略 ~
   </ImageInstall>
 の 2種類のブロックを削除する。(x86と amd64の 2箇所を削除する必要が有ります。)
<!--*************************************************
Windows 10 Answer File Generator
Created using Windows AFG found at:
http://windowsafg.no-ip.org

Installation Notes
Location: Location
Notes: Notes 1
Notes 2
Notes 3

**************************************************-->

<?xml version="1.0" encoding="utf-8"?>
<unattend
 xmlns="urn:schemas-microsoft-com:unattend">

 <!-- windowsPE -->
 <settings pass="windowsPE">

  <!-- Microsoft-Windows-International-Core-WinPE -->
  <component name="Microsoft-Windows-International-Core-WinPE" processorArchitecture="x86" publicKeyToken="31bf3856ad364e35" language="neutral" versionScope="nonSxS"
   xmlns:wcm="http://schemas.microsoft.com/WMIConfig/2002/State"
   xmlns:xsi="http://www.w3.org/2001/XMLSchema-instance">
   <SetupUILanguage>
    <UILanguage>ja-JP</UILanguage>
   </SetupUILanguage>
   0411:{03B5835F-F03C-411B-9CE2-AA23E1171E36}{A76C93D9-5523-4E90-AAFA-4DB112F9AC76}
   <SystemLocale>ja-JP</SystemLocale>
   <UILanguage>ja-JP</UILanguage>
   <UILanguageFallback>ja-JP</UILanguageFallback>
   <UserLocale>ja-JP</UserLocale>
  </component>

  <component name="Microsoft-Windows-International-Core-WinPE" processorArchitecture="amd64" publicKeyToken="31bf3856ad364e35" language="neutral" versionScope="nonSxS"
   xmlns:wcm="http://schemas.microsoft.com/WMIConfig/2002/State"
   xmlns:xsi="http://www.w3.org/2001/XMLSchema-instance">
   <SetupUILanguage>
    <UILanguage>ja-JP</UILanguage>
   </SetupUILanguage>
   0411:{03B5835F-F03C-411B-9CE2-AA23E1171E36}{A76C93D9-5523-4E90-AAFA-4DB112F9AC76}
   <SystemLocale>ja-JP</SystemLocale>
   <UILanguage>ja-JP</UILanguage>
   <UILanguageFallback>ja-JP</UILanguageFallback>
   <UserLocale>ja-JP</UserLocale>
  </component>

  <!-- Microsoft-Windows-Setup -->
  <component name="Microsoft-Windows-Setup" processorArchitecture="x86" publicKeyToken="31bf3856ad364e35" language="neutral" versionScope="nonSxS"
   xmlns:wcm="http://schemas.microsoft.com/WMIConfig/2002/State"
   xmlns:xsi="http://www.w3.org/2001/XMLSchema-instance">

   <ImageInstall>
    <OSImage>
     <InstallFrom>
      <MetaData wcm:action="add">
       <Key>/IMAGE/NAME</Key>
       <Value>Windows 10 Pro</Value>
      </MetaData>
     </InstallFrom>
    </OSImage>
   </ImageInstall>

   <UserData>
    <AcceptEula>true</AcceptEula>
    <FullName>User</FullName>
    <Organization>Organization Name</Organization>
    <ProductKey>
     <Key>W269N-WFGWX-YVC9B-4J6C9-T83GX</Key>
    </ProductKey>
   </UserData>
  </component>

  <component name="Microsoft-Windows-Setup" processorArchitecture="amd64" publicKeyToken="31bf3856ad364e35" language="neutral" versionScope="nonSxS"
   xmlns:wcm="http://schemas.microsoft.com/WMIConfig/2002/State"
   xmlns:xsi="http://www.w3.org/2001/XMLSchema-instance">

   <ImageInstall>
    <OSImage>
     <InstallFrom>
      <MetaData wcm:action="add">
       <Key>/IMAGE/NAME</Key>
       <Value>Windows 10 Pro</Value>
      </MetaData>
     </InstallFrom>
    </OSImage>
   </ImageInstall>

   <UserData>
    <AcceptEula>true</AcceptEula>
    <FullName>User</FullName>
    <Organization>Organization Name</Organization>
    <ProductKey>
     <Key>W269N-WFGWX-YVC9B-4J6C9-T83GX</Key>
    </ProductKey>
   </UserData>

  </component>
 </settings>

 <!-- offlineServicing -->
 <settings pass="offlineServicing">
  <component name="Microsoft-Windows-LUA-Settings" processorArchitecture="x86" publicKeyToken="31bf3856ad364e35" language="neutral" versionScope="nonSxS"
   xmlns:wcm="http://schemas.microsoft.com/WMIConfig/2002/State"
   xmlns:xsi="http://www.w3.org/2001/XMLSchema-instance">
   <EnableLUA>true</EnableLUA>
  </component>
 </settings>
 <settings pass="offlineServicing">
  <component name="Microsoft-Windows-LUA-Settings" processorArchitecture="amd64" publicKeyToken="31bf3856ad364e35" language="neutral" versionScope="nonSxS"
   xmlns:wcm="http://schemas.microsoft.com/WMIConfig/2002/State"
   xmlns:xsi="http://www.w3.org/2001/XMLSchema-instance">
   <EnableLUA>true</EnableLUA>
  </component>
 </settings>

 <!-- generalize -->
 <settings pass="generalize">
  <component name="Microsoft-Windows-Security-SPP" processorArchitecture="x86" publicKeyToken="31bf3856ad364e35" language="neutral" versionScope="nonSxS"
   xmlns:wcm="http://schemas.microsoft.com/WMIConfig/2002/State"
   xmlns:xsi="http://www.w3.org/2001/XMLSchema-instance">
   <SkipRearm>1</SkipRearm>
  </component>
 </settings>

 <settings pass="generalize">
  <component name="Microsoft-Windows-Security-SPP" processorArchitecture="amd64" publicKeyToken="31bf3856ad364e35" language="neutral" versionScope="nonSxS"
   xmlns:wcm="http://schemas.microsoft.com/WMIConfig/2002/State"
   xmlns:xsi="http://www.w3.org/2001/XMLSchema-instance">
   <SkipRearm>1</SkipRearm>
  </component>
 </settings>

 <!-- specialize -->
 <settings pass="specialize">
  <component name="Microsoft-Windows-International-Core" processorArchitecture="x86" publicKeyToken="31bf3856ad364e35" language="neutral" versionScope="nonSxS"
   xmlns:wcm="http://schemas.microsoft.com/WMIConfig/2002/State"
   xmlns:xsi="http://www.w3.org/2001/XMLSchema-instance">
   0411:{03B5835F-F03C-411B-9CE2-AA23E1171E36}{A76C93D9-5523-4E90-AAFA-4DB112F9AC76}
   <SystemLocale>ja-JP</SystemLocale>
   <UILanguage>ja-JP</UILanguage>
   <UILanguageFallback>ja-JP</UILanguageFallback>
   <UserLocale>ja-JP</UserLocale>
  </component>

  <component name="Microsoft-Windows-International-Core" processorArchitecture="amd64" publicKeyToken="31bf3856ad364e35" language="neutral" versionScope="nonSxS"
   xmlns:wcm="http://schemas.microsoft.com/WMIConfig/2002/State"
   xmlns:xsi="http://www.w3.org/2001/XMLSchema-instance">
   0411:{03B5835F-F03C-411B-9CE2-AA23E1171E36}{A76C93D9-5523-4E90-AAFA-4DB112F9AC76}
   <SystemLocale>ja-JP</SystemLocale>
   <UILanguage>ja-JP</UILanguage>
   <UILanguageFallback>ja-JP</UILanguageFallback>
   <UserLocale>ja-JP</UserLocale>
  </component>

  <component name="Microsoft-Windows-Security-SPP-UX" processorArchitecture="x86" publicKeyToken="31bf3856ad364e35" language="neutral" versionScope="nonSxS"
   xmlns:wcm="http://schemas.microsoft.com/WMIConfig/2002/State"
   xmlns:xsi="http://www.w3.org/2001/XMLSchema-instance">
   <SkipAutoActivation>true</SkipAutoActivation>
  </component>

  <component name="Microsoft-Windows-Security-SPP-UX" processorArchitecture="amd64" publicKeyToken="31bf3856ad364e35" language="neutral" versionScope="nonSxS"
   xmlns:wcm="http://schemas.microsoft.com/WMIConfig/2002/State"
   xmlns:xsi="http://www.w3.org/2001/XMLSchema-instance">
   <SkipAutoActivation>true</SkipAutoActivation>
  </component>

  <component name="Microsoft-Windows-SQMApi" processorArchitecture="x86" publicKeyToken="31bf3856ad364e35" language="neutral" versionScope="nonSxS"
   xmlns:wcm="http://schemas.microsoft.com/WMIConfig/2002/State"
   xmlns:xsi="http://www.w3.org/2001/XMLSchema-instance">
   <CEIPEnabled>0</CEIPEnabled>
  </component>

  <component name="Microsoft-Windows-SQMApi" processorArchitecture="amd64" publicKeyToken="31bf3856ad364e35" language="neutral" versionScope="nonSxS"
   xmlns:wcm="http://schemas.microsoft.com/WMIConfig/2002/State"
   xmlns:xsi="http://www.w3.org/2001/XMLSchema-instance">
   <CEIPEnabled>0</CEIPEnabled>
  </component>

  <component name="Microsoft-Windows-Shell-Setup" processorArchitecture="x86" publicKeyToken="31bf3856ad364e35" language="neutral" versionScope="nonSxS"
   xmlns:wcm="http://schemas.microsoft.com/WMIConfig/2002/State"
   xmlns:xsi="http://www.w3.org/2001/XMLSchema-instance">
   <ComputerName>WIN10-PRO-PC</ComputerName>
   <ProductKey>W269N-WFGWX-YVC9B-4J6C9-T83GX</ProductKey>
  </component>

  <component name="Microsoft-Windows-Shell-Setup" processorArchitecture="amd64" publicKeyToken="31bf3856ad364e35" language="neutral" versionScope="nonSxS"
   xmlns:wcm="http://schemas.microsoft.com/WMIConfig/2002/State"
   xmlns:xsi="http://www.w3.org/2001/XMLSchema-instance">
   <ComputerName>WIN10-PRO-PC</ComputerName>
   <ProductKey>W269N-WFGWX-YVC9B-4J6C9-T83GX</ProductKey>
  </component>
 </settings>

 <!-- oobeSystem -->
 <settings pass="oobeSystem">
  <component name="Microsoft-Windows-Shell-Setup" processorArchitecture="x86" publicKeyToken="31bf3856ad364e35" language="neutral" versionScope="nonSxS"
   xmlns:wcm="http://schemas.microsoft.com/WMIConfig/2002/State"
   xmlns:xsi="http://www.w3.org/2001/XMLSchema-instance">
   <AutoLogon>
    <Password>
     <Value>Password</Value>
     <PlainText>true</PlainText>
    </Password>
    <Enabled>true</Enabled>
    <Username>User</Username>
   </AutoLogon>

   <OOBE>
    <HideEULAPage>true</HideEULAPage>
    <HideOEMRegistrationScreen>true</HideOEMRegistrationScreen>
    <HideOnlineAccountScreens>true</HideOnlineAccountScreens>
    <HideWirelessSetupInOOBE>true</HideWirelessSetupInOOBE>
    <NetworkLocation>Home</NetworkLocation>
    <SkipUserOOBE>true</SkipUserOOBE>
    <SkipMachineOOBE>true</SkipMachineOOBE>
    <ProtectYourPC>1</ProtectYourPC>
   </OOBE>

   <UserAccounts>
    <LocalAccounts>
     <LocalAccount wcm:action="add">
      <Password>
       <Value>Password</Value>
       <PlainText>true</PlainText>
      </Password>
      <Description>Description</Description>
      <DisplayName>User</DisplayName>
      <Group>Administrators</Group>
      <Name>User</Name>
     </LocalAccount>
    </LocalAccounts>
   </UserAccounts>
   <RegisteredOrganization>Organization Name</RegisteredOrganization>
   <RegisteredOwner>User</RegisteredOwner>
   <DisableAutoDaylightTimeSet>true</DisableAutoDaylightTimeSet>
   <FirstLogonCommands>
    <SynchronousCommand wcm:action="add">
     <Description>Control Panel View</Description>
     <Order>1</Order>
     <CommandLine>reg add "HKEY_CURRENT_USER\Software\Microsoft\Windows\CurrentVersion\Explorer\ControlPanel" /v StartupPage /t REG_DWORD /d 1 /f</CommandLine>
     <RequiresUserInput>true</RequiresUserInput>
    </SynchronousCommand>
    <SynchronousCommand wcm:action="add">
     <Order>2</Order>
     <Description>Control Panel Icon Size</Description>
     <RequiresUserInput>false</RequiresUserInput>
     <CommandLine>reg add "HKEY_CURRENT_USER\Software\Microsoft\Windows\CurrentVersion\Explorer\ControlPanel" /v AllItemsIconView /t REG_DWORD /d 1 /f</CommandLine>
    </SynchronousCommand>
   </FirstLogonCommands>
   <TimeZone>Tokyo Standard Time</TimeZone>
  </component>

  <component name="Microsoft-Windows-Shell-Setup" processorArchitecture="amd64" publicKeyToken="31bf3856ad364e35" language="neutral" versionScope="nonSxS"
   xmlns:wcm="http://schemas.microsoft.com/WMIConfig/2002/State"
   xmlns:xsi="http://www.w3.org/2001/XMLSchema-instance">
   <AutoLogon>
    <Password>
     <Value>Password</Value>
     <PlainText>true</PlainText>
    </Password>
    <Enabled>true</Enabled>
    <Username>User</Username>
   </AutoLogon>
   <OOBE>
    <HideEULAPage>true</HideEULAPage>
    <HideOEMRegistrationScreen>true</HideOEMRegistrationScreen>
    <HideOnlineAccountScreens>true</HideOnlineAccountScreens>
    <HideWirelessSetupInOOBE>true</HideWirelessSetupInOOBE>
    <NetworkLocation>Home</NetworkLocation>
    <SkipUserOOBE>true</SkipUserOOBE>
    <SkipMachineOOBE>true</SkipMachineOOBE>
    <ProtectYourPC>1</ProtectYourPC>
   </OOBE>
   <UserAccounts>
    <LocalAccounts>
     <LocalAccount wcm:action="add">
      <Password>
       <Value>Password</Value>
       <PlainText>true</PlainText>
      </Password>
      <Description>Description</Description>
      <DisplayName>User</DisplayName>
      <Group>Administrators</Group>
      <Name>User</Name>
     </LocalAccount>
    </LocalAccounts>
   </UserAccounts>
   <RegisteredOrganization>Organization Name</RegisteredOrganization>
   <RegisteredOwner>User</RegisteredOwner>
   <DisableAutoDaylightTimeSet>true</DisableAutoDaylightTimeSet>
   <FirstLogonCommands>
    <SynchronousCommand wcm:action="add">
     <Description>Control Panel View</Description>
     <Order>1</Order>
     <CommandLine>reg add "HKEY_CURRENT_USER\Software\Microsoft\Windows\CurrentVersion\Explorer\ControlPanel" /v StartupPage /t REG_DWORD /d 1 /f</CommandLine>
     <RequiresUserInput>true</RequiresUserInput>
    </SynchronousCommand>
    <SynchronousCommand wcm:action="add">
     <Order>2</Order>
     <Description>Control Panel Icon Size</Description>
     <RequiresUserInput>false</RequiresUserInput>
     <CommandLine>reg add "HKEY_CURRENT_USER\Software\Microsoft\Windows\CurrentVersion\Explorer\ControlPanel" /v AllItemsIconView /t REG_DWORD /d 1 /f</CommandLine>
    </SynchronousCommand>
   </FirstLogonCommands>
   <TimeZone>Tokyo Standard Time</TimeZone>
  </component>
 </settings>

</unattend>

   <ImageInstall>
    <OSImage>
     <InstallFrom>
      <MetaData wcm:action="add">
       <Key>/IMAGE/NAME</Key>
       <Value>Windows 10 Pro</Value>
      </MetaData>
     </InstallFrom>
    </OSImage>
   </ImageInstall>


sc config AxInstSV start= demand

※ demandの前に半角の空白が必要です。
| 1 | Specifies the recommended level of protection for your computer. |
| 2 | Specifies that only updates are installed. |
| 3 | Specifies that automatic protection is disabled. |
for /f "delims=" %%a in (%windir%\Setup\Scripts\00_Service.dat) do (
  echo "%%a"
  echo "==== %%a" >> C:\TMP\Service.log
  sc config %%a start= disabled >> C:\TMP\Service.log
)
tiledatamodelsvc
AJRouter
ALG
AppMgmt
AppVClient
BDESVC
BthHFSrv
CDPSvc
CDPUserSvc
CDPUserSvc_2a560
CertPropSvc
CscService
DiagTrack
HomeGroupListener
HomeGroupProvider
HvHost
IpxlatCfgSvc
MSiSCSI
MapsBroker
MessagingService
MessagingService_2a560
NaturalAuthentication
NcbService
NcdAutoSetup
Netlogon
NfsClnt
OneSyncSvc
OneSyncSvc_2a560
PNRPsvc
p2psvc
p2pimsvc
PeerDistSvc
PhoneSvc
PimIndexMaintenanceSvc
PimIndexMaintenanceSvc_2a560
RasAuto
RasMan
RemoteAccess
RemoteRegistry
RetailDemo
RpcLocator
SCPolicySvc
SCardSvr
SEMgrSvc
SNMPTRAP
ScDeviceEnum
SensorDataService
SensorService
SensrSvc
SharedAccess
SmsRouter
SysMain
TabletInputService
Themes
UevAgentService
WFDSConSvc
WMPNetworkSvc
WbioSrvc
WebClient
Wecsvc
WerSvc
WinHttpAutoProxySvc
WinRM
WpnService
WpnUserService
WpnUserService_2a560
WwanSvc
XblAuthManager
XblGameSave
XboxGipSvc
XboxNetApiSvc
diagnosticshub.standardcollector.service
dmwappushsvc
icssvc
iphlpsvc
irmon
lfsvc
luafv
shpamsvc
tzautoupdate
vmicguestinterface
vmicheartbeat
vmickvpexchange
vmicrdv
vmicshutdown
vmictimesync
vmicvmsession
vmicvss
wcncsvc
wisvc
wlpasvc
wmiApSrv
xbgm
rem //======== PowerShell AppxProvisionedPackage
for /f "delims=" %%a in (%windir%\Setup\Scripts\AppxProvisionedPackage.dat) do (
  echo "%%a"
  echo "==== %%a" >> C:\TMP\RemoveAppxPackage.log
  powershell.exe -Command "Get-AppxPackage *%%a* | Remove-AppxPackage" >> C:\TMP\RemoveAppxPackage.log
  echo "==== %%a" >> C:\TMP\Remove.log
  powershell.exe -Command "Get-AppxProvisionedPackage -Online | Where PackageName -Like %%a* | Remove-AppxProvisionedPackage -Online" >> C:\TMP\RemoveAppxPackage.log
)

powershell.exe -Command "Get-AppxPackage | FindStr ""^PackageFullName""" >> C:\TMP\AppxPackage2.log
powershell.exe -Command "Get-AppxProvisionedPackage -Online | FindStr ""^PackageName""" >> C:\TMP\AppxProvisionedPackage2.log
CortanaListenUIApp*
KeeperSecurityInc.Keeper
Microsoft.3DBuilder
Microsoft.Bing*
Microsoft.BingNews
Microsoft.BingWeather
Microsoft.Getstarted
Microsoft.MSPaint
Microsoft.Messaging
Microsoft.Microsoft3DViewer
Microsoft.MicrosoftOfficeHub
Microsoft.MicrosoftSolitaireCollection
Microsoft.MicrosoftStickyNotes
Microsoft.Office.OneNote
Microsoft.OneConnect
Microsoft.People
Microsoft.SkypeApp
Microsoft.Windows.OOBE*
Microsoft.WindowsFeedbackHub
Microsoft.Xbox*
Microsoft.XboxApp
Microsoft.XboxGameOverlay
Microsoft.XboxIdentityProvider
Microsoft.XboxSpeechToTextOverlay
Microsoft.Zune*
Microsoft.ZuneMusic
Microsoft.ZuneVideo
NAVER.LINEwin8
echo //========
ECHO schtasks
echo //========
schtasks /create /tn "00_UAC_Disable" /tr %HOMEDRIVE%\Users\Public\Documents\uac_off.bat /sc ONCE /sd 2099/01/01 /st 00:00 /rl HIGHEST
schtasks /create /tn "00_UAC_Enable" /tr %HOMEDRIVE%\Users\Public\Documents\uac_default.bat /sc ONCE /sd 2099/01/01 /st 00:00 /rl HIGHEST
echo //========
echo Disable Spot Light Lock Screen Image
reg add "HKCU\Software\Microsoft\Windows\CurrentVersion\ContentDeliveryManager" /f /v "RotatingLockScreenEnabled" /t REG_DWORD /d "0"
reg add "HKCU\Software\Microsoft\Windows\CurrentVersion\ContentDeliveryManager" /f /v "RotatingLockScreenOverlayEnabled" /t REG_DWORD /d "0"

echo No Aero Shake
reg add "HKCU\Control Panel\Desktop" /v DockMoving /t REG_SZ /d "0" /f
reg add "HKCU\Control Panel\Desktop" /v SnapSizing /t REG_SZ /d "0" /f
reg add HKCU\Software\Policies\Microsoft\Windows\Explorer /v NoWindowMinimizingShortcuts /t REG_DWORD /d 1 /f

reg add "HKCU\Control Panel\Desktop" /v WindowArrangementActive /t REG_SZ /d "0" /f
reg add HKCU\Software\Microsoft\Windows\CurrentVersion\Explorer\Advanced /v JointResize /t REG_DWORD /d 0 /f
reg add HKCU\Software\Microsoft\Windows\CurrentVersion\Explorer\Advanced /v SnapAssist /t REG_DWORD /d 0 /f
reg add HKCU\Software\Microsoft\Windows\CurrentVersion\Explorer\Advanced /v SnapFill /t REG_DWORD /d 0 /f

echo Disable Windows Hint
echo Disable Action Center Notification
reg add HKCU\Software\Microsoft\Windows\CurrentVersion\ContentDeliveryManager /v SoftLandingEnabled /t REG_DWORD /d 0 /f

echo SystemPaneSuggestionsEnabled
echo Disable Sometime Display Revommended Application in Start Menu
reg add HKCU\Software\Microsoft\Windows\CurrentVersion\ContentDeliveryManager /v SystemPaneSuggestionsEnabled /t REG_DWORD /d 0 /f

echo Disable Hover Select Virtual Desktops
reg add "HKCU\Software\Microsoft\Windows\CurrentVersion\Explorer" /v HoverSelectDesktops /t REG_DWORD /d 0 /f

echo PaintDesktopVersion
reg add "HKCU\Control Panel\Desktop" /v PaintDesktopVersion /t REG_DWORD /d 1 /f

echo Display File Extention
reg add "HKCU\Software\Microsoft\Windows\CurrentVersion\Explorer\Advanced" /v "HideFileExt" /t REG_DWORD /d 0 /f

echo Disable Start Menu Transparent
reg add "HKCU\Software\Microsoft\Windows\CurrentVersion\Themes\Personalize" /v EnableTransparency /t REG_DWORD /d 0 /f
reg add "HKCU\Software\Microsoft\Windows\CurrentVersion\Themes\Personalize" /v EnableBlurBehind /t REG_DWORD /d 0 /f

echo Disable Start Menu Live Tile
reg add "HKCU\Software\Policies\Microsoft\Windows\CurrentVersion\PushNotifications" /v NoTileApplicationNotification /t REG_DWORD /d 1 /f


echo Clear Live Tile Cache
reg add "HKCU\Software\Microsoft\Windows\CurrentVersion\ImmersiveShell\StateStore" /V ResetCache /T REG_DWORD /D 1 /F
reg add "HKCU\Software\Microsoft\Windows\CurrentVersion\ImmersiveShell\StateStore" /V ResetCacheCount /T REG_DWORD /D 0 /F

echo Clear Tiles On Exit
reg add "HKCU\SOFTWARE\Policies\Microsoft\Windows\Explorer" /V ClearTilesOnExit /T REG_DWORD /D 1 /F


echo Disable Action Center
reg add "HKCU\Software\Policies\Microsoft\Windows\Explorer" /v "DisableNotificationCenter" /t REG_DWORD /d "1" /f


echo Disable Silent Installed Apps
reg add "HKCU\Software\Microsoft\CurrentVersion\ContentDeliveryManager\" /T REG_DWORD /V "PreInstalledAppsEnabled" /D 0 /F
reg add "HKCU\Software\Microsoft\CurrentVersion\ContentDeliveryManager\" /T REG_DWORD /V "SilentInstalledAppsEnabled" /D 0 /F

echo Disable Notifications Ads File Explorer
Reg Add "HKCU\Software\Microsoft\Windows\CurrentVersion\Explorer\Advanced\" /T REG_DWORD /V "ShowSyncProviderNotifications" /D 0 /F

echo Stop Installing Unwanted Apps
reg add "HKCU\Software\Microsoft\Windows\CurrentVersion\ContentDeliveryManager\" /T REG_DWORD /V "SystemPaneSuggestionsEnabled" /D 0 /F
reg add "HKCU\Software\Microsoft\CurrentVersion\ContentDeliveryManager\" /T REG_DWORD /V "ContentDeliveryAllowed" /D 0 /F

echo Turn Off Tip Trick and Suggestion Notifications
reg add "HKCU\Software\Microsoft\CurrentVersion\ContentDeliveryManager\" /T REG_DWORD /V "SoftLandingEnabled" /D 0 /F

echo Power Button Action Power OFF
reg add "HKCU\Software\Microsoft\Windows\CurrentVersion\Explorer\Advanced" /v Start_PowerButtonAction /t REG_DWORD /d 2 /f

echo .
reg add HKCU\Software\Microsoft\Windows\CurrentVersion\Explorer\CabinetState /v Settings /t REG_BINARY /d 0c0002000b01000060000000 /f
reg add HKCU\Software\Microsoft\Windows\CurrentVersion\Explorer\CabinetState /v FullPath /t REG_DWORD /d 1 /f

echo .
reg add HKCU\Software\Microsoft\Windows\CurrentVersion\PenWorkspace /v PenWorkspaceAppSuggestionsEnabled /t REG_DWORD /d 0 /f

echo Task Bar Not Combine
reg add "HKCU\Software\Microsoft\Windows\CurrentVersion\Explorer\Advanced" /v "TaskbarGlomLevel" /t REG_DWORD /d "2" /f

echo //========
echo Desktop Icon Computer
reg add HKCU\Software\Microsoft\Windows\CurrentVersion\Explorer\HideDesktopIcons\NewStartPanel /v "{20D04FE0-3AEA-1069-A2D8-08002B30309D}" /t REG_DWORD /d "0" /f
echo Desktop Icon User
reg add HKCU\Software\Microsoft\Windows\CurrentVersion\Explorer\HideDesktopIcons\NewStartPanel /v "{59031a47-3f72-44a7-89c5-5595fe6b30ee}" /t REG_DWORD /d "0" /f
echo Desktop Icon NetWork
reg add HKCU\Software\Microsoft\Windows\CurrentVersion\Explorer\HideDesktopIcons\NewStartPanel /v "{F02C1A0D-BE21-4350-88B0-7367FC96EF3C}" /t REG_DWORD /d "0" /f
echo Desktop Icon Control Panel
reg add HKCU\Software\Microsoft\Windows\CurrentVersion\Explorer\HideDesktopIcons\NewStartPanel /v "{5399E694-6CE5-4D6C-8FCE-1D8870FDCBA0}" /t REG_DWORD /d "0" /f
echo .NET Framework 3.5
start /wait dism.exe /online /enable-feature /featurename:NetFX3 /All /Source:%1:\sources\sxs /LimitAccess
echo Chrome
start /wait msiexec /i %1:\00_App\GoogleChromeStandaloneEnterprise64.msi /norestart
PauseKey 10 0
start /wait pnputil /add-driver "%1:\00_Drv\99_Other\*.inf" /subdirs /install
echo HKLM RunOnce
reg add HKLM\Software\Microsoft\Windows\CurrentVersion\RunOnce /v 00_Setup /t REG_SZ /d "%HOMEDRIVE%\Users\Public\Documents\00_Setup\00_Setup_1.bat %DVD_DRIVE%" /f
rem //========
rem Power Button
powercfg -setacvalueindex 8c5e7fda-e8bf-4a96-9a85-a6e23a8c635c 4f971e89-eebd-4455-a8de-9e59040e7347 7648efa3-dd9c-4e3e-b566-50f929386280 3
powercfg -setdcvalueindex 8c5e7fda-e8bf-4a96-9a85-a6e23a8c635c 4f971e89-eebd-4455-a8de-9e59040e7347 7648efa3-dd9c-4e3e-b566-50f929386280 3

rem Sleep Button
powercfg -setacvalueindex 8c5e7fda-e8bf-4a96-9a85-a6e23a8c635c 4f971e89-eebd-4455-a8de-9e59040e7347 96996bc0-ad50-47ec-923b-6f41874dd9eb 0
powercfg -setdcvalueindex 8c5e7fda-e8bf-4a96-9a85-a6e23a8c635c 4f971e89-eebd-4455-a8de-9e59040e7347 96996bc0-ad50-47ec-923b-6f41874dd9eb 0

rem Close
powercfg -setacvalueindex 8c5e7fda-e8bf-4a96-9a85-a6e23a8c635c 4f971e89-eebd-4455-a8de-9e59040e7347 5ca83367-6e45-459f-a27b-476b1d01c936 0
powercfg -setdcvalueindex 8c5e7fda-e8bf-4a96-9a85-a6e23a8c635c 4f971e89-eebd-4455-a8de-9e59040e7347 5ca83367-6e45-459f-a27b-476b1d01c936 0
rem //========
rem Disable Remote Assistance
rem https://technet.microsoft.com/en-us/library/ff715437.aspx
reg add "HKLM\System\CurrentControlSet\Control\Remote Assistance" /v fAllowToGetHelp /t REG_DWORD /d 1 /f

rem //========
rem Disable Remote Assistance
rem http://technet.microsoft.com/ja-jp/library/cc778860(WS.10).aspx
rem reg add "HKLM\System\CurrentControlSet\Control\Terminal Server" /v fDenyTSConnections /t REG_DWORD /d 0 /f

rem UserAuthentication
rem http://technet.microsoft.com/en-us/library/ff716065(WS.10).aspx


rem //========
rem Turn off Automatic App Update Windows 10 include Store Apps
rem Disable Automatic Download windows store application ex. Candy Crush Soda Saga and other shit app.
rem reg add HKLM\Software\Microsoft\Windows\CurrentVersion\WindowsStore\WindowsUpdate /v AutoDownload /t REG_DWORD /d 2 /f
reg add HKLM\SOFTWARE\Policies\Microsoft\WindowsStore /v AutoDownload /t REG_DWORD /d 2 /f

rem //========
rem Turn off Automatic App Update Windows 10 include Store Apps
reg add HKLM\SOFTWARE\Policies\Microsoft\WindowsInkWorkspace /v AllowWindowsInkWorkspace /t REG_DWORD /d 0 /f


rem https://support.microsoft.com/en-us/help/3135657/can-t-disable-windows-store-in-windows-10-pro-through-group-policy
reg add HKLM\Software\Microsoft\Windows\CurrentVersion\WindowsStore /v RemoveWindowsStore /t REG_DWORD /d 0 /f
reg add HKLM\Software\Microsoft\Windows\CurrentVersion\WindowsStore /v DisableStoreApps /t REG_DWORD /d 1 /f

rem //========
rem 拡張子を表示
rem [HKLM\Software\Microsoft\Windows\CurrentVersion\Explorer\Advanced]
rem "HideFileExt"=dword:00000000
rem Display File extension
reg add HKLM\Software\Microsoft\Windows\CurrentVersion\Explorer\Advanced /v HideFileExt /t REG_DWORD /d 0 /f


rem //========
rem Disable Consumer Experience
reg add HKLM\Software\Policies\Microsoft\Windows\CloudContent /v DisableWindowsConsumerFeatures /t REG_DWORD /d 1 /f

rem //========
rem Disable Cortana using Registry
reg add "HKLM\Software\Policies\Microsoft\Windows\Windows Search" /v AllowCortana /t REG_DWORD /d 0 /f

rem //========
rem Disable Cloud Content
reg add "HKLM\Software\Policies\Microsoft\Windows\CloudContent" /v DisableWindowsConsumerFeatures /t REG_DWORD /d 1 /f

rem //========
rem Delete User folder
rem Delete User folder - DeskTop
reg delete "HKLM\Software\Microsoft\Windows\CurrentVersion\Explorer\MyComputer\NameSpace\{B4BFCC3A-DB2C-424C-B029-7FE99A87C641}" /f
rem Delete User folder - Download
reg delete "HKLM\Software\Microsoft\Windows\CurrentVersion\Explorer\MyComputer\NameSpace\{088e3905-0323-4b02-9826-5d99428e115f}" /f
rem Delete User folder - Picture
reg delete "HKLM\Software\Microsoft\Windows\CurrentVersion\Explorer\MyComputer\NameSpace\{24ad3ad4-a569-4530-98e1-ab02f9417aa8}" /f
rem Delete User folder - Music
reg delete "HKLM\Software\Microsoft\Windows\CurrentVersion\Explorer\MyComputer\NameSpace\{3dfdf296-dbec-4fb4-81d1-6a3438bcf4de}" /f
rem Delete User folder - Docment
reg delete "HKLM\Software\Microsoft\Windows\CurrentVersion\Explorer\MyComputer\NameSpace\{d3162b92-9365-467a-956b-92703aca08af}" /f
rem Delete User folder - Video
reg delete "HKLM\Software\Microsoft\Windows\CurrentVersion\Explorer\MyComputer\NameSpace\{f86fa3ab-70d2-4fc7-9c99-fcbf05467f3a}" /f

rem //========
rem Old Volume Control
reg add "HKLM\Software\Microsoft\Windows NT\CurrentVersion\MTCUVC" /v EnableMtcUvc /t REG_DWORD /d 0 /f

rem //========
rem Old Paint
reg add "HKLM\Software\Microsoft\Windows\CurrentVersion\Applets\Paint\Settings" /v DisableModernPaintBootstrap /t REG_DWORD /d 0 /f


rem //========
rem Disable Cortana using Registry
reg add "HKLM\Software\Policies\Microsoft\Windows\Windows Search" /v AllowCortana /t REG_DWORD /d 0 /f

rem //======== Device Cast
reg add "HKLM\Software\Microsoft\Windows\CurrentVersion\Shell Extensions\Blocked" /v {7AD84985-87B4-4a16-BE58-8B72A5B390F7} /t REG_SZ /f

rem //========
rem Hide Windows Insider
reg add "HKLM\Software\Microsoft\WindowsSelfHost\UI\Visibility" /v HideInsiderPage /t REG_DWORD /d 1 /f


rem https://docs.microsoft.com/ja-jp/windows/deployment/update/waas-configure-wufb
rem schtasks /Change /TN "Microsoft\Windows\Device Setup\Metadata Refresh" /Disable
rem reg add "HKLM\Software\Microsoft\Windows\CurrentVersion\Device Metadata" /v "PreventDeviceMetadataFromNetwork" /t REG_DWORD /d "1" /f
rem reg add "HKLM\Software\Microsoft\Windows\CurrentVersion\DriverSearching" /v "SearchOrderConfig" /t REG_DWORD /d "0" /f
rem reg add "HKLM\Software\Policies\Microsoft\Windows\WindowsUpdate" /v "ExcludeWUDriversInQualityUpdate" /t REG_DWORD /d "1" /f

rem //========
rem Hide IsoFile burn Context Menu ProgrammaticAccessOnly
reg add "HKCR\Windows.IsoFile\shell\burn" /v ProgrammaticAccessOnly /t REG_SZ /f

rem //========
rem DisableWindowsConsumerFeatures
rem Consumer Experienceの無効化
rem https://blogs.msdn.microsoft.com/mdtjp/2016/07/04/windows-10-os-%E5%B1%95%E9%96%8B%E3%81%AE%E6%B3%A8%E6%84%8F%E7%82%B9/
reg add HKLM\Software\Policies\Microsoft\Windows\CloudContent /v DisableWindowsConsumerFeatures /t REG_DWORD /d 1 /f


rem //========
rem Disable Spot Light Lock Screen Image
reg add "HKLM\Software\Policies\Microsoft\Windows\Personalization" /v "LockScreenImage" /t REG_SZ /d "" /f
rem Disable Spot Light Hint
reg add "HKLM\Software\Policies\Microsoft\Windows\Personalization" /v "LockScreenOverlaysDisabled" /t REG_DWORD /d "1" /f


rem //========
rem Disable Automatic Restarts When Windows Crashes
reg add HKLM\SYSTEM\CurrentControlSet\Control\CrashControl /v AutoReboot /t REG_DWORD /d 0 /f


rem //========
rem LargeSystemCache ?
rem DisablePagingExecutive ?
rem Disable Paging Execute Kernel
rem https://technet.microsoft.com/ja-jp/library/cc959492.aspx
rem reg add "HKLM\Software\CurrentControlSet\Control\Session Manager\Memory Management\" /T REG_DWORD /V "DisablePagingExecutive" /D 1 /F

rem //========
rem Disable Superfetch Prefetch
reg add "HKLM\SYSTEM\CurrentControlSet\Control\SessionManager\Memory Management\PrefetchParameters" /v EnablePrefetcher /t REG_DWORD /d 0 /f
reg add "HKLM\SYSTEM\CurrentControlSet\Control\SessionManager\Memory Management\PrefetchParameters" /v EnableSuperfetch /t REG_DWORD /d 0 /f


rem //========
rem Hide Lock option
reg add "HKLM\SOFTWARE\Microsoft\Windows\CurrentVersion\Explorer\FlyoutMenuSettings" /v "ShowLockOption" /t REG_DWORD /d "0" /f

rem Hide Hibernate option
reg add "HKLM\SOFTWARE\Microsoft\Windows\CurrentVersion\Explorer\FlyoutMenuSettings" /v "ShowHibernateOption" /t REG_DWORD /d "0" /f

rem Hide Sleep option
reg add "HKLM\SOFTWARE\Microsoft\Windows\CurrentVersion\Explorer\FlyoutMenuSettings" /v "ShowSleepOption" /t REG_DWORD /d "0" /f
reg add hklm\system\currentcontrolset\services\tcpip6\parameters /v DisabledComponents /t REG_DWORD /d 0xFF
rem Windows Updateサービスを無効化する。
net stop wuauserv
sc config wuauserv start= disabled

※ disabledの前に半角の空白が必要です。
rem Windows Updateサービスを有効化する。
sc config wuauserv start= delayed-auto
| start=に指定する値 | 設定の意味 |
| auto | 自動 |
| demand | 手動 |
| disabled | 無効 |
| delayed-auto | 自動(遅延実行) |
reg add “HKEY_LOCAL_MACHINE\SOFTWARE\Policies\Microsoft\Windows\WindowsUpdate\AU” /v “NoAutoUpdate” /d “1” /t REG_DWORD /f
rem Windows Defenderのパターンファイルを最新に更新します。
"C:\Program Files\Windows Defender\MpCmdRun.exe" -SignatureUpdate
schtasks /Create /TN "MpCmdRun_Weekly" /TR "\"%ProgramFiles%\Windows Defender\MpCmdRun.exe\" -SignatureUpdate" /SC WEEKLY /MO 1 /D WED /ST 12:00
reg add "HKEY_LOCAL_MACHINE\SOFTWARE\Microsoft\Windows\CurrentVersion\Run" /v "MpCmdRun" /t REG_SZ /d "\"C:\Program Files\Windows Defender\MpCmdRun.exe\" -SignatureUpdate" /f
Windows Registry Editor Version 5.00

[HKEY_LOCAL_MACHINE\SOFTWARE\Microsoft\Windows\CurrentVersion\Run]
"MpCmdRun"="\"C:\\Program Files\\Windows Defender\\MpCmdRun.exe\" -SignatureUpdate"
rem Windows 10 Professional
cscript "%windir%\system32\slmgr.vbs" /ipk VK7JG-NPHTM-C97JM-9MPGT-3V66T
pnputil /add-driver "X:Driver\Hogehoge\*.inf" /subdirs /install

 コマンドの指定方法が、
pnputil -a
 から
pnputil /add-driver
 に変更になりました。
rem 実行しているパソコンの機種が VOYO V1かを判定して分岐する方法
Systeminfo | findstr /C:"YJKC Corporation"
if %ERRORLEVEL%==1 goto not_VOYO_V1

echo VOYO V1です。 is VOYO V1

~~ ここで VOYO V1独自の設定内容を行なう。 ~~

echo コンピューター名をコマンドラインで設定する方法
wmic computersystem where name="%computername%" call rename name="VOYO V1"

echo デバイスドライバをコマンドラインで設定する方法 Pnputilコマンド
start /wait pnputil /add-driver "X:Driver\VOYO_V1\*.inf" /subdirs /install

goto SKIP

:not_VOYO_V1
echo VOYO V1では有りません。 not VOYO V1

:SKIP
rem 実行しているパソコンの機種が Morefine M1sかを判定して分岐する方法
Systeminfo | findstr /C:"win element"
if %ERRORLEVEL%==1 goto not_Morefine_M1s

echo Morefine M1sです。 is Morefine M1s

~~ ここで Morefine M1s独自の設定内容を行なう。 ~~

echo コンピューター名をコマンドラインで設定する方法
wmic computersystem where name="%computername%" call rename name="Morefine M1s"

echo デバイスドライバをコマンドラインで設定する方法 Pnputilコマンド
start /wait pnputil /add-driver "X:Driver\Morefine_M1s\*.inf" /subdirs /install

goto SKIP

:not_Morefine_M1s
echo Morefine M1sでは有りません。 not Morefine M1s

:SKIP
reg add "HKLM\SYSTEM\CurrentControlSet\Control\Lsa" /v "LimitBlankPasswordUse" /t REG_DWORD /d 0x00000000 /f
# Backup Device Driver Windows 10
mkdir C:\MyDrivers
dism /online /export-driver /destination:C:\MyDrivers

# Restore Device Driver Windows 10
dism /online /Add-Driver /Driver:C:\MyDrivers /Recurse
| \sources\$OEM$\$$\Setup\Scripts | %WinDir%\Setup\Scripts C:\Windows\Setup\Scripts |
| \sources\$OEM$\$1 | C: |
| \sources\$OEM$\$2 | D: |
| \sources\$OEM$\$3 | E: |
| \sources\$OEM$\$Docs | C:\Users |
C:\Windows\system32> DISM /online /get-features /format:table | find "SMB"
SMB1Protocol                                          | 無効
SMB1Protocol-Client                                   | 無効
SMB1Protocol-Server                                   | 無効
C:\Windows\system32> DISM /online /enable-feature /featurename:SMB1Protocol

展開イメージのサービスと管理ツール
バージョン: 10.0.17134.1

イメージのバージョン: 10.0.17134.1

機能を有効にしています
[==========================100.0%==========================]
操作は正常に完了しました。
Windows を再起動してこの操作を完了してください。
今すぐコンピューターを再起動しますか? (Y/N) N
C:\Windows\system32> DISM /Online /Enable-Feature /FeatureName:SMB1Protocol /NoRestart

展開イメージのサービスと管理ツール
バージョン: 10.0.17134.1

イメージのバージョン: 10.0.17134.1

機能を有効にしています
[==========================100.0%==========================]
操作は正常に完了しました。
C:\Windows\system32> DISM /online /get-features /format:table

展開イメージのサービスと管理ツール
バージョン: 10.0.17134.1

イメージのバージョン: 10.0.17134.1

パッケージの機能の一覧 : Microsoft-Windows-Foundation-Package~31bf3856ad364e35~amd64~~10.0.17134.1

----------------------------------------------------- | --
機能名                                                   | 状態
----------------------------------------------------- | --
LegacyComponents                                      | 無効
DirectPlay                                            | 無効
SimpleTCP                                             | 無効
SNMP                                                  | 無効
WMISnmpProvider                                       | 無効
MicrosoftWindowsPowerShellV2Root                      | 有効
MicrosoftWindowsPowerShellV2                          | 有効
Windows-Identity-Foundation                           | 無効
Microsoft-Windows-Subsystem-Linux                     | 無効
HypervisorPlatform                                    | 無効
Client-ProjFS                                         | 無効
WorkFolders-Client                                    | 有効
MediaPlayback                                         | 有効
WindowsMediaPlayer                                    | 有効
NetFx3                                                | 有効
IIS-WebServerRole                                     | 無効
IIS-WebServer                                         | 無効
IIS-CommonHttpFeatures                                | 無効
IIS-HttpErrors                                        | 無効
IIS-HttpRedirect                                      | 無効
IIS-ApplicationDevelopment                            | 無効
IIS-NetFxExtensibility                                | 無効
IIS-NetFxExtensibility45                              | 無効
IIS-HealthAndDiagnostics                              | 無効
IIS-HttpLogging                                       | 無効
IIS-LoggingLibraries                                  | 無効
IIS-RequestMonitor                                    | 無効
IIS-HttpTracing                                       | 無効
IIS-Security                                          | 無効
IIS-URLAuthorization                                  | 無効
IIS-RequestFiltering                                  | 無効
IIS-IPSecurity                                        | 無効
IIS-Performance                                       | 無効
IIS-HttpCompressionDynamic                            | 無効
IIS-WebServerManagementTools                          | 無効
IIS-ManagementScriptingTools                          | 無効
IIS-IIS6ManagementCompatibility                       | 無効
IIS-Metabase                                          | 無効
WAS-WindowsActivationService                          | 無効
WAS-ProcessModel                                      | 無効
WAS-NetFxEnvironment                                  | 無効
WAS-ConfigurationAPI                                  | 無効
IIS-HostableWebCore                                   | 無効
WCF-HTTP-Activation                                   | 無効
WCF-NonHTTP-Activation                                | 無効
WCF-Services45                                        | 有効
WCF-HTTP-Activation45                                 | 無効
WCF-TCP-Activation45                                  | 無効
WCF-Pipe-Activation45                                 | 無効
WCF-MSMQ-Activation45                                 | 無効
WCF-TCP-PortSharing45                                 | 有効
IIS-StaticContent                                     | 無効
IIS-DefaultDocument                                   | 無効
IIS-DirectoryBrowsing                                 | 無効
IIS-WebDAV                                            | 無効
IIS-WebSockets                                        | 無効
IIS-ApplicationInit                                   | 無効
IIS-ASPNET                                            | 無効
IIS-ASPNET45                                          | 無効
IIS-ASP                                               | 無効
IIS-CGI                                               | 無効
IIS-ISAPIExtensions                                   | 無効
IIS-ISAPIFilter                                       | 無効
IIS-ServerSideIncludes                                | 無効
IIS-CustomLogging                                     | 無効
IIS-BasicAuthentication                               | 無効
IIS-HttpCompressionStatic                             | 無効
IIS-ManagementConsole                                 | 無効
IIS-ManagementService                                 | 無効
IIS-WMICompatibility                                  | 無効
IIS-LegacyScripts                                     | 無効
IIS-LegacySnapIn                                      | 無効
IIS-FTPServer                                         | 無効
IIS-FTPSvc                                            | 無効
IIS-FTPExtensibility                                  | 無効
MSMQ-Container                                        | 無効
MSMQ-Server                                           | 無効
 ~~~ 略 ~~~
MultiPoint-Connector                                  | 無効
MultiPoint-Connector-Services                         | 無効
MultiPoint-Tools                                      | 無効
AppServerClient                                       | 無効
Internet-Explorer-Optional-amd64                      | 有効

操作は正常に完了しました。
C:\Windows\system32> DISM /online /get-featureinfo /featurename:SMB1Protocol

展開イメージのサービスと管理ツール
バージョン: 10.0.17134.1

イメージのバージョン: 10.0.17134.1

機能情報:

機能名 : SMB1Protocol
表示名 : SMB 1.0/CIFS ファイル共有のサポート
説明 : SMB 1.0/CIFS ファイル共有プロトコルと、コンピューター ブラウザー プロトコルのサポート。
再起動が必要 : Possible
状態 : 無効

カスタム プロパティ:

ServerComponent\Description : SMB 1.0/CIFS ファイル共有プロトコルと、コンピュー ター ブラウザー プロトコルのサポート。
ServerComponent\DisplayName : SMB 1.0/CIFS ファイル共有のサポート
ServerComponent\Id : 487
ServerComponent\Type : Feature
ServerComponent\UniqueName : FS-SMB1
ServerComponent\Deploys\Update\Name : SMB1Protocol

操作は正常に完了しました。
C:\Windows\system32> DISM /?

展開イメージのサービスと管理ツール
バージョン: 10.0.17134.1

DISM.exe [dism_options] {Imaging_command} [<イメージング引数>]
DISM.exe {/Image:<オフライン イメージのパス> | /Online} [dism_options]
         {servicing_command} [<サービス引数>]

説明:

  DISM は、Windows イメージの機能とパッケージを列挙、インストール、
  アンインストール、構成、および更新します。使用できるコマンドは、サービス
  するイメージによって、またイメージがオフラインか実行中かによって異なります。


汎用イメージング コマンド:

  /Split-Image            - 既存の .wim ファイルを複数の読み取り専用の
                            分割 WIM (SWM) ファイルに分割します。
  /Apply-Image            - イメージを適用します。
  /Get-MountedImageInfo   - マウントされた WIM および VHD イメージに関する
                            情報を表示します。
  /Get-ImageInfo          - WIM、VHD、または FFU ファイル内のイメージに関する情 報を
                            表示します。
  /Commit-Image           - マウントされた WIM または VHD イメージへの変更を
                            保存します。
  /Unmount-Image          - マウントされた WIM または VHD イメージのマウントを
                            解除します。
  /Mount-Image            - WIM または VHD ファイルからイメージをマウント
                            します。
  /Remount-Image          - 孤立したイメージ マウント ディレクトリを回復します。
  /Cleanup-Mountpoints    - マウント済みの破損したイメージに関連付けられ
                            ているリソースを削除します。

WIM コマンド:

  /Apply-CustomDataImage  - カスタム データ イメージに含まれているファイルを退避します。
  /Capture-CustomImage    - カスタマイズを WIMBoot システム上のデルタ WIM
                            ファイルにキャプチャします。キャプチャされる
                            ディレクトリには、すべてのサブフォルダーとデータが
                            含まれます。
  /Get-WIMBootEntry       - 指定したディスク ボリュームの
                            WIMBoot 構成エントリを表示します。
  /Update-WIMBootEntry    - 指定したディスク ボリュームの
                            WIMBoot 構成エントリを更新します。
  /List-Image             - 指定したイメージ内のファイルとフォルダーの一覧を
                            表示します。
  /Delete-Image           - 指定したボリューム イメージを、複数のボリューム
                            イメージがある WIM ファイルから削除します。
  /Export-Image           - 指定したイメージのコピーを別のファイルにエクスポートします。
  /Append-Image           - 別のイメージを WIM ファイルに追加します。
  /Capture-Image          - ドライブのイメージを新しい WIM ファイルに
                            キャプチャします。
                            キャプチャされるディレクトリには、すべての
                            サブフォルダーとデータが含まれます。
  /Get-MountedWimInfo     - マウントされた WIM イメージに関する情報を表示します
  /Get-WimInfo            - WIM ファイル内のイメージに関する情報を表示します。
  /Commit-Wim             - マウントされた WIM イメージへの変更を保存します。
  /Unmount-Wim            - マウントされた WIM イメージのマウントを解除します。
  /Mount-Wim              - WIM ファイルからイメージをマウントします。
  /Remount-Wim            - 孤立した WIM マウント ディレクトリを回復します。
  /Cleanup-Wim            - マウント済みの破損した WIM イメージに関連付けられ
                            ているリソースを削除します。

FFU COMMANDS:

  /Capture-Ffu            - Captures a physical disk image into a new FFU file.
  /Apply-Ffu              - Applies an .ffu image.
  /Split-Ffu              - Splits an existing .ffu file into multiple read-only
                            split FFU files.

イメージの指定:

  /Online                 - 実行中のオペレーティング システムをターゲットに
                            します。
  /Image                  - オフライン Windows イメージのルート ディレクトリ
                            へのパスを指定します。

DISM オプション:

  /English                - コマンド ライン出力を英語で表示します。
  /Format                 - レポートの出力形式を指定します。
  /WinDir                 - Windows ディレクトリへのパスを指定します。
  /SysDriveDir            - BootMgr という名前のシステム ローダー ファイルへの
                            パスを指定します。
  /LogPath                - ログ ファイルのパスを指定します。
  /LogLevel               - ログに表示する出力レベルを指定します (1-4)。
  /NoRestart              - 自動再起動と再起動の確認要求を抑制します。
  /Quiet                  - エラー メッセージを除き、すべての出力を抑制します。
  /ScratchDir             - スクラッチ ディレクトリへのパスを指定します。

これらの DISM オプションおよびその引数の詳細については、オプションの
直後に /? を指定してください。

  例:
    DISM.exe /Mount-Wim /?
    DISM.exe /ScratchDir /?
    DISM.exe /Image:C:\test\offline /?
    DISM.exe /Online /?
C:\Windows\system32> DISM /online /enable-feature /?

展開イメージのサービスと管理ツール
バージョン: 10.0.17134.1

イメージのバージョン: 10.0.17134.1

/Enable-Feature /FeatureName:<イメージ内の名前>
  [/PackageName:<イメージ内の名前>]
  [/Source:<ソース>] [/LimitAccess] [/All]

  FeatureName コマンド引数で指定された機能を有効にします。
  Windows Foundation パッケージの場合は /PackageName を指定する必要は
  ありません。
  それ以外の場合、/PackageName を使用して機能の親パッケージを指定します。

  機能が同じ親パッケージ内のコンポーネントの場合、複数の引数 /FeatureName を
  使用できます。

  以前イメージから削除した機能を復元して有効にできます。引数 /Source を使用し、
  機能を復元するために必要なファイルの場所を指定します。複数の引数 /Source
  を使用できます。
  DISM が WU/WSUS にアクセスできないようにするには、/LimitAccess を使用し
  ます。
  指定する機能のすべての親機能を有効にするには、/All を使用します。

    例:
      DISM.exe /Online /Enable-Feature /FeatureName:Hearts /All

      DISM.exe /Image:c:\offline /Enable-Feature /FeatureName:Calc
        /PackageName:Microsoft.Windows.Calc.Demo~6595b6144ccf1df~x86~en~1.0.0.0

      DISM.exe /Image:c:\offline /Enable-Feature /FeatureName:Feature
        /Source:c:\test\mount
C:\Windows\system32> DISM /online /?

展開イメージのサービスと管理ツール
バージョン: 10.0.17134.1

イメージのバージョン: 10.0.17134.1

イメージをサービスするために使用できるコマンド:

OS UNINSTALL SERVICING COMMANDS:

  /Set-OSUninstallWindow  - Sets the OS Uninstall Window.
  /Get-OSUninstallWindow  - Gets the OS Uninstall Window.
  /Remove-OSUninstall     - Remove the OS Uninstall.
  /Initiate-OSUninstall   - Initiates the OS Uninstall

Windows エディション サービス コマンド:

  /Optimize-Image         - 指定した構成をオフライン イメージに対して実行し
                            ます。
  /Set-ProductKey         - オフライン イメージのプロダクト キーを設定します。
  /Get-TargetEditions     - イメージのアップグレード先として指定可能な Windows
                            エディションの一覧を表示します。
  /Get-CurrentEdition     - 現在のイメージのエディションを表示します。
  /Set-Edition            - イメージを上位のエディションにアップグレードします。

既定の関連付けコマンド:

  /Remove-DefaultAppAssociations - 既定のアプリケーションの関連付けを
                            Windows イメージから削除します。
  /Import-DefaultAppAssociations - 一連の既定のアプリケーションの関連付けを
                            Windows イメージにインポートします。
  /Get-DefaultAppAssociations - Windows イメージから既定のアプリケーション
                            の関連付けの一覧を表示します。
  /Export-DefaultAppAssociations - 既定のアプリケーションの関連付けを、実行中の
                            オペレーティング システムからエクスポートします。

PROVISIONING PACKAGE SERVICING COMMANDS:

  /Get-ProvisioningPackageInfo - Gets the information of provisioning package.
  /Add-ProvisioningPackage - Adds provisioning package.

APPX サービス コマンド:

  /Optimize-ProvisionedAppxPackages - appx パッケージ全体で同一ファイルをハード リンクすることによって、
                            プロビジョニングされた appx のフットプリントを最適化します。
  /Set-ProvisionedAppxDataFile - 指定したアプリ パッケージ (.appx または
                            .appxbundle) にカスタム データを配置します。指定
                            したアプリケーション パッケージは既にイメージ内に
                            ある必要があります。
  /Remove-ProvisionedAppxPackage - イメージからアプリ パッケージ (.appx または
                            .appxbundle) を削除します。新しいユーザー
                            アカウントが作成されても、アプリ パッケージは
                            インストールされません。
  /Add-ProvisionedAppxPackage - イメージにアプリ パッケージ (.appx または
                            .appxbundle) を追加し、新しいユーザーごとに
                            インストールするように設定します。
  /Get-ProvisionedAppxPackages - 新しいユーザーごとにインストールするように
                            設定されている、イメージ内のアプリ パッケージ
                            (.appx または .appxbundle) についての情報を
                            表示します。

無人セットアップ サービス コマンド:

  /Apply-Unattend         - 無人セットアップ ファイルをイメージに適用します。

ドライバー サービス コマンド:

  /Remove-Driver          - オフライン イメージからドライバー パッケージを
                            削除します。
  /Add-Driver             - オフライン イメージにドライバー パッケージを
                            追加します。
  /Get-DriverInfo         - オフライン イメージまたは実行中のオペレーティング
                            システムの特定のドライバーに関する情報を
                            表示します。
  /Get-Drivers            - オフライン イメージまたは実行中のオペレーティング
                            システムのすべてのドライバーに関する情報を
                            表示します。
  /Export-Driver          - オフライン イメージまたは実行中のオペレーティング
                            システムから、すべてのサード パーティ ドライバーを
                            エクスポートします。

地域と言語サービス コマンド:

  /Set-LayeredDriver      - キーボード レイヤード ドライバーを設定します。
  /Set-UILang             - マウントされたオフライン イメージで使用する既定の
                            システム UI 言語を設定します。
  /Set-UILangFallback     - マウントされたオフライン イメージのシステム UI の、
                            既定のフォールバック言語を設定します。
  /Set-UserLocale         - マウントされたオフライン イメージのユーザー ロケー
                            ルを設定します。
  /Set-SysLocale          - Unicode 対応ではないプログラム (システム ロケール
                            とも呼ばれる) の言語およびマウントされた
                            オフライン イメージのフォント設定を設定します。
  /Set-InputLocale        - マウントされたオフライン イメージで使用する入力
                             ロケールとキーボード レイアウトを設定します。
  /Set-TimeZone           - マウントされたオフライン イメージの既定のタイム
                            ゾーンを設定します。
  /Set-AllIntl            - マウントされたオフライン イメージのすべての地域と
                            言語の設定を設定します。
  /Set-SKUIntlDefaults    - マウントされたオフライン イメージに指定された
                            エディション言語のすべての地域と言語の設定を
                            既定値に設定します。
  /Gen-LangIni            - 新しい lang.ini ファイルを生成します。
  /Set-SetupUILang        - セットアップで使用する既定の言語を定義します。
  /Get-Intl               - 地域と言語の設定に関する情報を表示します。

アプリケーション サービス コマンド:

  /Check-AppPatch         - マウントされたイメージに MSP 更新プログラムが適用
                            されるかどうかについての情報を表示します。
  /Get-AppPatchInfo       - インストール済みの MSP 更新プログラムに関する情報を
                            表示します。
  /Get-AppPatches         - インストールされているすべてのアプリケーションの
                            すべての適用済み MSP更新プログラムに関する
                            情報を表示します。
  /Get-AppInfo            - インストールされている特定の MSI アプリケーションに
                            関する情報を表示します。
  /Get-Apps               - インストールされているすべての MSI アプリケーション
                            に関する情報を表示します。

パッケージ サービス コマンド:

  /Add-Package            - パッケージをイメージに追加します。
  /Remove-Package         - パッケージをイメージから削除します。
  /Enable-Feature         - イメージ内の特定の機能を有効にします。
  /Disable-Feature        - イメージ内の特定の機能を無効にします。
  /Get-Packages           - イメージ内のすべてのパッケージに関する情報を
                            表示します。
  /Get-PackageInfo        - 特定のパッケージに関する情報を表示します。
  /Get-Features           - パッケージ内のすべての機能に関する情報を
                            表示します。
  /Get-FeatureInfo        - 特定の機能に関する情報を表示します。
  /Cleanup-Image          - イメージに対してクリーンアップおよび回復の操作を
                            実行します。
  /Export-Source (ソースのエクスポート) - 新しいリポジトリに機能の設定をエクスポートします。
  /Add-Capability         - 1 つ以上の機能をイメージに追加します。
  /Remove-Capability      - 1 つのイメージから機能を削除します。
  /Get-Capabilities       - イメージ内の機能を取得します。
  /Get-CapabilityInfo     - イメージ内の機能の情報を取得します。

これらのサービス コマンドとその引数の詳細については、コマンドの
直後に /? を指定してください。

     例:
         DISM.exe /Image:C:\test\offline /Apply-Unattend /?
         DISM.exe /Image:C:\test\offline /Get-Features /?
         DISM.exe /Online /Get-Drivers /?
Windows Registry Editor Version 5.00

Windows オペレーティング システムのコンポーネントから Microsoft サービスへの接続の管理


; Windows オペレーティング システムのコンポーネントから Microsoft サービスへの接続の管理
; フィードバックと診断
; 「フィードバックを求められる頻度」をしない(完全にオフにする)
[HKEY_CURRENT_USER\Software\Microsoft\Siuf\Rules]
"NumberOfSIUFInPeriod"=dword:00000000
"PeriodInNanoSeconds"=dword:00000000

Windows 10 更新プログラムの配信の最適化の構成


; Windows 10 更新プログラムの配信の最適化の構成
; 「複数の場所から更新する」を無効化
[HKEY_LOCAL_MACHINE\SOFTWARE\Policies\Microsoft\Windows\DeliveryOptimization]
"DODownloadMode"=dword:00000000
Windows Registry Editor Version 5.00

[HKEY_CURRENT_USER\Software\Microsoft\Siuf\Rules]
"NumberOfSIUFInPeriod"=dword:00000000
Windows Registry Editor Version 5.00

[HKEY_CURRENT_USER\Software\Microsoft\Windows\CurrentVersion\Policies\Explorer]
"NoCDBurning"=dword:00000001
"NoDrivesInSendToMenu"=dword:00000001
"NoStrCmpLogical"=dword:00000001
"%ProgramFiles%\Windows Defender\MpCmdRun.exe"
PowerShell
Add-MpPreference -ExclusionExtension ".test"
 拡張子の指定は先頭にドットが必要!
rem 指定のディレクトリ(サブディレクトリも含む)を Windows Defenderの除外設定する方法
PowerShell -inputformat none -outputformat none -NonInteractive -Command Add-MpPreference -ExclusionPath "C:\Hoge\Fuga\Path"

rem Windows Defenderのディレクトリの除外設定を確認する方法
PowerShell -inputformat none -outputformat text -NonInteractive -Command Get-MpPreference

rem 指定の拡張子を Windows Defenderの除外設定する方法
PowerShell -inputformat none -outputformat none -NonInteractive -Command Add-MpPreference -ExclusionPath "C:\Hoge\Fuga\Path"

rem 指定のディレクトリ(サブディレクトリも含む)を Windows Defenderの除外設定する方法
PowerShell -Command Add-MpPreference -ExclusionPath "C:\tmp"

rem 指定のプロセスを Windows Defenderの除外設定する方法
PowerShell -Command Add-MpPreference -ExclusionProcess "java.exe"

rem 空白を含む場合の書き方
PowerShell -Command "Add-MpPreference -ExclusionProcess 'C:\H O G E\F U G A\some.exe'"

rem 指定の拡張子を Windows Defenderの除外設定する方法
PowerShell -Command Add-MpPreference -ExclusionExtension ".java"

rem 指定の拡張子を Windows Defenderの除外設定を削除する方法
PowerShell -Command Remove-MpPreference -ExclusionExtension ".java"
rem Android Studioでのビルドの高速化(AndroidStudioの生成ファイルをスキャンから除外)
rem AndroidStudioの実行ファイルのフルパスを指定する
PowerShell -Command Add-MpPreference -ExclusionProcess "{\android-studio\bin\studio64.exeのフルパス}"

PowerShell -Command Add-MpPreference -ExclusionProcess "{java.exeのフルパス}"
PowerShell -Command Add-MpPreference -ExclusionProcess "{javac.exeのフルパス}"

rem Android Studioでのビルドの高速化(ビルドの中間生成ファイルをスキャンから除外)
PowerShell -Command Add-MpPreference -ExclusionExtension ".dex"
PowerShell -Command Add-MpPreference -ExclusionExtension ".class"
PowerShell -Command Add-MpPreference -ExclusionExtension ".xml"

rem この様なワイルドカード指定が有効化は未確認
PowerShell -Command Add-MpPreference -ExclusionPath "*\build"
PowerShell -Command Add-MpPreference -ExclusionPath "*\.git"
Win + Rキーの操作をして、「ファイル名を指定して実行」に下記を入力する。
shell:startup

下記と同じ
"C:\Users\{ユーザー名}\AppData\Roaming\Microsoft\Windows\Start Menu\Programs\Startup"

環境変数の場合は
echo %AppData%
C:\Users\{ユーザー名}\AppData\Roaming
なので、下記の様になる
"%AppData%\Microsoft\Windows\Start Menu\Programs\Startup"
rem Windows 10 の consent.exeのテレメトリのスパイ通信をブロックする
netsh advfirewall firewall add rule action=block dir=out name="consent.exe" program="%SystemRoot%\System32\consent.exe" enable=yes
rem 特定のプログラムの受信の通信を全部ブロックする方法
netsh advfirewall firewall add rule name="My Application" dir=in action=block program="C:\MyApp\MyApp.exe" enable=yes

rem 特定のプログラムの送信の通信を全部ブロックする方法
netsh advfirewall firewall add rule name="My Application" dir=out action=block program="C:\MyApp\MyApp.exe" enable=yes

許可の場合は action=allow
下記のホストの HTTP通信(ポート 80と 443)を遮断します。
tile-service.weather.microsoft.com
blob.weather.microsoft.com
cy2.vortex.data.microsoft.com.akadns.net
v10.vortex-win.data.microsoft.com
watson.telemetry.microsoft.com
modern.watson.data.microsoft.com.akadns.net
新しいユーザー アカウントに対してアプリを削除します。
管理者特権でのコマンド プロンプトで、次の Windows PowerShell コマンドを実行します:
Get-AppxProvisionedPackage -Online | Where-Object {$_.PackageName -Like "Microsoft.BingWeather"} | ForEach-Object { Remove-AppxProvisionedPackage -Online -PackageName $_.PackageName}

および
現在のユーザーのアプリを削除します。
管理者特権のコマンド プロンプトから、次の Windows PowerShell コマンドを実行します:
Get-AppxPackage Microsoft.BingWeather | Remove-AppxPackage
sc stop DisplayEnhancementService
sc config DisplayEnhancementService start= disabled

sc stop speicssvcctrum
sc config speicssvcctrum start= disabled

sc stop spectWwanSvcrum
sc config WwanSvc start= disabled

sc stop spectrum
sc config spectrum start= disabled

sc stop SharedRealitySvc
sc config SharedRealitySvc start= disabled

sc stop VacSvc
sc config VacSvc start= disabled

sc stop perceptionsimulation
sc config perceptionsimulation start= disabled
BcastDVRUserService
BcastDVRUserService_12345
GameDVR とブロードキャスト ユーザー サービス_12345
C:\Windows\system32\svchost.exe -k BcastDVRUserService
※ この末尾に数字系のサービスは停止しても勝手に復活する(ホストの同期_12345 とか)

DisplayEnhancementService
ディスプレイ拡張サービス
輝度制御などのディスプレイ拡張を管理するためのサービス。
C:\Windows\system32\svchost.exe -k LocalSystemNetworkRestricted -p

携帯データ接続は使用しない!
icssvc
Windows モバイル ホットスポット サービス
携帯データ接続を別のデバイスと共有する機能を提供します。
C:\Windows\system32\svchost.exe -k LocalServiceNetworkRestricted -p

WwanSvc
WWAN AutoConfig
このサービスは、モバイル ブロードバンド (GSM と CDMA) データ カードまたは埋め込みモジュール アダプターと接続を、ネットワークを自動的に構成することによって管理します。モバイル ブロードバンド デバイスを快適にお使いいただくには、このサービスを常に実行しておくことをお勧めします。
C:\Windows\system32\svchost.exe -k LocalSystemNetworkRestricted -p

Mixed Reality不要!
VacSvc
容積オーディオ コンポジター サービス
Mixed Reality オーディオ シミュレーションのための空間分析をホストします。
C:\Windows\System32\svchost.exe -k LocalServiceNetworkRestricted -p

perceptionsimulation
Windows 認識シミュレーション サービス
空間知覚シミュレーション、仮想カメラ管理、空間入力シミュレーションを有効にします。
C:\Windows\system32\PerceptionSimulation\PerceptionSimulationService.exe

spectrum
Windows 認識サービス

SharedRealitySvc
空間データ サービス
Perception simulation
C:> wmic OS get FreePhysicalMemory,FreeVirtualMemory,FreeSpaceInPagingFiles /VALUE
FreePhysicalMemory=29240116
FreeSpaceInPagingFiles=0
FreeVirtualMemory=29458260

C:> wmic OS get FreePhysicalMemory /Value
FreePhysicalMemory=29264096

C:> wmic OS get FreePhysicalMemory
FreePhysicalMemory
29240032

C:> wmic computersystem get TotalPhysicalMemory /Value
TotalPhysicalMemory=34218385408

C:> wmic computersystem get TotalPhysicalMemory
TotalPhysicalMemory
34218385408
rem 切断
netsh wlan disconnect

rem "WiFi-SSID"と言うアクセスポイントに接続
netsh wlan connect name="WiFi-SSID"

rem 60秒待つ
timeout /t 60 > nul

rem 5秒待つ
timeout /t 5 > nul
rem WiFiの調子が悪い時に再接続を行なうバッチファイル

rem 切断
netsh wlan disconnect

rem 5秒待つ
timeout /t 5 > nul

rem "WiFi-SSID"と言うアクセスポイントに接続
netsh wlan connect name="WiFi-SSID"
SystemInfo
wmic csproduct get IdentifyingNumber
IdentifyingNumber
G12345678ABC
wmic csproduct get
Caption                      Description                  ElementName  IdentifyingNumber  InstanceID  Name       SKUNumber  UUID                                  Vendor                   Version     WarrantyDuration  WarrantyStartDate
コンピューター システム製品  コンピューター システム製品               G12345678ABC                   NUC8i5BEH             11111111-2222-3333-4444-555555555555  Intel(R) Client Systems  J12345-123
wmic csproduct get Name,IdentifyingNumber
IdentifyingNumber  Name
G12345678ABC       NUC8i5BEH
自作パソコンの場合1
IdentifyingNunber
To be filled by O.E.M
自作パソコンの場合2
IdentifyingNunber
(何も表示しない)
rundll32 user32.dll,MessageBeep
echo ^G
※ Ctrl+Gで「^G」を入力できる
WScript.CreateObject("WScript.Shell").Run "rundll32 user32.dll,MessageBeep", 0, False
netplwizコマンドで設定可能
レジストリの方法
HKEY_LOCAL_MACHINE\SOFTWARE\Microsoft\Windows NT\CurrentVersion\Winlogon
AutoAdminLogon
DefaultUserName
DefaultPassword
DefaultDomainName
Windows Registry Editor Version 5.00

[HKEY_LOCAL_MACHINE\SYSTEM\CurrentControlSet\Services\NlaSvc\Parameters\Internet]
"EnableActiveProbing"=dword:00000000

[HKEY_LOCAL_MACHINE\Software\Policies\Microsoft\Windows\NetworkConnectivityStatusIndicator]
"NoActiveProbe"=dword:00000001

[HKEY_LOCAL_MACHINE\Software\Policies\Microsoft\Windows\NetworkConnectivityStatusIndicator]
"DisablePassivePolling"=dword:00000001
rem SSIDが HogeHogeの場合
rem 2) WiFiの接続設定した内容をコマンドラインから設定ファイルに書き出す
netsh wlan export profile name=HogeHoge key=clear

rem Wi-Fi-HogeHoge.xmlと言う設定ファイルができる

rem 3) 設定ファイルを読み込んで WiFiの接続設定を行なう
netsh wlan add profile filename=Wi-Fi-HogeHoge.xml user=current
<?xml version="1.0"?>
<WLANProfile xmlns="http://www.microsoft.com/networking/WLAN/profile/v1">
	<name>HogeHoge</name>
	<SSIDConfig>
		<SSID>
			<hex>xxxxxxxxxxxx</hex>
			<name>HogeHoge</name>
		</SSID>
	</SSIDConfig>
	<connectionType>ESS</connectionType>
	<connectionMode>manual</connectionMode>
	<MSM>
		<security>
			<authEncryption>
				<authentication>WPA2PSK</authentication>
				<encryption>AES</encryption>
				<useOneX>false</useOneX>
			</authEncryption>
			<sharedKey>
				<keyType>passPhrase</keyType>
				<protected>true</protected>
				<keyMaterial>000000000000000000000000000 ...略...</keyMaterial>
			</sharedKey>
		</security>
	</MSM>
	<MacRandomization xmlns="http://www.microsoft.com/networking/WLAN/profile/v3">
		<enableRandomization>false</enableRandomization>
		<randomizationSeed>000000000</randomizationSeed>
	</MacRandomization>
</WLANProfile>