・2017/09/07
 Raspberry Piで Amazon Dash Buttonを自在にハックする方法。Node.js Dasher方法
(ラズパイ + Node.js Dasherライブラリで ARPパケット検出からの Amazon Dash Buttonをハック)
Tags: [Raspberry Pi], [電子工作]
● Amazon Dash Buttonとは?
Amazon Dash Buttonは、ワンプッシュでお気に入りの商品を簡単に注文できるボタンです。
Amazon Dash Button
あらかじめボタンに紐付けて設定した商品をボタンのワンプッシュの操作で注文する事ができます。
(Amazonがあらかじめ決めた商品の中から紐付けして、商品の注文が可能です。利用者が自由に好きな商品を設定する事はできません。)
Dash Buttonは 500円ですが、ボタンを通じた初回注文時にご請求額より500円差し引かれるので Dash Buttonは実質無料となります。
※ 500円未満の商品を購入した場合は次回の注文(Amazon扱いのどんな注文でも良い)で残りの金額が差し引かれます。
詳細はこちら。プロモーション利用規約を確認する
Dash Buttonを500円で購入し、初回注文代金から500円が差し引かれる特典に関する利用規約
今回はこの Dash Buttonをハックして IoTボタンとして使用する方法を解説します。
なお、Amazon Dash Buttonはプライム会員専用なのでプライム会員の登録が必要です。
プライム会員の登録はこちらからできます(30日間の無料体験を試す)
お急ぎ便、お届け日時指定便がいつでも使い放題
プライムで映画や音楽も楽しめる
無料体験終了後は、年会費¥3,900(税込)でAmazonプライムをご利用いただけます。無料体験はいつでもキャンセルできます。
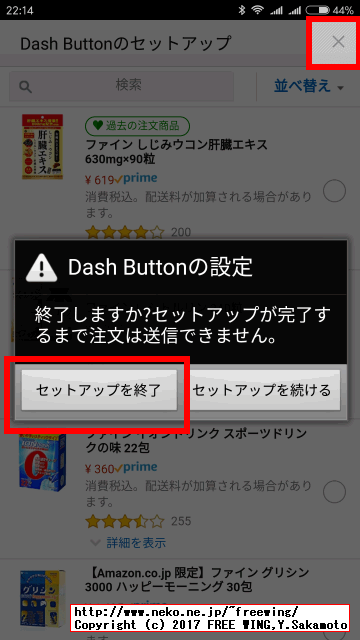
● Amazon Dash Buttonを通常の方法で使用する場合の初期設定方法
IoTハックで Dash Buttonを使用する場合は、
・注文する商品を選択しないで初期設定を終了する
または、
・注文する商品を選択した後に、設定メニューでボタンを「無効」にする
とします。
・2017/08/11

Amazon Dash Buttonを普通の方法で使う場合の設定方法と解除方法
アマゾン ダッシュボタンを普通に登録して、普通に商品を注文する方法(500円割引き)
● Amazon Dash Buttonを IoTハックする場合の設定方法
・Amazon Dash Buttonを IoTハックする場合の設定方法
商品設定の時に商品を設定しないでセットアップを終了します。
● 購入した Amazon Dash Buttonの種類
500円が勿体無いので実際に商品を購入し、消費する商品の Dash Buttonにしました。
オススメは、下記の 4種類。商品価格が低いので 500円割引の率が相対的に高いです。
● Amazon Dash Buttonをラズパイで簡単に扱う補助アプリ Node.js Dasher
maddox/dasher - A simple way to bridge your Amazon Dash buttons to HTTP services
maddox/dasherをラズパイに入れて、Dash Buttonをハックするのが一番簡単で手間が要らないと思います。
なお、maddox/dasherは package.jsonを見れば分かりますが、内部で node-dash-buttonを使用しています。
hortinstein/node-dash-button - A small module to emit events when an Amazon Dash Button is pressed
独立した別物として、
ide/dash-button - A small Node.js server that reacts to Amazon Dash buttons on your WiFi network
Dash Button for Node
が有ります。
※ この ide/dash-buttonはエラーが出て動かせませんでした。(Raspbian Stretch)
● Dasherのインストール
# 必要なアプリをインストール その1
sudo apt-get install libpcap-dev
sudo apt-get install npm

# 必要なアプリをインストール その2
sudo apt-get install node
wget http://node-arm.herokuapp.com/node_latest_armhf.deb
sudo dpkg -i node_latest_armhf.deb

# Dasher本体をインストール
cd
git clone https://github.com/maddox/dasher.git
cd dasher
npm install

# Find Dash Button
sudo ./script/find_button

Watching for arp & udp requests on your local network, please try to press your dash now
Dash buttons should appear as manufactured by 'Amazon Technologies Inc.'

Possible dash hardware address detected: 68:37:e9:xx:xx:xx Manufacturer: unknown Protocol: udp
Possible dash hardware address detected: 68:37:e9:xx:xx:xx Manufacturer: unknown Protocol: arp
Possible dash hardware address detected: 68:37:e9:xx:xx:xx Manufacturer: unknown Protocol: udp
Possible dash hardware address detected: 68:37:e9:xx:xx:xx Manufacturer: unknown Protocol: arp
Possible dash hardware address detected: b4:7c:9c:xx:xx:xx Manufacturer: unknown Protocol: udp
Possible dash hardware address detected: b4:7c:9c:xx:xx:xx Manufacturer: unknown Protocol: arp

# Manufacturer: unknownで表示されました。
# https://github.com/hortinstein/node-dash-buttonの stor.jsファイルに登録されていないから。
68:37:e9:xx:xx:xx Amazon Dash Buttonの MACアドレス
68:54:fd:xx:xx:xx Amazon Dash Buttonの MACアドレス
b4:7c:9c:xx:xx:xx Amazon Dash Buttonの MACアドレス
fc:a6:67:xx:xx:xx Amazon Dash Buttonの MACアドレス
# 設定ファイル config.jsonを編集してボタンと実行するアクションを登録する
# update /config/config.json with mac address of your button
sudo nano ./config/config.json
# 設定ファイル config.jsonを編集してボタンと実行するアクションを登録する
68:37:e9:xx:xx:xx = Debug Dash Buttonのデバグ用メッセージを表示
fc:a6:67:xx:xx:xx = /home/pi/dash_button_led_on.shを実行する(LEDを点灯)
b4:7c:9c:xx:xx:xx = /home/pi/dash_button_led_off.shを実行する(LEDを消灯)
{"buttons":[
  {
    "name": "Debug Dash Button",
    "address": "68:37:e9:xx:xx:xx",
    "debug": true
  },
  {
    "name": "Command Exec Button 1",
    "address": "fc:a6:67:xx:xx:xx",
    "cmd": "/home/pi/dash_button_led_on.sh"
  },
  {
    "name": "Command Exec Button 2",
    "address": "b4:7c:9c:xx:xx:xx",
    "cmd": "/home/pi/dash_button_led_off.sh"
  }
]}
# Dasherを実行する
sudo npm run start &
$ sudo npm run start

> dasher@1.4.1 start /home/pi/dasher
> node app.js

[2017-09-05T13:53:14.613Z] Debug Dash Button added.
[2017-09-05T13:53:15.387Z] Command Exec Button 1 added.
[2017-09-05T13:53:15.931Z] Command Exec Button 2 added.
[2017-09-05T13:53:25.709Z] Command Exec Button 1 pressed. Count: 1
[2017-09-05T13:53:25.948Z] Debug Dash Button pressed. Count: 1
[2017-09-05T13:53:25.948Z] Debug mode, skipping request.
{ name: 'Debug Dash Button',
  address: '68:37:e9:xx:xx:xx',
  debug: true }
[2017-09-05T13:53:40.268Z] Command Exec Button 1 pressed. Count: 2
[2017-09-05T13:56:47.468Z] Command Exec Button 2 pressed. Count: 1
[2017-09-05T13:57:18.668Z] Command Exec Button 1 pressed. Count: 3
cd
nano dash_button_led_on.sh
chmod +x dash_button_led_on.sh
#!/bin/sh

# GPIO5を使用する宣言
sudo echo 5 > /sys/class/gpio/export

# IN/OUTの設定。出力する場合はout
sudo echo out > /sys/class/gpio/gpio5/direction

# Low = '0'にする(負論理の場合は LEDが点く)
sudo echo 0 > /sys/class/gpio/gpio5/value
cd
nano dash_button_led_off.sh
chmod +x dash_button_led_off.sh
#!/bin/sh

# GPIO5を使用する宣言
sudo echo 5 > /sys/class/gpio/export

# IN/OUTの設定。出力する場合はout
sudo echo out > /sys/class/gpio/gpio5/direction

# High = '1'にする(負論理の場合は LEDが消える)
sudo echo 1 > /sys/class/gpio/gpio5/value
● ラズパイ起動時に Dasherを自動で実行する方法
Running Dasher on a Raspberry Pi at startup
Tags: [Raspberry Pi], [電子工作]
●関連するコンテンツ(この記事を読んだ人は、次の記事も読んでいます)
TIの 8051マイコン内蔵の BLE CC2540/CC2541を使ってみる
Bluetooth Low Energyの SensorTagや iBeacon、CC Debuggerの使い方など
Raspberry Pi 3の Bluetooth BLEで TI SensorTagと接続してセンサーの測定値を読み取る方法
ラズパイ3の BLEと Node.jsで、TIの SensorTag CC2541DKに接続してセンサーの状態を取得
Raspberry Pi 3の gatttoolのコマンドラインで TIの SensorTagを直接操作する方法
ラズパイ3と gatttoolのコマンドラインで TIの SensorTagに直接接続して gatttoolの使い方を覚える
Raspberry Pi 3に Nodejs blenoをインストールして Bluetooth BLEのペリフェラルを作成する
ラズパイ3と Node.js blenoで Bluetooth BLEの周辺機器機能を実装する
Raspberry Pi 3の Nodejs blenoで BLE接続して GPIOで Lチカ制御やボタン状態を読み取る
ラズパイ3と Node.js blenoで BLEの周辺機器機能を実装する GPIO編
Raspberry Pi 3の Python BLE pygattlibライブラリで TIの SensorTagに接続して制御する方法
ラズパイ3と Python BLE pygattlibで TIの SensorTagのセンサーの値を取得とボタン状態の通知を受信する
Raspberry Pi 3に Bluetooth BlueZ Version 5.42 BLE
ラズパイで Bluetooth 4.0の BLE gatt通信を行なう TIの SensorTagや iBeacon実験など
Amazon Dash Buttonをハックして IoTボタンとして使う方法を解説
Amazon Dash Buttonをハック。ARP要求を監視、DNSハック、IPアドレスハック等。
Raspberry Piで Amazon Dash Buttonを自在にハックする方法。node-dash-button方法
ラズパイ + Node.jsで Amazon Dash Buttonをハックして IoTボタンとして使う方法を解説
Raspberry Piで Amazon Dash Buttonを自在にハックする方法。tcpdump libpcap方法
ラズパイ + libpcap Packet Capture libraryで Amazon Dash Buttonをハックして IoTする
Raspberry Piで Amazon Dash Buttonを自在にハックする方法。Python Scapyライブラリ方法
ラズパイ + Python Scapyライブラリで ARPパケット検出からの Amazon Dash Buttonをハック
Raspberry Pi 3で安定して使える相性の無い最適な microSDカードの種類のまとめ
ラズパイ3で安定して使える microSDカードを購入する Teamと SanDiskは絶対に買わない
Raspberry Pi 3の Linuxコンソール上で使用する各種コマンドまとめ
ラズパイの Raspbian OSのコマンドラインで使用する便利コマンド、負荷試験や CPUシリアル番号の確認方法等も
Raspberry Pi 3で GPIO端子の I2C機能を有効化する方法
ラズパイ3の GPIO端子の I2C機能を有効にして各種センサーを繋げる方法まとめ
[HOME]
|
[BACK]
リンクフリー(連絡不要、ただしトップページ以外は Web構成の変更で移動する場合があります)
Copyright (c)
2017 FREE WING,Y.Sakamoto
Powered by 猫屋敷工房 & HTML Generator
http://www.neko.ne.jp/~freewing/raspberry_pi/raspberry_pi_amazon_dash_iot_hack_dasher/